Official Aces High Two Campaign Thread.
Florida, United States
Joined: January 14, 2009
KitMaker: 2,798 posts
AeroScale: 2,443 posts
Posted: Saturday, January 02, 2010 - 03:10 AM UTC
Your link must be copy righted or you dont have permission because it is forbiddon.....
Just an update started my P-38 for twin booms because I enlisted with D first should be done soon.
I will start and post pictures within the next couple weeks.
Build On,
Justin

"From time to time, the tree of liberty must be watered with the blood of
tyrants and patriots."
- Thomas Jefferson
IPMS#47611
Uusimaa, Finland
Joined: March 30, 2004
KitMaker: 2,845 posts
AeroScale: 1,564 posts
Posted: Saturday, January 02, 2010 - 04:51 AM UTC
Quoted Text
Your link must be copy righted or you dont have permission because it is forbiddon.....
Nothing to do with copyright, just a computer thingie I think.
Copy the link, paste it to the browser's address line and hit "go" (or press enter or whatever). It should load OK.

I'm not 100% certain, but I think it's a server set to prevent direct linking, or something...
Quoted Text
My efforts so far today on the Brewster. It's a rather tricky fitting kit that is going to take a bit of care to get the fuselage halves together.

Andrew
Always nice to see a Brewster built.

Looks like a good start. Keep up the good work.
I've got that kit too, two of them actually, and had a feeling wanting to get building one for this campaign. Or some other ace's aircraft, I think I got quite a few in my stash...


#029
England - East Midlands, United Kingdom
Joined: December 23, 2005
KitMaker: 6,249 posts
AeroScale: 3,270 posts
Posted: Saturday, January 02, 2010 - 05:34 AM UTC
Quoted Text
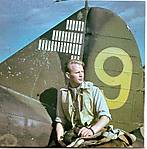
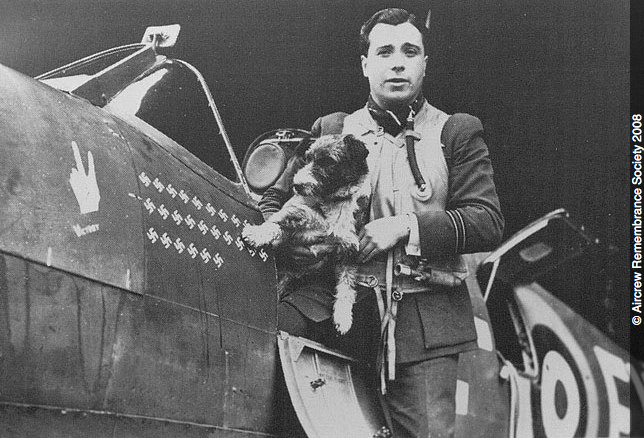
Ok, I am tentatively modeling Eric Lock's Spitfire Mk Vb, #W3257 of No. 611 Squadron, flying out of Hornchurch.
Here you go.
Nige
It's not the same, better, but not the same...
#243
England - North East, United Kingdom
Joined: March 21, 2008
KitMaker: 996 posts
AeroScale: 915 posts
Posted: Saturday, January 02, 2010 - 05:45 AM UTC
Hi All,
I won't start for a week or two but planning a Fokker DVII (Eduard 1/48 Weekend) probably OOB. The kit is Herman Goering but I haven't decided which Ace yet, probably Erich Lowenhardt. Will be building two at once, a CR42 for thw Made in Italy campaign and the Fokker
Andrew
Pfalz DIIIa, Eduard 1/48 Uffz Max Hitschler Jasta 18 Late 1917
Alabama, United States
Joined: October 06, 2009
KitMaker: 34 posts
AeroScale: 22 posts
Posted: Saturday, January 02, 2010 - 05:52 AM UTC
Thanks Nige! Thats the very photo I have tried in vain to upload.
#029
England - East Midlands, United Kingdom
Joined: December 23, 2005
KitMaker: 6,249 posts
AeroScale: 3,270 posts
Posted: Saturday, January 02, 2010 - 06:04 AM UTC
I know
The reason it wasnt showing on your posts is because you had put the [img tags around a webpage address.
All the best
Nige
It's not the same, better, but not the same...
Victoria, Australia
Joined: August 23, 2007
KitMaker: 629 posts
AeroScale: 539 posts
Posted: Saturday, January 02, 2010 - 09:44 PM UTC
Almost time to close up the fuselage on the Brewster. This kit looks like a disaster about to happen...with all of them bulkheads and internal pieces with very poor locating instructions. But actually test fitting the left fuselage half shows a relatively good fit now that everything is in place...no more filler will be required than on most limited run kits.

Andrew
Current Projects:
Eduard 1/48 F6F-3 Hellcat
Hasegawa 1/350 Yukikaze
1/6 JJ Models Sarah "Gothic"
North Carolina, United States
Joined: September 28, 2005
KitMaker: 347 posts
AeroScale: 179 posts
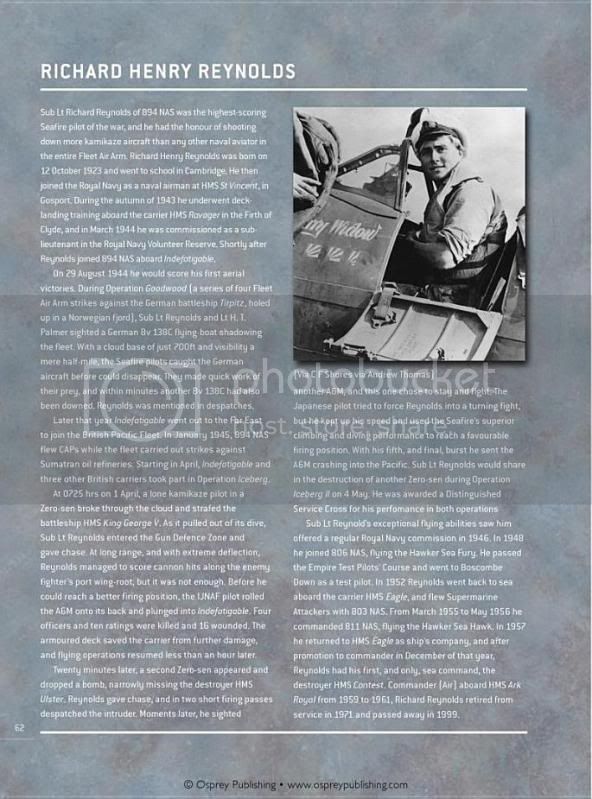
Posted: Sunday, January 03, 2010 - 09:18 AM UTC
Definitely will be doing the Seafire and maybe the 109
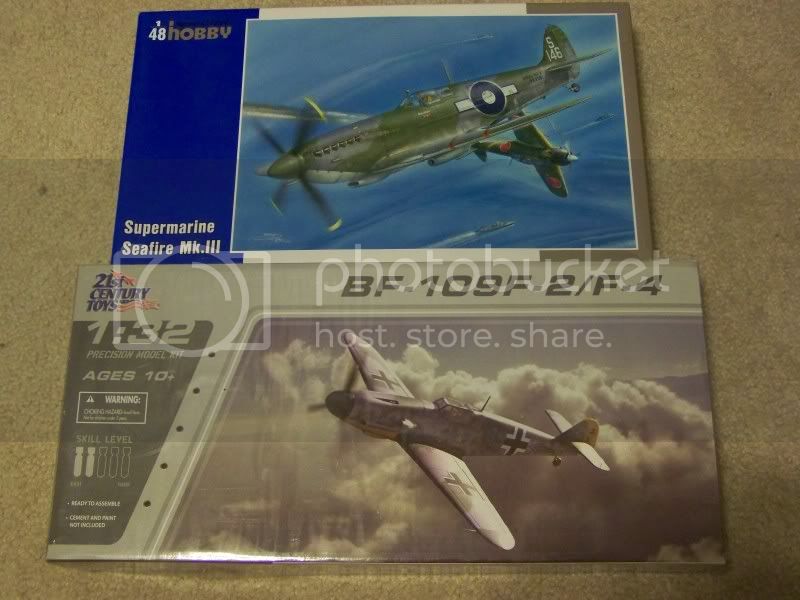
the ace will be SubLt RH Reynolds ...the only Seafire ace of the war
On the workbench:
1/48 Spitfire Mk V & Mk VIII (Spitfire Campaign)
1/72 Challenger II (British Armor Campaign)
1/48 AH-64D Apache (CAS)
North Carolina, United States
Joined: September 28, 2005
KitMaker: 347 posts
AeroScale: 179 posts
Posted: Tuesday, January 05, 2010 - 02:50 PM UTC
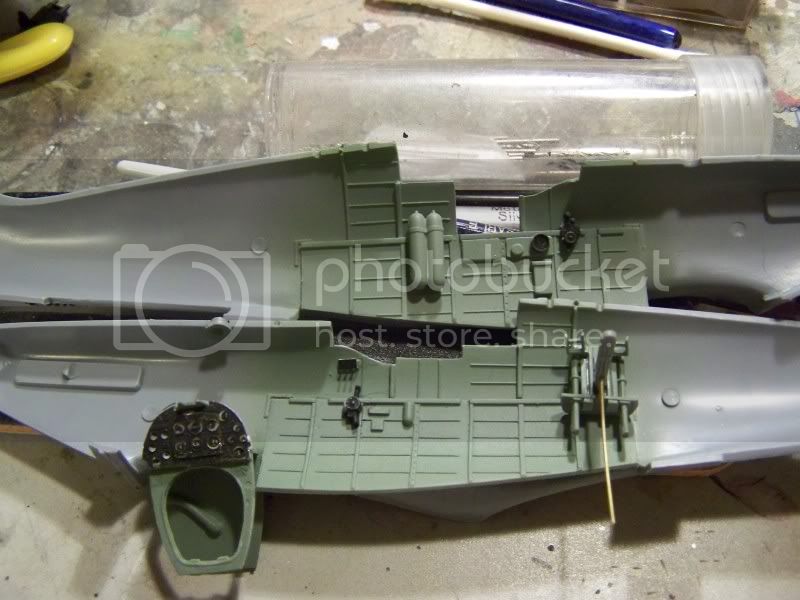
Meager beginnings ...
On the workbench:
1/48 Spitfire Mk V & Mk VIII (Spitfire Campaign)
1/72 Challenger II (British Armor Campaign)
1/48 AH-64D Apache (CAS)
Victoria, Australia
Joined: August 23, 2007
KitMaker: 629 posts
AeroScale: 539 posts
Posted: Tuesday, January 05, 2010 - 06:39 PM UTC
I have the Brewsters airframe together and filler applied ready for final sanding tomorrow. I ended up with a significant gap under the nose which i filled with styrene sheet. Otherwise just the usual limited run kit cleanup around all the join lines.

Andrew
Current Projects:
Eduard 1/48 F6F-3 Hellcat
Hasegawa 1/350 Yukikaze
1/6 JJ Models Sarah "Gothic"
#029
England - East Midlands, United Kingdom
Joined: December 23, 2005
KitMaker: 6,249 posts
AeroScale: 3,270 posts
Posted: Thursday, January 07, 2010 - 09:38 AM UTC
Nice start guys!
I have made a start on my P-51 and the cockpit is coming together.
Photos to follow.
Nige
It's not the same, better, but not the same...
North Carolina, United States
Joined: November 28, 2005
KitMaker: 2,216 posts
AeroScale: 1,080 posts
Posted: Thursday, January 07, 2010 - 12:43 PM UTC
As most of you guys know I lost most of my built airplane collection when my display cabinet dropped a shelf. Another member here saw the damage including my P-38 "Virginia Marie" and felt so bad about the disaster that he sent me a brand new kit to replace it....a 1/48 scale P-38 Hasegawa no less. The decal sheet includes the option for Capt. John S. Loisel from the 432 fighter squadron flying his P-38F "Screamin' Kid" #161. I don't know any other way of showing my appreciation to this man other than to say thanks.......and I'll do the best job I possibly can on this beautiful bird. Here is a pic of the box art for my entry along with a photo of Capt. Loisel. This build is dedicated to Mike (Wingman)......thanks Mike.


Again, thank you for the kit and the kind letter Mike and I hope the finished build is worthy of your generosity.
Hermon

"Those who would give up Essential Liberty
to purchase a little Temporary Safety,
deserve neither Liberty nor Safety."
Benjamin Franklin
Florida, United States
Joined: January 14, 2009
KitMaker: 2,798 posts
AeroScale: 2,443 posts
Posted: Thursday, January 07, 2010 - 12:59 PM UTC
Save the marking for beautiful lass you can use them for PIN-UPS campaign

seriously nice kit I mite have to get one of those.
Build On,
Justin
"From time to time, the tree of liberty must be watered with the blood of
tyrants and patriots."
- Thomas Jefferson
IPMS#47611
AussieReg
 Associate Editor
#007
Victoria, Australia
Joined: June 09, 2009
KitMaker: 8,156 posts
AeroScale: 3,756 posts
Posted: Thursday, January 07, 2010 - 03:24 PM UTC
Quoted Text
Again, thank you for the kit and the kind letter Mike and I hope the finished build is worthy of your generosity.
Hermon
Hermon, you've got some good friends here. Wingman's kind gift reflects how we all feel. I'm sure your build will be worthy.
Well, I got a small start on my Roden Gladiator for this Campaign today. Got the wings assembled and the fuse off to check for fit. No probs thus far . . .

Will be getting on to the front cowl and engine assembly thisarvo.
Cheers, D
ON the bench
Revell 1/24 '53 Corvette (building as '54)
Revell 1/24 BMW 507 Coupe and Cabrio
Italeri 1/48 Me262 B-1a/U1 Nightfighter
Monogram 1/24 '57 Chevy Nomad
Dragon 1/350 USS Frank Knox DD-742
Victoria, Australia
Joined: August 23, 2007
KitMaker: 629 posts
AeroScale: 539 posts
Posted: Friday, January 08, 2010 - 12:11 AM UTC
The Brewster has moved past the primer stage.

And the silver undersides are on. Could have been light blue, depending upon when the aircraft was major serviced and repainted. But i think it would have still been the original silver dope to which the Finns intially just added the upper colours. So the decision is made and now final.

Andrew
Current Projects:
Eduard 1/48 F6F-3 Hellcat
Hasegawa 1/350 Yukikaze
1/6 JJ Models Sarah "Gothic"
Victoria, Australia
Joined: August 23, 2007
KitMaker: 629 posts
AeroScale: 539 posts
Posted: Friday, January 08, 2010 - 12:15 AM UTC
Good start on the Gladiator Damian, the Roden kit is quite nice but very tight fitting just like most Roden models.
One thing worries me since you say the wings are assembled...and that is that all 4 ailerons are in the full down position in your pic. That would only occur if the controls were broken. But maybe you simply haven't final positioned them and glued them yet? Well easy fix even if they are glued anyway.
Andrew
Quoted Text
Quoted Text
Again, thank you for the kit and the kind letter Mike and I hope the finished build is worthy of your generosity.
Hermon
Hermon, you've got some good friends here. Wingman's kind gift reflects how we all feel. I'm sure your build will be worthy.
Well, I got a small start on my Roden Gladiator for this Campaign today. Got the wings assembled and the fuse off to check for fit. No probs thus far . . .
Will be getting on to the front cowl and engine assembly thisarvo.
Cheers, D
Current Projects:
Eduard 1/48 F6F-3 Hellcat
Hasegawa 1/350 Yukikaze
1/6 JJ Models Sarah "Gothic"
Uusimaa, Finland
Joined: March 30, 2004
KitMaker: 2,845 posts
AeroScale: 1,564 posts
Posted: Friday, January 08, 2010 - 12:53 AM UTC
Quoted Text
The Brewster has moved past the primer stage.
And the silver undersides are on. Could have been light blue, depending upon when the aircraft was major serviced and repainted. But i think it would have still been the original silver dope to which the Finns intially just added the upper colours. So the decision is made and now final.
Andrew
Looking nice.
But before you proceed, delete the landing light under the starboard wing, as the early variants, including B-239, only had a landing light under the port (left) wing. Gluing in the clear part, then filling and sanding should do the trick. Although Classic airframes' instructions do mention this, the notice looks easy to miss.
Have you made decisions on the marking options yet?
The underside colour could also be light grey, btw. (the order for light blue, so called DN-color, to replace the light grey was issued on 7th May 1942)
As you already mentioned, repaintings were usually done along major overhauls, so depending on the need for such servicing, some aircraft retained their original aluminium laqcuer undersides longer than others.
AussieReg
Associate Editor #007
Victoria, Australia
Joined: June 09, 2009
KitMaker: 8,156 posts
AeroScale: 3,756 posts
Posted: Friday, January 08, 2010 - 03:35 AM UTC
Hi Andrew, and thanks for the heads up !
Quoted Text
Good start on the Gladiator Damian, the Roden kit is quite nice but very tight fitting just like most Roden models.
One thing worries me since you say the wings are assembled...and that is that all 4 ailerons are in the full down position in your pic. That would only occur if the controls were broken. But maybe you simply haven't final positioned them and glued them yet? Well easy fix even if they are glued anyway.
Andrew
I was actually looking through some references tonight when you posted your concerns, and came to the conclusion that flaps down was NOT the way to go. The ailerons in the pic are not glued, the locating tabs are just nice and tight and hold them in position. I have glued them in place now fully centred, and got a start on the engine (which is very nicely detailed from the box).
Cheers, D
ON the bench
Revell 1/24 '53 Corvette (building as '54)
Revell 1/24 BMW 507 Coupe and Cabrio
Italeri 1/48 Me262 B-1a/U1 Nightfighter
Monogram 1/24 '57 Chevy Nomad
Dragon 1/350 USS Frank Knox DD-742
Victoria, Australia
Joined: August 23, 2007
KitMaker: 629 posts
AeroScale: 539 posts
Posted: Friday, January 08, 2010 - 10:13 AM UTC
Quoted Text
Looking nice.
But before you proceed, delete the landing light under the starboard wing, as the early variants, including B-239, only had a landing light under the port (left) wing. Gluing in the clear part, then filling and sanding should do the trick. Although Classic airframes' instructions do mention this, the notice looks easy to miss.
Have you made decisions on the marking options yet?
The underside colour could also be light grey, btw. (the order for light blue, so called DN-color, to replace the light grey was issued on 7th May 1942)
As you already mentioned, repaintings were usually done along major overhauls, so depending on the need for such servicing, some aircraft retained their original aluminium laqcuer undersides longer than others.
Thanks Eetu, i'll be filling in the landing light before i go any further. You're right the instructions do mention it, but i jump around so much in my build sequences to make subassemblies, that i miss things quite often.
I've decided to do the Ilmari Juutilianen Orange 4. I'm still going with aluminium doped undersides, as looking at how worn the paint is on most Finnish Brewsters makes me think that they probably were not freshly painted until it was an absolute neccessity. Of course it's almost impossible to actually prove one way or the other what the underside colour is at any time as you can't really tell worn aluminium dope from light grey or blue in old B&W pics. In such situations i just make a decision and go with it!
Andrew
Current Projects:
Eduard 1/48 F6F-3 Hellcat
Hasegawa 1/350 Yukikaze
1/6 JJ Models Sarah "Gothic"
AussieReg
Associate Editor #007
Victoria, Australia
Joined: June 09, 2009
KitMaker: 8,156 posts
AeroScale: 3,756 posts
Posted: Saturday, January 09, 2010 - 11:47 AM UTC
Hi all, a little more progress on the Gladiator. The engine cowling is a 3-piece affair that leaves some nasty seams right where they shouldn't be. I'm going to try a new technique on the inside and use a needle file to reduce the ridge either side of the seam, brush the filings into the seam and put a small drop of thin cement in to act as a filler. Wish me luck. And yes, I'm going to fill that yucky ejector pin hole.

A question for the experts, the instructions call for Interior Green Gunze 58, which is Zinc Chromate Green, but from the shots I've seen this seems wrong. Can anybody confirm or suggest a better alternative?
Cheers, D
ON the bench
Revell 1/24 '53 Corvette (building as '54)
Revell 1/24 BMW 507 Coupe and Cabrio
Italeri 1/48 Me262 B-1a/U1 Nightfighter
Monogram 1/24 '57 Chevy Nomad
Dragon 1/350 USS Frank Knox DD-742
Victoria, Australia
Joined: August 23, 2007
KitMaker: 629 posts
AeroScale: 539 posts
Posted: Saturday, January 09, 2010 - 05:12 PM UTC
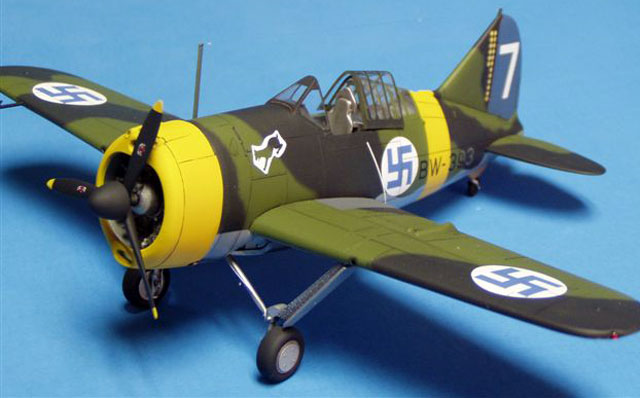
Most of the colours are on the Brewster now. Like is my usual habit these days, i've learnt to lighten the colours and shade with about 50% more contrast than i actually think is right. This is due to my process of laquer clear coating and eventual weathering which tends to reduce the contast of all shading by about 50% on the end product.
Only the yellow theater bands to go now...usually i do those first over white primer. This time i'm doing it different.


Andrew
Current Projects:
Eduard 1/48 F6F-3 Hellcat
Hasegawa 1/350 Yukikaze
1/6 JJ Models Sarah "Gothic"
AussieReg
Associate Editor #007
Victoria, Australia
Joined: June 09, 2009
KitMaker: 8,156 posts
AeroScale: 3,756 posts
Posted: Saturday, January 09, 2010 - 06:02 PM UTC
Andrew the weathering and fading effect on that camo is superb, I love it !!
Cheers, D
ON the bench
Revell 1/24 '53 Corvette (building as '54)
Revell 1/24 BMW 507 Coupe and Cabrio
Italeri 1/48 Me262 B-1a/U1 Nightfighter
Monogram 1/24 '57 Chevy Nomad
Dragon 1/350 USS Frank Knox DD-742
Turku ja Pori, Finland
Joined: September 10, 2008
KitMaker: 470 posts
AeroScale: 279 posts
Posted: Saturday, January 09, 2010 - 10:38 PM UTC
Andrew,
your weathering looks good, but sadly the colours are off for finnish B-239. They should be black / dark green uppersides.
Workbench;
Academy Curtiss Hawk H-75 FAF + Eduard PE
Roden Fokker D.VII "Bruno Loerzer" (Aces High II)
Italeri Messerschmitt Me 262 (The great checkerboard campaign)
Uusimaa, Finland
Joined: March 30, 2004
KitMaker: 2,845 posts
AeroScale: 1,564 posts
Posted: Sunday, January 10, 2010 - 03:43 AM UTC
Quoted Text
Andrew,
your weathering looks good, but sadly the colours are off for finnish B-239. They should be black / dark green uppersides.
Oh, I think they look just fine, the green seems especilly nice to my eye. The amount of shading does indeed make the black seem a bit on the grey side, but as Andrew mentioned, the subsequent clear coating, weathering and what have yous will reduce the contrast of the effects. Also, IMO pure black on scale models usually is too stark.
Btw, is that preshading just black or some other colour?
Quoted Text
I've decided to do the Ilmari Juutilianen Orange 4. I'm still going with aluminium doped undersides, as looking at how worn the paint is on most Finnish Brewsters makes me think that they probably were not freshly painted until it was an absolute neccessity. Of course it's almost impossible to actually prove one way or the other what the underside colour is at any time as you can't really tell worn aluminium dope from light grey or blue in old B&W pics. In such situations i just make a decision and go with it!
So true!
Just that the underside color was ordered to be changed didn't by any means result in aircraft being repainted right away. Touch-ups were probably done in the field, but repaintings were done when planes were sent for rehauls. Every possible aircraft was needed at the front and thus they weren't sent away just for small servicings that could be done right in the field, let alone for just repainting to conform to official regulations. Also, existing paint stocks were used up before switching to the new ones, so planes could have had earlier underside color applied even after the order for the switch was issed.
So, even from studying individual aircraft histories on when a particular aircraft was given a major overhaul, one can only conclude with 100% certainty which underside color the offical specifications called for at the time.
Saskatchewan, Canada
Joined: April 23, 2006
KitMaker: 140 posts
AeroScale: 89 posts
Posted: Sunday, January 10, 2010 - 09:04 AM UTC
Hello. The subject I would like to build for this campaign is the La-5 of Vladimir Dmitriyev of the 4 GIAP. I can't seem to find a photo of his bird but the colour profiles I've found, and the AML decals show it carried no kill markings. The references I've found indicate he had between 11 and 15 (depending on the source) victories including shared ones. Can I enter this in the campaign? I really like the toothy grin!