Air Campaigns
Want to start or join a group build? This is where to start.
OFFICIAL: "Zerstorer!" Campaign Thread
wespe66
_VISITCOMMUNITY
Frederiksborg, Denmark
Joined: June 27, 2011
KitMaker: 122 posts
AeroScale: 121 posts
Posted: Sunday, October 09, 2011 - 07:13 AM UTC
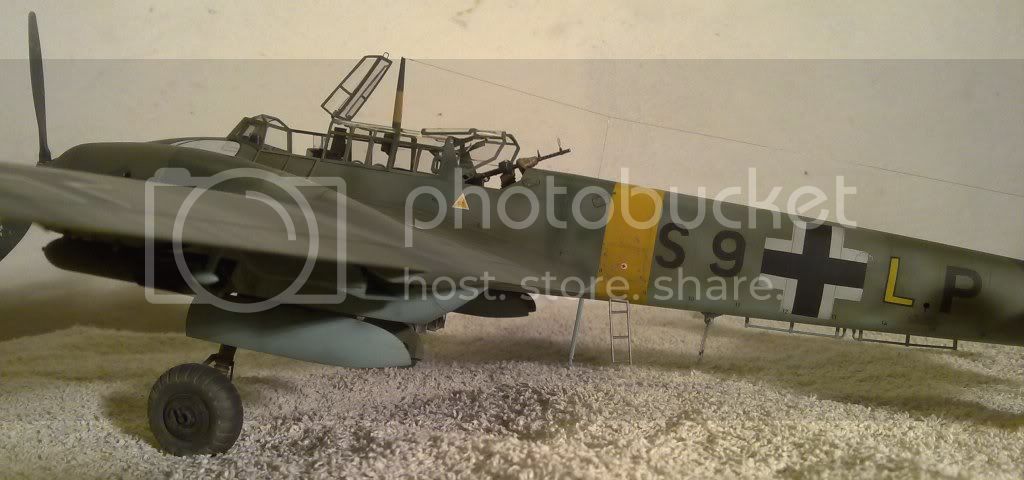
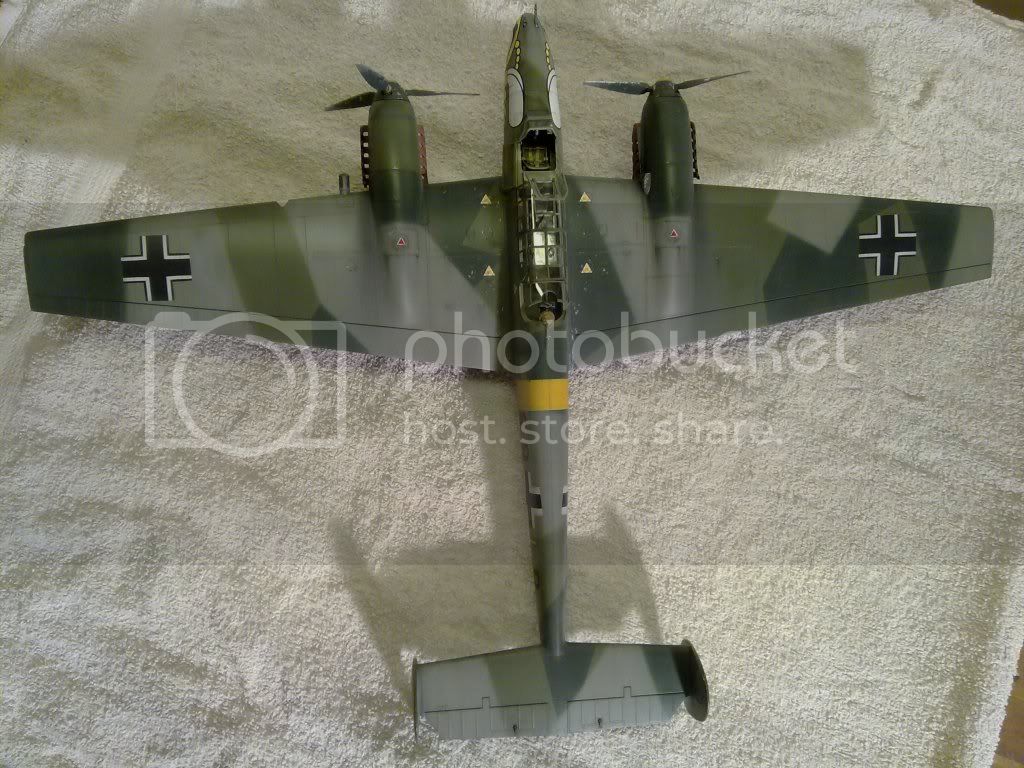
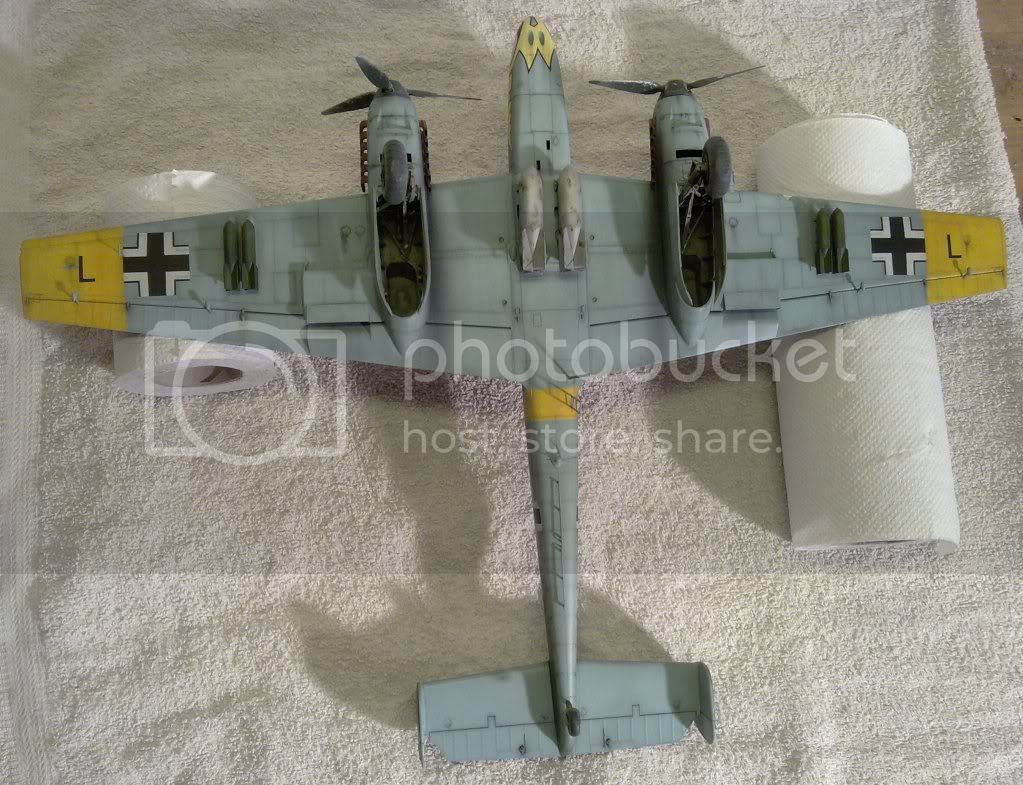
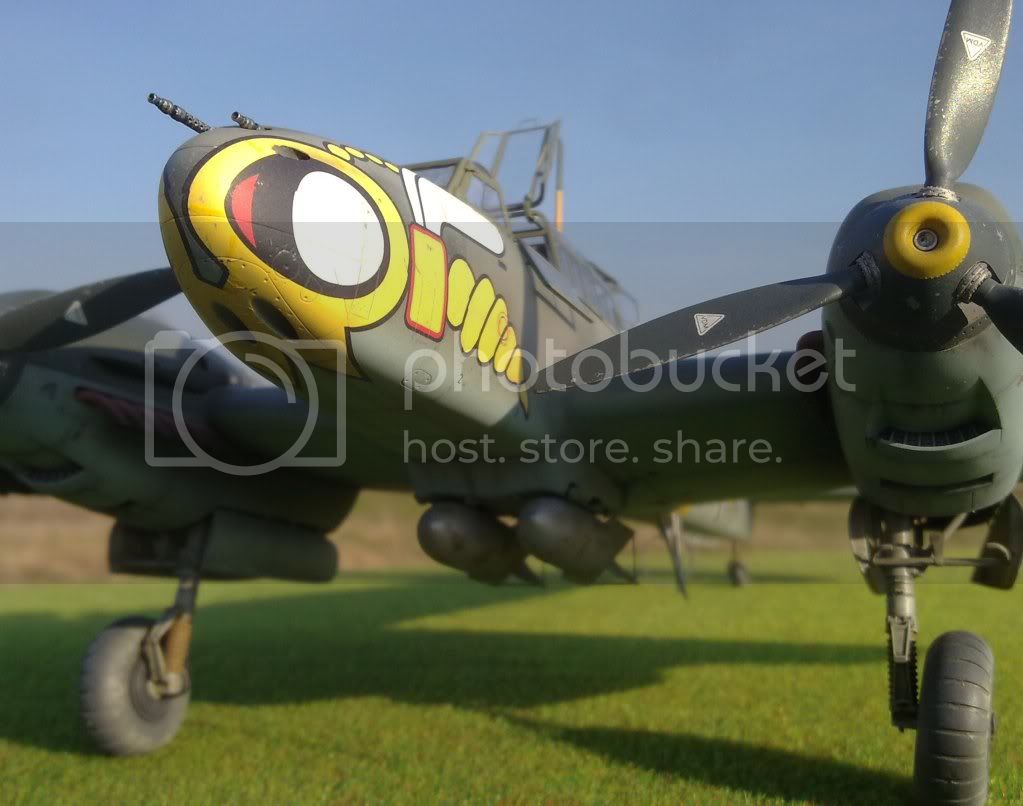
Ed: Congrats on your beautiful zerstörer! I have also finished mine today, so I think you and me can call us

sweat- and blood brothers now, agree? :-)

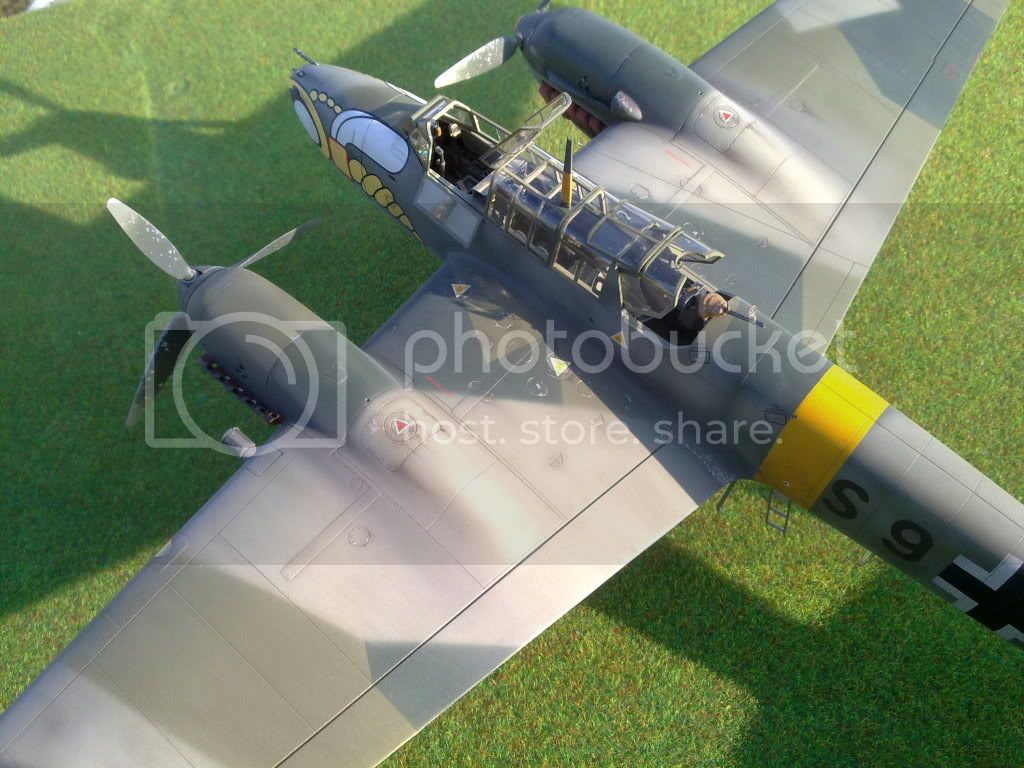
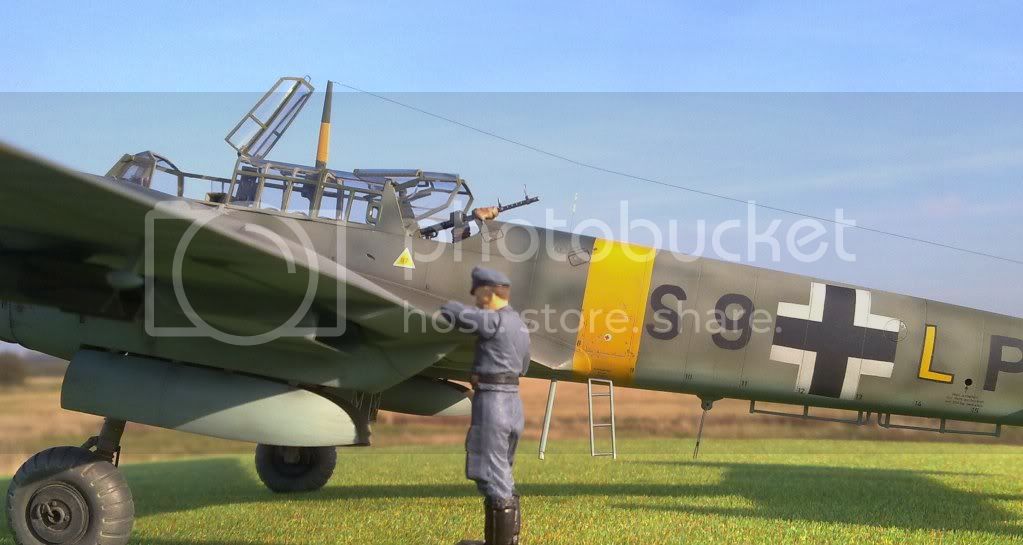
OK, here is a few pictures. I promise to post more and better pics when time and weather permits.

Kenneth


greif8
_VISITCOMMUNITY
Bayern, Germany
Joined: January 17, 2006
KitMaker: 673 posts
AeroScale: 492 posts
Posted: Sunday, October 09, 2011 - 10:21 PM UTC
There are a lot of very high quality builds in this campaign. The eye camdy is almost as nice a a beach in Mallorca!

My build has not been the smoothest thus far. I must have gotten either the first mold done after a long weekend or just before one started. There has been a lot of flash on several of the parts, which is pretty rare for Eduard models in my experience. The wing tips were also warped pretty badly. It took a good bit of time to get the engine nancels and wings trimmed , sanded and aligned but they are complete. I am just about ready to begin painting.

The following photos show the "office" with the fuselage joined and an overall view of the model.

Ernest


Torchy
#047
_VISITCOMMUNITY
England - East Anglia, United Kingdom
Joined: September 13, 2005
KitMaker: 2,016 posts
AeroScale: 475 posts
Posted: Tuesday, October 11, 2011 - 08:57 AM UTC
Hi all
Some cracking builds on here,but a bit of a 110 fest
Let break it up with a Mossie
Heres the cannon pack and fuel tanks in most of which wont be seen when complete

Bomb racks in and the lower fuselage sides fitted

Just a tiny gap between these and the underside of the wing which was over come with wood glue instead of filler.
A bit of pre shading with Tamiya NATO black,I want to keep the stripes quite clean looking as they had just been applied

I should be able to lob the Sky underside paint on tomorrow,more pics soon.
Oh ,any ideas what colour the 250lb bombs should be please lads?
Cheers
Andy
P.S.
Aarron,yes mate it is the Kotobukiya Boba Fett as seen here with the rest of the boys

Vader came in parts with the rest of them,so you had to buy all six to get him.
Big bucks now!
http://www.ebay.co.uk/sch/i.html?_from=R40&_trksid=p4712.m570.l1313&_nkw=Kotobukiya+Star+Wars+ARTFX+Bounty+Hunter+Statue+Set+IG88+Boba+Fett+Bossk+Dengar&_sacat=See-All-Categories
Tomcat31
#042
_VISITCOMMUNITY
England - North East, United Kingdom
Joined: November 18, 2006
KitMaker: 2,828 posts
AeroScale: 1,720 posts
Posted: Tuesday, October 11, 2011 - 09:27 AM UTC
Looking good Andy just a shame some of all that hard work will be hidden

As much as I love Boba Fett, I would love to know where you got the giant Lego Stormtrooper? as I can imagine Sam would love to have one of those
Torchy
#047
_VISITCOMMUNITY
England - East Anglia, United Kingdom
Joined: September 13, 2005
KitMaker: 2,016 posts
AeroScale: 475 posts
Posted: Tuesday, October 11, 2011 - 09:49 AM UTC

Quoted Text

Looking good Andy just a shame some of all that hard work will be hidden

As much as I love Boba Fett, I would love to know where you got the giant Lego Stormtrooper? as I can imagine Sam would love to have one of those


Hi Allen
Thanks mate,yeah its a real bummer all that detail will be lost, but ho hum we know its there!!!
The Lego stormtrooper came from Firebox
http://www.firebox.com/product/3054/Stormtrooper-LEGO-Minifigure-Alarm-Clock
They do a Vader and a Boba aswell
They pop up on Ebay every now and again but watch the postage, Firebox is free
The stormtrooper makes a grand job of holding my lottery tickets!!!
Cheers
Andy
Siderius
_VISITCOMMUNITY
Tennessee, United States
Joined: September 20, 2005
KitMaker: 1,747 posts
AeroScale: 1,673 posts
Posted: Tuesday, October 11, 2011 - 09:56 AM UTC
Hi all, I have a question for the administrator of this campaign. I have a 1/72 scale Tamiya (Italeri) JU-88 solid nose heavy fighter that had the wings glued together (I did it a couple of months ago) but had no paint or other work done on it. Would it qualify for entry into this campaign. I have since been working on painting some of the parts. Thanks, Russell
AussieReg
Staff MemberAssociate Editor
AUTOMODELER
#007
_VISITCOMMUNITY
Victoria, Australia
Joined: June 09, 2009
KitMaker: 8,156 posts
AeroScale: 3,756 posts
Posted: Tuesday, October 11, 2011 - 11:00 AM UTC
Kenneth, superb job sir, your paint and weathering look great. Thanks for sharing with us and well done on getting finished.

Ernest, excellent work on the interior, great progress so far !

Torchy, STUNNING ! That big bird is a true work of art so far mate.

Russell, go for it sir. We have about 3 weeks left so if you think you can get it finished in time I'd love to see it done.

Cheers, D
Siderius
_VISITCOMMUNITY
Tennessee, United States
Joined: September 20, 2005
KitMaker: 1,747 posts
AeroScale: 1,673 posts
Posted: Tuesday, October 11, 2011 - 02:20 PM UTC
GREAT! Thanks Damian, yeah, I think I can get her done. I think I'll have her finished within a week or so actually, so you've got a JU-88 heavy fighter in the offing. I am painting it in MTO colors, RLM 78/79 with splotches of RLM 80. Got the wings and stabilizers finished. Working on the fuselage now. Photos to come soon. Russell
AussieReg
Staff MemberAssociate Editor
AUTOMODELER
#007
_VISITCOMMUNITY
Victoria, Australia
Joined: June 09, 2009
KitMaker: 8,156 posts
AeroScale: 3,756 posts
Posted: Tuesday, October 11, 2011 - 02:55 PM UTC
Thanks for joining in Russell. I see you've enlisted already, so I've added your details to the Roll Call/Build Status post on page 1. Good luck with the build, I'm looking forward to seeing your progress pics.

Cheers, D
rochaped
_VISITCOMMUNITY
Lisboa, Portugal
Joined: August 27, 2010
KitMaker: 679 posts
AeroScale: 669 posts
Posted: Wednesday, October 12, 2011 - 05:11 AM UTC
Hi everybody,

Call this one done!
Minus one detail to be added later, this 110G-2/R1 is completed.

A very enjoyable and troublesome build, definitely not for the beginner, this Eduard kit was a revelation and a tutorial for me.

The 2nd 110 i am building, will hardly be finished by the deadline of the campaign, but is going much more smoothly than this one did. No wonder

[url=http://www.flickr.com/people/rochinhas4/]rochaped38


[url=http://www.flickr.com/people/rochinhas4/]rochaped38


[url=http://www.flickr.com/people/rochinhas4/]rochaped38


[url=http://www.flickr.com/people/rochinhas4/]rochaped38


[url=http://www.flickr.com/people/rochinhas4/]rochaped38


[url=http://www.flickr.com/people/rochinhas4/]rochaped38


[url=http://www.flickr.com/people/rochinhas4/]rochaped38

Damian, rest assure that I will upload 1 photo on the campaign album

Cheers and have fun modeling, after all that is what drives us...

Pedro
greif8
_VISITCOMMUNITY
Bayern, Germany
Joined: January 17, 2006
KitMaker: 673 posts
AeroScale: 492 posts
Posted: Wednesday, October 12, 2011 - 07:55 PM UTC
Beautiful work Pedro! The paint job is outstanding. I am also building one of Eduard's 110s and completely agree that they are not for beginners and have some fit issues. Though they do represent the 110 line very well when built by a skilled modeller. Top marks for your build!

Ernest
Snorri23
_VISITCOMMUNITY
Ontario, Canada
Joined: March 25, 2010
KitMaker: 514 posts
AeroScale: 244 posts
Posted: Thursday, October 13, 2011 - 06:09 AM UTC
Here are some more photos of my Bf 110D-3, I am using a point and shoot which has a crappy macro/non existent setting.II painted it in the 3 colour splinter, using RLM 02 to mask the old insignia.

Siderius
_VISITCOMMUNITY
Tennessee, United States
Joined: September 20, 2005
KitMaker: 1,747 posts
AeroScale: 1,673 posts
Posted: Friday, October 14, 2011 - 01:00 PM UTC
Well, the girl is ready for decals. Wings didn't fit as well as I like but, oh well, I am on my way with her. Here are some photos. Russell


Jessie_C
_VISITCOMMUNITY
British Columbia, Canada
Joined: September 03, 2009
KitMaker: 6,965 posts
AeroScale: 6,247 posts
Posted: Friday, October 14, 2011 - 01:09 PM UTC
Russel, there's a way to fill that gap, not damage your paint job, and it'll only require a small bit of masking and repainting. Apply a bead of ordinary white glue over the gap and then blend it in with a wet finger. Once it dries, mask and repaint the roots.
Siderius
_VISITCOMMUNITY
Tennessee, United States
Joined: September 20, 2005
KitMaker: 1,747 posts
AeroScale: 1,673 posts
Posted: Friday, October 14, 2011 - 01:28 PM UTC
Thanks Jessica, I thought of that and still may do it, not sure; thank you for the suggestion though. Take care, Russell
AussieReg
Staff MemberAssociate Editor
AUTOMODELER
#007
_VISITCOMMUNITY
Victoria, Australia
Joined: June 09, 2009
KitMaker: 8,156 posts
AeroScale: 3,756 posts
Posted: Friday, October 14, 2011 - 04:14 PM UTC
Fast work there Russell, and I like the scheme as well mate !

With just over 2 weeks to run here the current state of play for the Campaign is 47 enlisted, 14 Completed builds and 14 listed as in progress.

I'm embarrased to say that I didn't get past opening the box and checking the sprues, so I don't even rate a mention, Campign overload hit me in my own Campaign.

Good luck with the run home folks, I'm looking forward to seeing the results.

Cheers, D
Siderius
_VISITCOMMUNITY
Tennessee, United States
Joined: September 20, 2005
KitMaker: 1,747 posts
AeroScale: 1,673 posts
Posted: Friday, October 14, 2011 - 05:42 PM UTC
Well, although the wings still don't fit quite right I'll call it finished right now. Got the decals on and the desert version of "heavy fighter" Junkers 88-C is ready to fly.
Markings are for the MTO, white band on fuselage and white under wings were airbrushed on. Colors for the aircraft consist of RLM 79 topsides, with RLM 78 undersides. Splotches of RLM 80 to help the bird blend into the desert landscape as well were applied.
Decals were average but gave no real problems. Hope you all enjoy looking at her. Russell


P.S. Challenge was using a fine brush to brush paint canopy. I have NEVER been able to properly mask a canopy, so I guess that is my weak point in modeling. I do the best I can with a brush, it comes out so so sometimes, sometimes it comes out better.
greif8
_VISITCOMMUNITY
Bayern, Germany
Joined: January 17, 2006
KitMaker: 673 posts
AeroScale: 492 posts
Posted: Sunday, October 16, 2011 - 02:23 AM UTC
Nice Ju88 Russell. The desert camo scheme is very pleasing to the eye.

Below are two shots of my Bf110G4. The model is ready for decaling. I used Vallejo Model Air RLM 76 and 75 for the base and camo scheme. This was the first time I have used Vallejo paints and they took I bit of experimenting to get the right paint/thinner ratio. Overall the paint sprayed quite well.

Ernest


Siderius
_VISITCOMMUNITY
Tennessee, United States
Joined: September 20, 2005
KitMaker: 1,747 posts
AeroScale: 1,673 posts
Posted: Sunday, October 16, 2011 - 05:21 AM UTC
Thank you Ernest. Yes I agree, the RLM 79/78/80 with the white Meditterean markings is nice to look at. Thanks again. Russell
wespe66
_VISITCOMMUNITY
Frederiksborg, Denmark
Joined: June 27, 2011
KitMaker: 122 posts
AeroScale: 121 posts
Posted: Monday, October 17, 2011 - 06:22 AM UTC
Andy: That is some stunning paintwork. I'm absolutely sure you cheat, but I don't know how?

Pedro: Beautiful. Now I have to make the same aircraft someday. Thank you very much.

Russel: Very nice desert camo!

Ernest: Very nice night fighter camo! It just popped up on my to-do list...


Finally got some time to take a few decent shots.
I also posted the required photos to the Zerstörer Campaign Gallery.


More pics here:

my pre-flight check thread

Cheers,
Kenneth
rochaped
_VISITCOMMUNITY
Lisboa, Portugal
Joined: August 27, 2010
KitMaker: 679 posts
AeroScale: 669 posts
Posted: Monday, October 17, 2011 - 06:59 AM UTC
@ Ernest: thank u for you open feedback, and for what i see so far your nachtjager is going to be a blast. Just a hint, eduard has completely missed some issues, and 2 air scoops located on the right- facing side of both engines being completely forgotten is strange! If you care to look carefully at my posts you'll see their location.

@kenneth: Thanks, i guess??!? Not quite sure what you mean with your comments
wespe66
_VISITCOMMUNITY
Frederiksborg, Denmark
Joined: June 27, 2011
KitMaker: 122 posts
AeroScale: 121 posts
Posted: Monday, October 17, 2011 - 09:17 AM UTC

Quoted Text

@kenneth: Thanks, i guess??!? Not quite sure what you mean with your comments


Hehe, just my weird way of saing that I think that your build is great and that it inspired me to do the same aircraft sometime in the future. The only problem is that I already have enough kits in the stash for maybe 10 years or so

Kenneth
611_sqd
_VISITCOMMUNITY
Ontario, Canada
Joined: January 24, 2011
KitMaker: 470 posts
AeroScale: 99 posts
Posted: Monday, October 17, 2011 - 11:40 AM UTC
Decals are on. Working on canopy masking and weathering. Masking a 410 is a tedious job. I image the 110 isn't any better.


Torchy
#047
_VISITCOMMUNITY
England - East Anglia, United Kingdom
Joined: September 13, 2005
KitMaker: 2,016 posts
AeroScale: 475 posts
Posted: Tuesday, October 18, 2011 - 08:49 PM UTC
Hi chums
Had a few days off work but golf got in the way a couple of times(the weathers nice).
Many thanks for the kind comments
@ Kenneth... Cheat !me! I wish I knew how to I'd do it all the time
your 110's a beauty mate and those pics look great,well done
@Aarron... Kermits looking good mate,try masking this mossie I've used a shed load of tape and I had to re do the fuslage bands
@Russell...,nice desert commo job,I like the German med patterns
@Trevor...Lovely 110 mate the cammo came out superb
@Jay and Ernest, bloody great cockpits boys,superb jobs
@Pedro,Beauty no more no less
Well lads ,I've chucked a bucket load of paint at it and here it is...


After testing a few different paints on spare panels I picked Xtracrylix XA 1007 RAF Sky and XA 1005 RAF Extra dark sea grey thinned 10% with water as this airbrushed better than Tamiya which came out a tad splattery.
I had to re do the fuselage bands as I was not happy with the finish (Tamiya flat black and white).
A coat of Klear is next on the list then I can start the decals,once thats done the engines and the plumbing can be fitted.
Thanks for looking ,more soon
Andy
Torchy
#047
_VISITCOMMUNITY
England - East Anglia, United Kingdom
Joined: September 13, 2005
KitMaker: 2,016 posts
AeroScale: 475 posts
Posted: Wednesday, October 19, 2011 - 04:17 AM UTC
Hi all
A splash of colour


but the stripes are showing through the top roundels

Bummox ,I've put a plea out for a spare set so I can double them up,otherwise I'm knackered