Air Campaigns
Want to start or join a group build? This is where to start.
Want to start or join a group build? This is where to start.
Hosted by Frederick Boucher, Michael Satin
OFFICIAL: Aerial Screw Helicopter Campaign

Keeperofsouls2099

Joined: January 14, 2009
KitMaker: 2,798 posts
AeroScale: 2,443 posts

Posted: Thursday, July 14, 2011 - 12:49 PM UTC
good build guys and mine looks good in the box sitting on the shelf.still dont know if im going huey or black hawk 

ShawnM

Joined: November 24, 2008
KitMaker: 564 posts
AeroScale: 510 posts

Posted: Friday, July 15, 2011 - 01:02 AM UTC
Still here!
Finishing up the cockpit on my OOB 1/32 Apache build.
I never thought building straight box stock would be so tough! My AMS is really suffering, lol.
Pics soon I swear.
Finishing up the cockpit on my OOB 1/32 Apache build.
I never thought building straight box stock would be so tough! My AMS is really suffering, lol.
Pics soon I swear.
Posted: Saturday, July 16, 2011 - 10:46 AM UTC
OK I'm calling this one done.
Cierva W.11 Airhorse
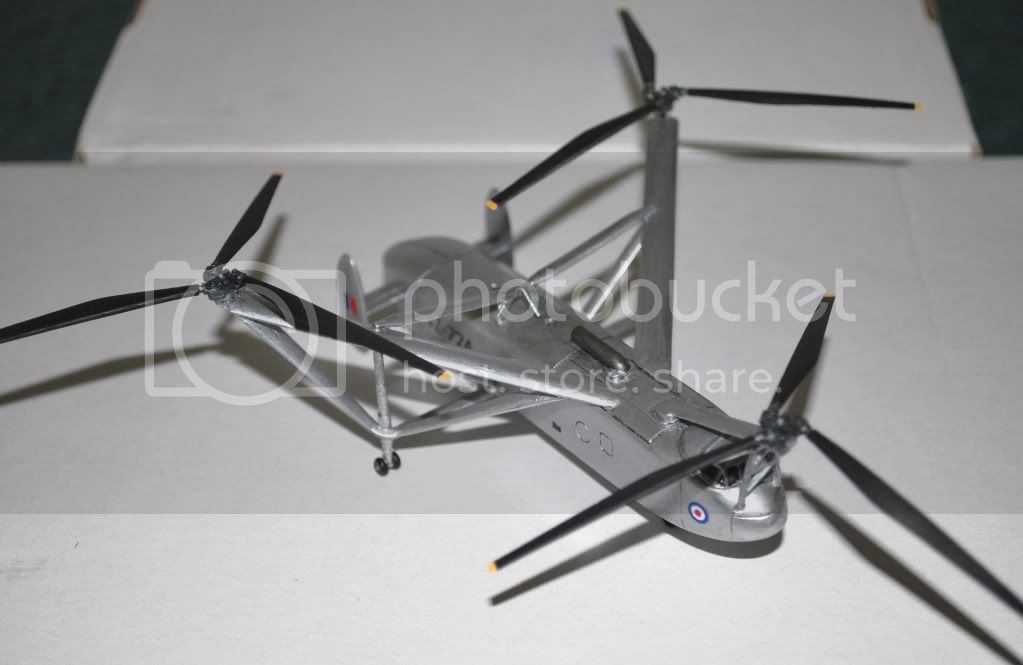
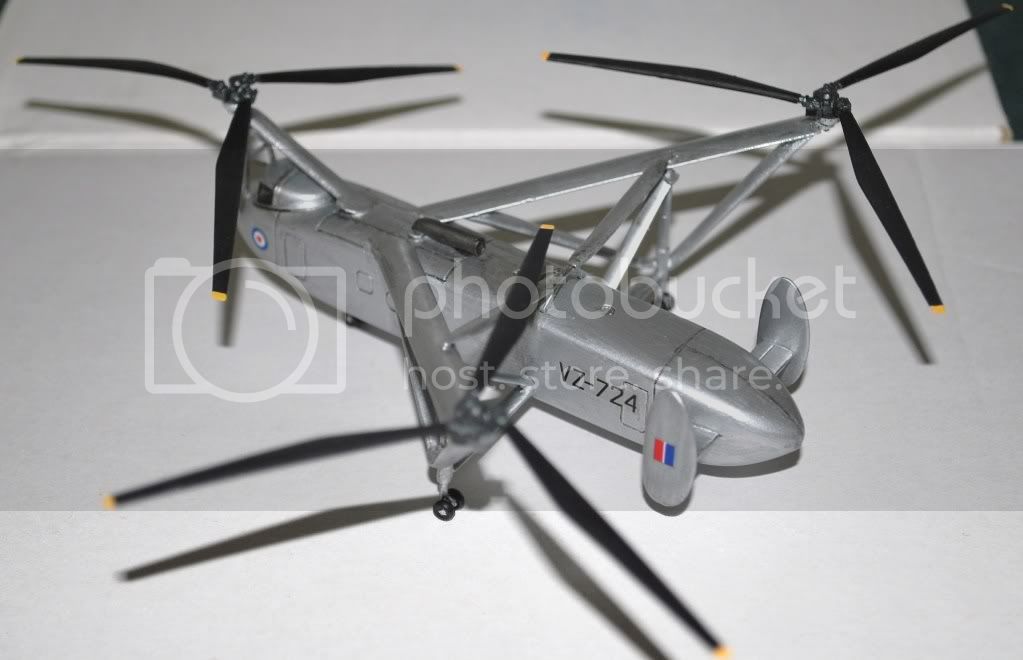
Cierva W.11 Airhorse


Keeperofsouls2099

Joined: January 14, 2009
KitMaker: 2,798 posts
AeroScale: 2,443 posts

Posted: Saturday, July 16, 2011 - 11:37 AM UTC
nice finish and congrats make sure you post in gallery 

Posted: Sunday, July 17, 2011 - 09:59 AM UTC
Very nice build, Luciano. A figuration of rotors you dont see everyday 
Thanks for participating

Thanks for participating

Posted: Sunday, July 17, 2011 - 12:21 PM UTC
Thanks guy's,
Although this one is done I'll still try and get the Seahawk finished as that was the entry I started first.
Jesper I agree a very unusual design, only two where built of which one crashed but others (bigger) were planned powered by twin Merlins.
Although this one is done I'll still try and get the Seahawk finished as that was the entry I started first.
Jesper I agree a very unusual design, only two where built of which one crashed but others (bigger) were planned powered by twin Merlins.
Posted: Sunday, July 31, 2011 - 05:46 AM UTC
Here are a couple more in-progress photos of the PKZ-2 that I am building for this campaign.
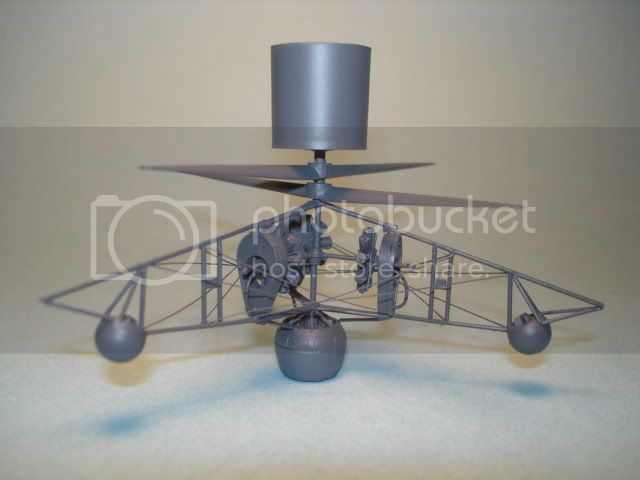
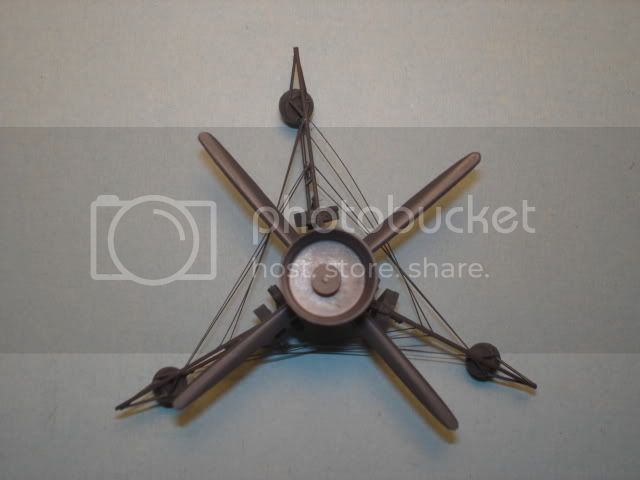
I added the support cables that I made out of stretched sprue and got a base coat of dark grey on it. Now on to the more detailed painting.
Thanks,
Randy


I added the support cables that I made out of stretched sprue and got a base coat of dark grey on it. Now on to the more detailed painting.
Thanks,
Randy

Gendrok

Joined: July 21, 2010
KitMaker: 125 posts
AeroScale: 45 posts

Posted: Sunday, July 31, 2011 - 08:14 AM UTC
My air compressor is busted.  Hopefully I can get it repaired in a timely fashion and get back on my Apache. I was making ok progress.
 Hopefully I can get it repaired in a timely fashion and get back on my Apache. I was making ok progress.
vertigo

Joined: November 11, 2004
KitMaker: 388 posts
AeroScale: 225 posts

Posted: Monday, August 01, 2011 - 04:35 AM UTC
I think it's about time I provided some updates on my AH-1E Cobra Gunship.
I've gone from this bare white cockpit:

To this:


I've gone from this bare white cockpit:

To this:


ShawnM

Joined: November 24, 2008
KitMaker: 564 posts
AeroScale: 510 posts

Posted: Monday, August 01, 2011 - 10:57 AM UTC
all "major assembly is complete now. Base coat applied to airframe:
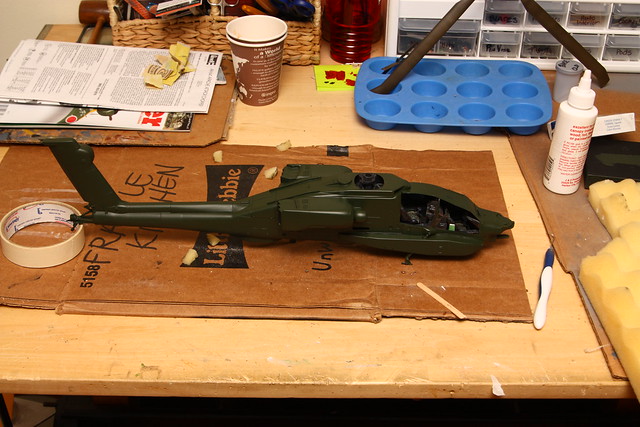
weathering and color modulation started on stub wings and tail plane.
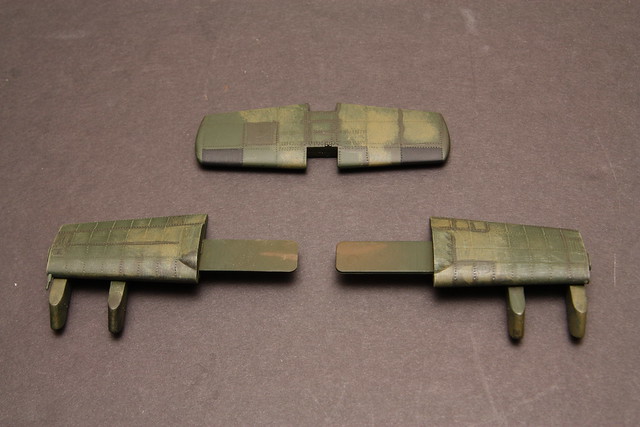
There are 4 greens on those parts...wishing I had an airbrush about now.
My goal was to stay OOB, I've caved in the following places:
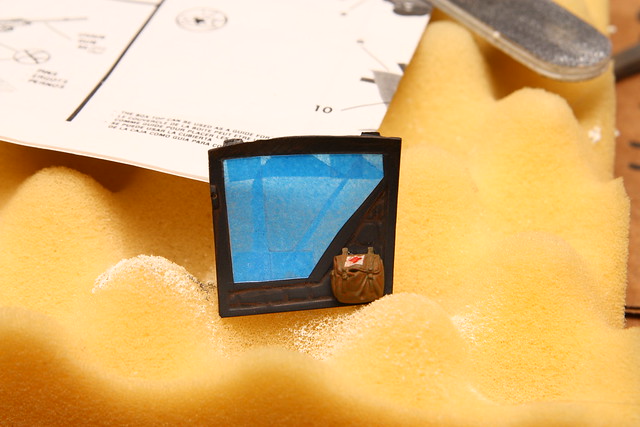
Added a first aid kit:
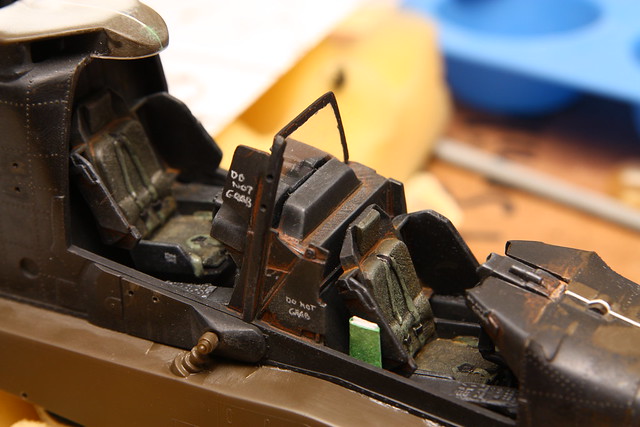
Added a Map:
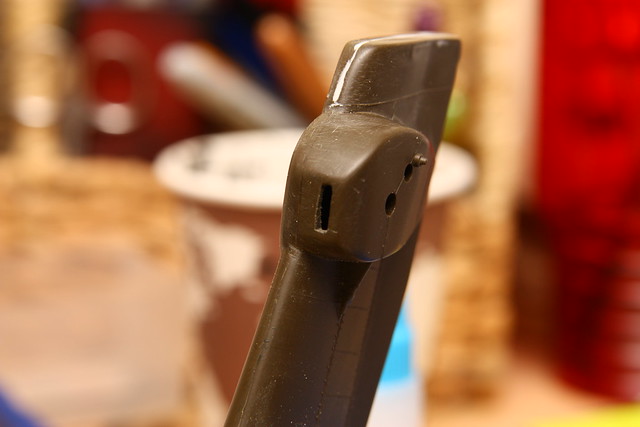
Opened up the tail rotor inlet:
The rest of the inprogress shots are here:
http://www.flickr.com/photos/shawnmanny/sets/72157626875233014/with/5998173673/

weathering and color modulation started on stub wings and tail plane.

There are 4 greens on those parts...wishing I had an airbrush about now.
My goal was to stay OOB, I've caved in the following places:
Added a first aid kit:

Added a Map:

Opened up the tail rotor inlet:

The rest of the inprogress shots are here:
http://www.flickr.com/photos/shawnmanny/sets/72157626875233014/with/5998173673/
ShawnM

Joined: November 24, 2008
KitMaker: 564 posts
AeroScale: 510 posts

Posted: Tuesday, August 02, 2011 - 05:15 AM UTC
weathering is in full swing now:
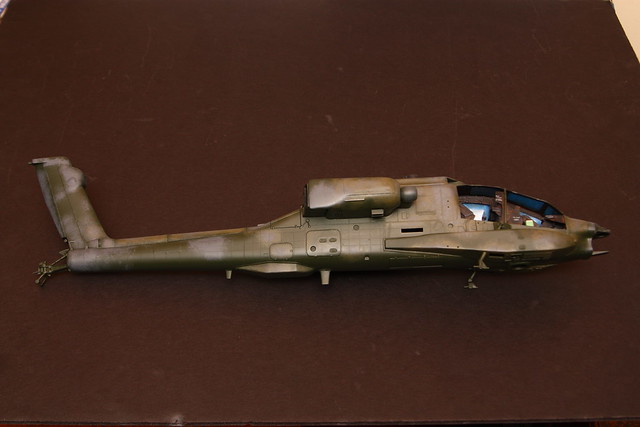
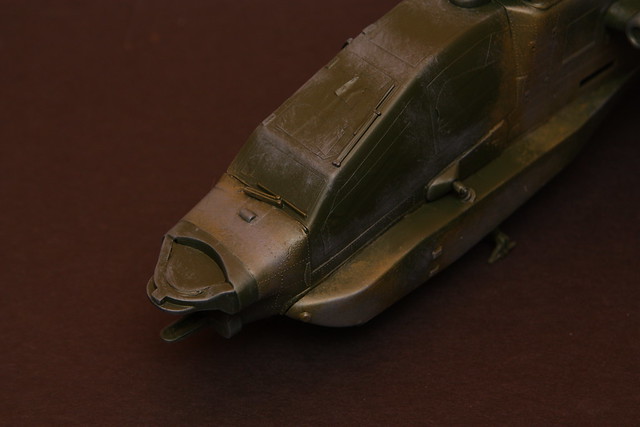
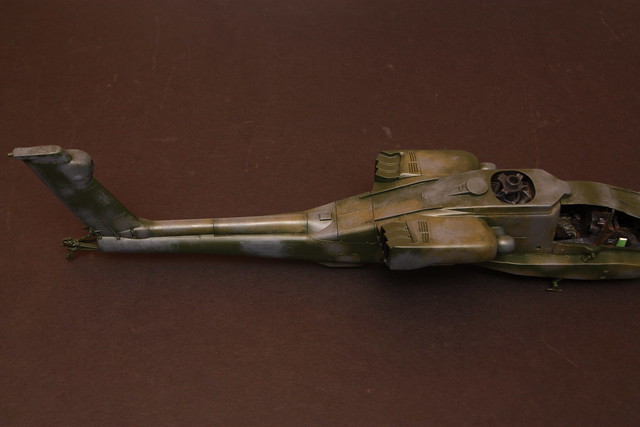
Added some grey on a suggestion from CobraHistorian, glad I did. Once I add the sand and abit more geens this will look right.


Added some grey on a suggestion from CobraHistorian, glad I did. Once I add the sand and abit more geens this will look right.

Keeperofsouls2099

Joined: January 14, 2009
KitMaker: 2,798 posts
AeroScale: 2,443 posts

Posted: Wednesday, August 03, 2011 - 03:39 PM UTC
Can't wait to see the fruits of your labor 

ShawnM

Joined: November 24, 2008
KitMaker: 564 posts
AeroScale: 510 posts

Posted: Monday, August 08, 2011 - 12:00 PM UTC
finished the massive weathering job today, and got started on final assembly.
Teaser shots for now!
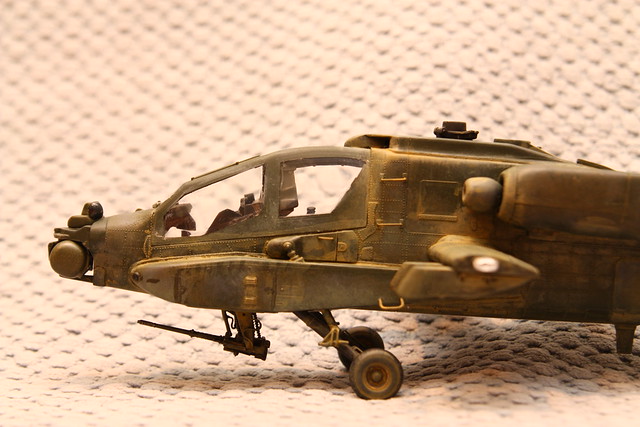
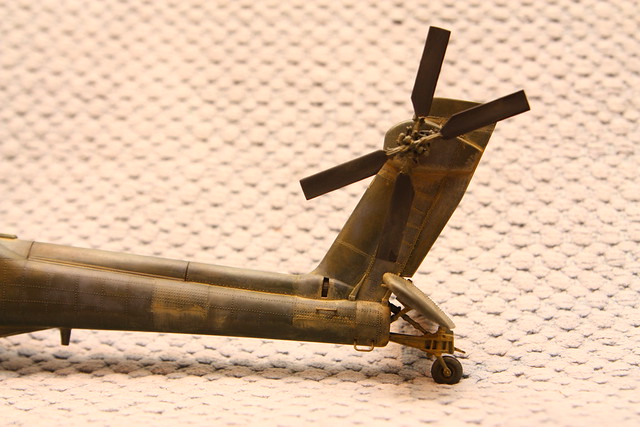
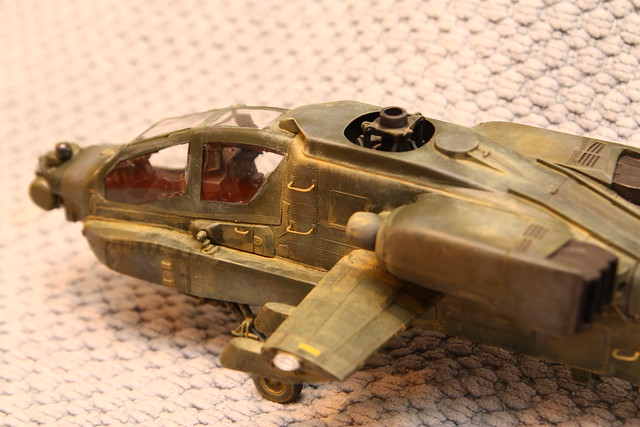
Will have it wrapped up this week.
Teaser shots for now!


Will have it wrapped up this week.

Keeperofsouls2099

Joined: January 14, 2009
KitMaker: 2,798 posts
AeroScale: 2,443 posts

Posted: Tuesday, August 09, 2011 - 02:42 PM UTC
Now that has been sitting in the desert good job sir the effect is good 

ShawnM

Joined: November 24, 2008
KitMaker: 564 posts
AeroScale: 510 posts

Posted: Tuesday, August 09, 2011 - 02:42 PM UTC
calling this one done!
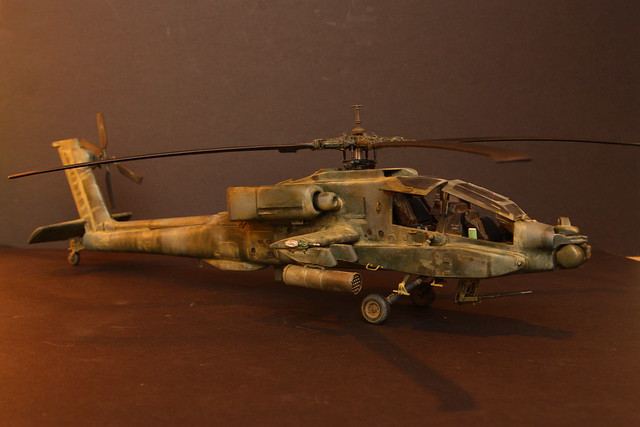
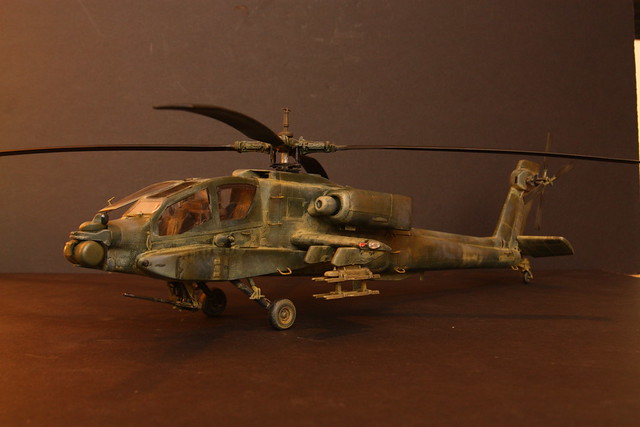
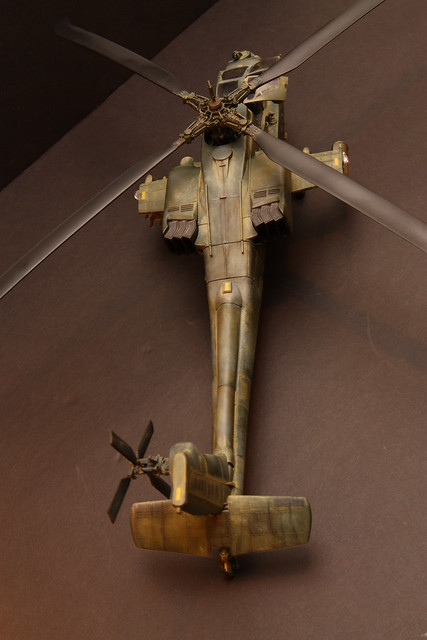
I'll do a full shoot next week on my days off.


I'll do a full shoot next week on my days off.

Siderius

Joined: September 20, 2005
KitMaker: 1,747 posts
AeroScale: 1,673 posts

Posted: Tuesday, August 09, 2011 - 03:50 PM UTC
Wow! Great looking whirlybird there Shawn! Now give her a bath!  Russell
 Russell
Keeperofsouls2099

Joined: January 14, 2009
KitMaker: 2,798 posts
AeroScale: 2,443 posts

Posted: Wednesday, August 10, 2011 - 12:47 AM UTC
Good job sir don't forget to post in the gallery and thank you for being part of my campaign 

ShawnM

Joined: November 24, 2008
KitMaker: 564 posts
AeroScale: 510 posts

Posted: Wednesday, August 10, 2011 - 01:16 AM UTC
Justin, I have had awful luck posting any of my previous builds to the gallery.
I will give it a try this weekend.
I will give it a try this weekend.
Posted: Wednesday, August 10, 2011 - 03:32 AM UTC
Quoted Text
If you have any issues drop us a PM and I'll look into it for you Justin, I have had awful luck posting any of my previous builds to the gallery.
I will give it a try this weekend.

ShawnM

Joined: November 24, 2008
KitMaker: 564 posts
AeroScale: 510 posts

Posted: Wednesday, August 10, 2011 - 05:41 AM UTC
thank you Allan, I'm guessing user error but ya never know. 

HeyLoad

Joined: December 06, 2005
KitMaker: 64 posts
AeroScale: 33 posts

Posted: Sunday, August 14, 2011 - 07:59 AM UTC
Just a photo of a couple of the completed sub-assemblies. The forward left window was filled in to make this correct for the SH-3D that I am building. The windows in the kit were badly scratched, so the next step is to try and clear them before mating the fuselage.
Tom

Tom


Keeperofsouls2099

Joined: January 14, 2009
KitMaker: 2,798 posts
AeroScale: 2,443 posts

Posted: Tuesday, August 16, 2011 - 04:07 PM UTC
is that a sea king sir?
HeyLoad

Joined: December 06, 2005
KitMaker: 64 posts
AeroScale: 33 posts

Posted: Wednesday, August 17, 2011 - 02:59 PM UTC
Sorry for the poor post, yes. 1/48 Hasegawa Sea King. Shown are the resin sponsons which are smaller than those that came with the kit. They are correct for the version I have decals for, which is the squadron which picked up the astronauts in the Pacific.
Tom
Tom
Posted: Wednesday, August 17, 2011 - 04:16 PM UTC
Shawn, great build and nice finish, I must admit I was a bit puzzled as to where your paint was going but once put together it looks like a war weary whirlybird.
Great finish.
Tom, Nice going with the Seaking so far.
Great finish.
Tom, Nice going with the Seaking so far.
ShawnM

Joined: November 24, 2008
KitMaker: 564 posts
AeroScale: 510 posts

Posted: Thursday, August 18, 2011 - 02:35 AM UTC
thank you Luciano, there was a time during the finish that I too wondered where it was going...
just had to stick to the vision
just had to stick to the vision
 |


