Air Campaigns
Want to start or join a group build? This is where to start.
OFFICIAL: Anything Goes Campaign
Simon_H
_VISITCOMMUNITY
England - East Anglia, United Kingdom
Joined: May 06, 2009
KitMaker: 32 posts
AeroScale: 31 posts
Posted: Saturday, June 29, 2013 - 09:02 PM UTC

Quoted Text

Decals...argh!!


You said a mouthful there! Not tried solvaset. I'll pick some up. Thanks!
Simon_H
_VISITCOMMUNITY
England - East Anglia, United Kingdom
Joined: May 06, 2009
KitMaker: 32 posts
AeroScale: 31 posts
Posted: Sunday, June 30, 2013 - 08:07 AM UTC
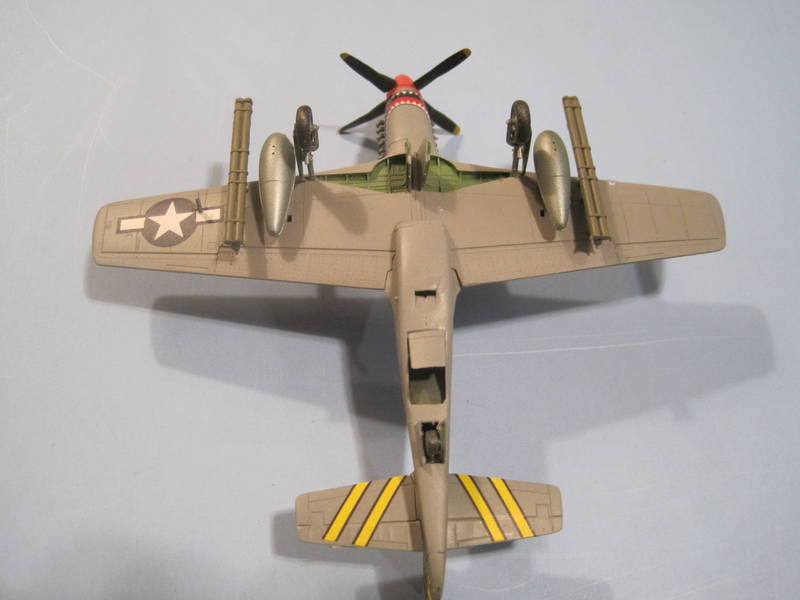
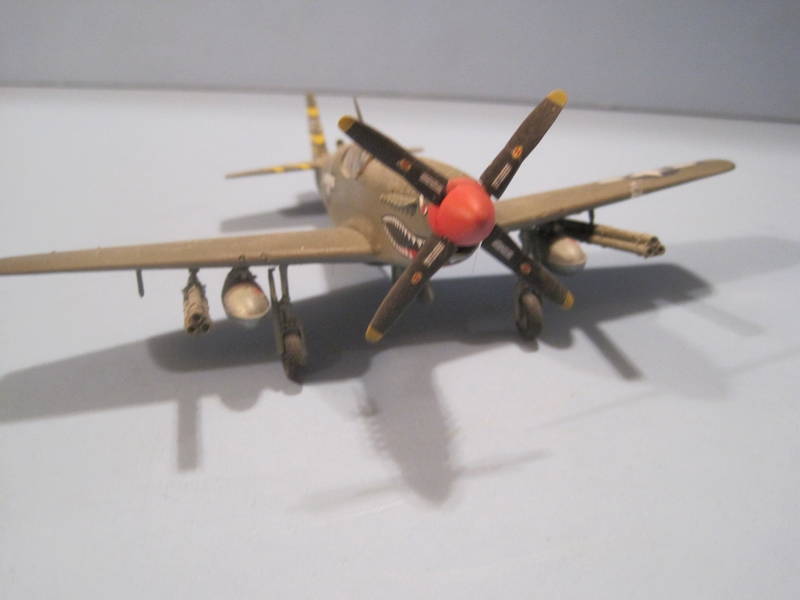
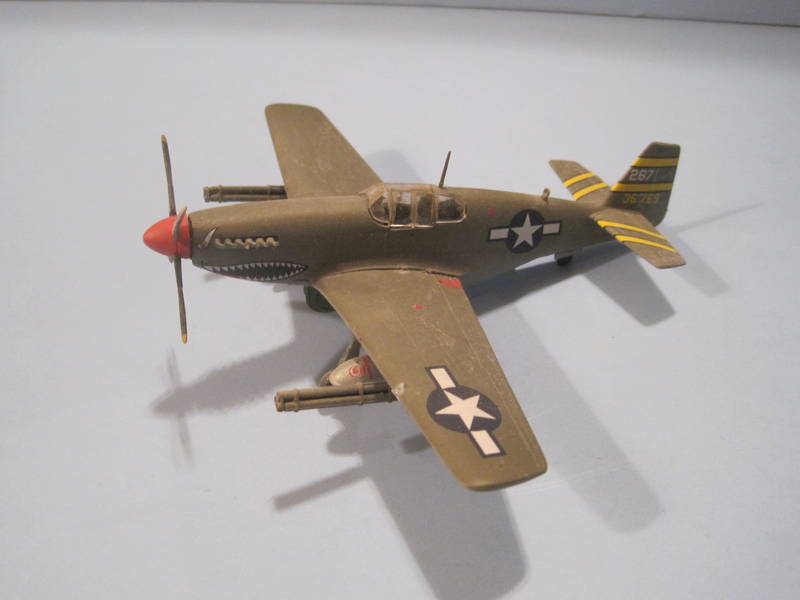
Well, it's finished... but ugh - don't look too close. I do like this hobby a lot, but I really wish I was a lot better at it.


Anyway, I tried out a couple of new techniques, so hopefully I learned something. Thanks for running a fun campaign.
SaxonTheShiba
_VISITCOMMUNITY
United States
Joined: February 01, 2009
KitMaker: 1,233 posts
AeroScale: 663 posts
Posted: Sunday, June 30, 2013 - 08:13 AM UTC
Simon-------A fine-looking Mustang indeed. It's always fun to try different techniques and use what works best for you. Most importantly, enjoy your builds and have fun!!!!!!!!


Best wishes,


Ian
mykroft
_VISITCOMMUNITY
Ontario, Canada
Joined: November 14, 2009
KitMaker: 270 posts
AeroScale: 264 posts
Posted: Sunday, June 30, 2013 - 09:36 AM UTC
Solvaset is wonderful stuff, I use it as my standard setting solution. It is a little hot though, so be careful.

The AZModel IXc is coming along nicely


AZModel Spitfire IXc 1/72 by mawz_models, on Flickr
raypalmer
_VISITCOMMUNITY
Ontario, Canada
Joined: March 29, 2010
KitMaker: 1,151 posts
AeroScale: 985 posts
Posted: Sunday, June 30, 2013 - 10:31 AM UTC
Simon!

Looks pretty darn good to me. Accentuate the positive man. Zero in on what you think was really successful and hone the techniques you used there. Anything you find lacking; abandon that technique or practice it on a mule.
Siderius
_VISITCOMMUNITY
Tennessee, United States
Joined: September 20, 2005
KitMaker: 1,747 posts
AeroScale: 1,673 posts
Posted: Sunday, June 30, 2013 - 11:49 AM UTC
Good job Simon. The Mustang looks fine. Adam is correct, Solva Set is a bit strong, but nothing like it for taming decals which don't want to perform right! I often use Micro Sol setting solution for many of my builds, and it works just fine.
Everyone is learning here, don't worry about being the best, just have fun and do your best. Each model is different, no one builds a perfect model, and you will find that experience is certainly the best teacher. Take care, Russell

P.S. Here is my version of the exact same kit Simon, in American garb however, lol.


SaxonTheShiba
_VISITCOMMUNITY
United States
Joined: February 01, 2009
KitMaker: 1,233 posts
AeroScale: 663 posts
Posted: Sunday, June 30, 2013 - 12:17 PM UTC
Well stated Russell!!!!!


Regards,


Ian
Shuftie
_VISITCOMMUNITY
Western Australia, Australia
Joined: September 05, 2012
KitMaker: 74 posts
AeroScale: 28 posts
Posted: Monday, July 01, 2013 - 06:38 PM UTC
I am building Hasegawa's A-7E Corsair II "Valions" OOB.


Shuftie
_VISITCOMMUNITY
Western Australia, Australia
Joined: September 05, 2012
KitMaker: 74 posts
AeroScale: 28 posts
Posted: Monday, July 01, 2013 - 06:41 PM UTC

Quoted Text

Well, it's finished... but ugh - don't look too close. I do like this hobby a lot, but I really wish I was a lot better at it.


HI Simon I know exactly what you mean! I think the Mustang looks great.
Shuftie
_VISITCOMMUNITY
Western Australia, Australia
Joined: September 05, 2012
KitMaker: 74 posts
AeroScale: 28 posts
Posted: Tuesday, July 02, 2013 - 06:32 PM UTC
Washed all the sprues in mild soapy water then sprayed the parts with Tamiya undercoat.


JClapp
#259
_VISITCOMMUNITY
Massachusetts, United States
Joined: October 23, 2011
KitMaker: 2,265 posts
AeroScale: 1,715 posts
Posted: Tuesday, July 02, 2013 - 08:09 PM UTC
Decals about done. just need to add some de icing boots to the tail. Then a coat of sealer, and I can pull the masks off the glass.

cutting out the seagull was difficult. I should have practiced a few times.
Jessie_C
_VISITCOMMUNITY
British Columbia, Canada
Joined: September 03, 2009
KitMaker: 6,965 posts
AeroScale: 6,247 posts
Posted: Friday, July 05, 2013 - 10:38 AM UTC

Quoted Text

I do like this hobby a lot, but I really wish I was a lot better at it.


The only way to get better is to build a lot
vdejarnette
_VISITCOMMUNITY
Maryland, United States
Joined: February 25, 2013
KitMaker: 209 posts
AeroScale: 138 posts
Posted: Friday, July 05, 2013 - 02:03 PM UTC
My BV-141B is all buttoned up. The future glue I used is setting at the moment, and thank god for the Eduard Masks... otherwise I would have been in for a world of hurt.


Perhaps you also see the dreaded RLM 84 in the background.
Siderius
_VISITCOMMUNITY
Tennessee, United States
Joined: September 20, 2005
KitMaker: 1,747 posts
AeroScale: 1,673 posts
Posted: Friday, July 05, 2013 - 02:23 PM UTC
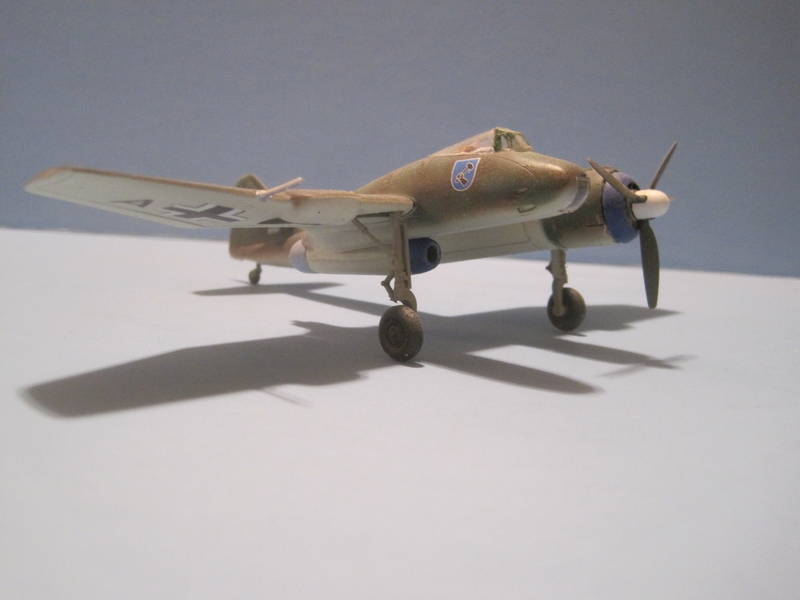
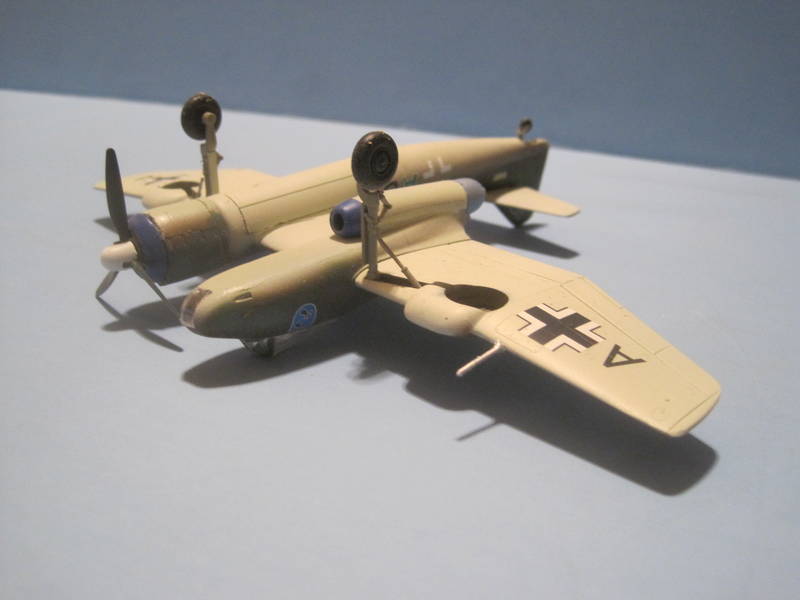
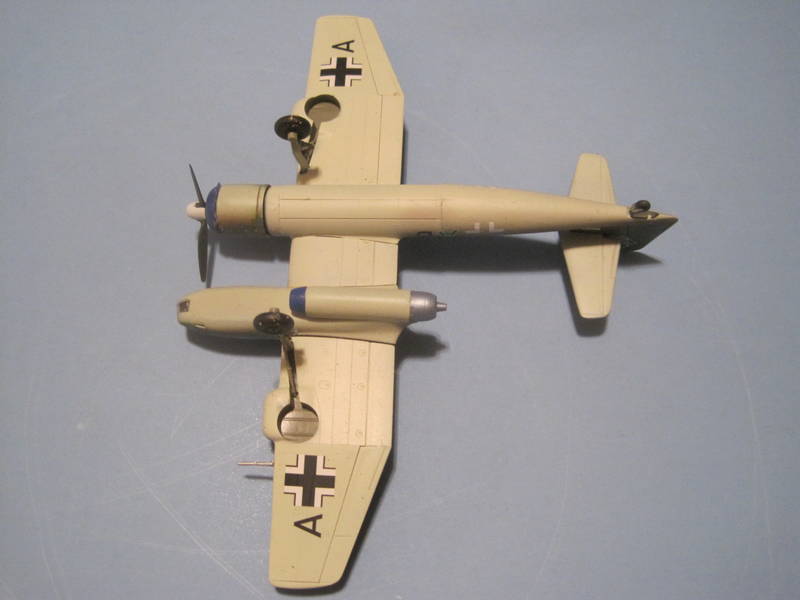
Hi Van, was going to show you how the "dreaded" RLM 84 looked. Here are some photos I took of a Blohm & Voss P.194 "paper project" attack aircraft. I painted it on the bottom and sides RLM 84, not only the same color but the same brand of paint you show in your picture. Thought you might be curious. Thanks, Russell


vdejarnette
_VISITCOMMUNITY
Maryland, United States
Joined: February 25, 2013
KitMaker: 209 posts
AeroScale: 138 posts
Posted: Saturday, July 06, 2013 - 01:31 AM UTC
Thanks Russell, I was curious what it was going to look like. I've seen that P.194 for sale on eBay a bunch and considered picking it up. It is an interesting design like the 141 and yours looks very nice! I am planning to use RLM 84 all over the aircraft in lieu of the more olivgrun color on the 1945 option in the instructions.
RedwingNev
_VISITCOMMUNITY
England - East Midlands, United Kingdom
Joined: February 07, 2004
KitMaker: 911 posts
AeroScale: 415 posts
Posted: Sunday, July 07, 2013 - 01:11 AM UTC
A couple of nice Mustangs That wee Revell kit is a beaut.
mrockhill
_VISITCOMMUNITY
Pennsylvania, United States
Joined: June 17, 2009
KitMaker: 566 posts
AeroScale: 507 posts
Posted: Sunday, July 07, 2013 - 04:44 AM UTC
Been away from the bench for a few months up until a week or so ago, looking forward to getting this Dora done. looks like ive missed a lot and have some reading and catching up to do!
Major assembly is complete and shes looking like a D-9 now. With the addition of the shoulder belts the cockpit is finished. Not sure what I beefed up but the tub doesn't sit well in the fuselage. Not a big dea as Im going to build this one cockpit closed for a clean look. I should have the windscreen and canopy attached later today and if im moving fast enough get the cowl and wheel wells masked and some RLM76 sprayed. I wish I had tried Bare metal foil before for canopy masking, its just too easy and much much cheaper than pre cut masks.


Delbert
#073
_VISITCOMMUNITY
Pennsylvania, United States
Joined: October 05, 2002
KitMaker: 2,659 posts
AeroScale: 209 posts
Posted: Sunday, July 07, 2013 - 06:03 AM UTC
Howdy

Been working on my project, almost ready to go to paint..

2 1/144 scale minicraft F-104's

I thought masking in 1/48 was bad.. try 1/144


later
Delbert
mrockhill
_VISITCOMMUNITY
Pennsylvania, United States
Joined: June 17, 2009
KitMaker: 566 posts
AeroScale: 507 posts
Posted: Sunday, July 07, 2013 - 10:09 AM UTC
Delbert,
I dig the steel penny, common enough but always a neat item. I imagine masking those 104s was a beast, I haven't built a 1/144 kit in ages
Emeritus
_VISITCOMMUNITY
Uusimaa, Finland
Joined: March 30, 2004
KitMaker: 2,845 posts
AeroScale: 1,564 posts
Posted: Sunday, July 07, 2013 - 12:35 PM UTC
Update time for my entry.

Funny how loosely fitting locators seem to be somewhat of a theme with this kit. Not a big problem though, just a matter of gluing in some styrene sheet to make the parts fit snuggly. Perhaps the largest of these parts are the outer wings. These needed strips of styrene sheet on both sides of the locator tabs.


Then there's the ram air turbine mount. Small locator node and a big hole in the fuselage bay, here filled with a piece of styrene rod. A more appropriately sized hole will be drilled soon. I also added some detail to the otherwise empty space that is the RAT compartment.

Compared to the real thing, that's perhaps not even one third of the amount of wiring and components. But as I'd rather keep my eyesight and sanity, I just added some to make it more look less empty.

As with the RAT compartment, I applied some creative gizmology when adding a bulkhead and piping to the main gear wells.

Since the gear well detailing in the kit is not only completely fictitious. but the wells also get way too shallow from around the middle outwards, I didn't stress about the detailing too much.

While I was at it, I added some wiring to the sides of the nose gear well.


WARLORD
Staff MemberAssociate Editor
HISTORICUS FORMA
_VISITCOMMUNITY
Warszawa, Poland
Joined: April 23, 2003
KitMaker: 1,923 posts
AeroScale: 100 posts
Posted: Sunday, July 07, 2013 - 09:25 PM UTC
Decals in Itleri's kit are very good. They are strong and thin
Emeritus
_VISITCOMMUNITY
Uusimaa, Finland
Joined: March 30, 2004
KitMaker: 2,845 posts
AeroScale: 1,564 posts
Posted: Wednesday, July 10, 2013 - 08:30 AM UTC
Starting to looks like an airplane. It's funny how just the addition of the outer wings transforms the whole thing; without them the Draken doesn't look like anything special.


Continuing with my detailing, I replaced the undersized molded-on whatever-they-are with thin copper wire. These are perhaps a little bit too big, but look much better than the dimensionless plastic representations.

At first I tried bending and cutting each one beforehand. Needless to say, it was very fiddly and didn't work. I then realized I could simple glue lengths of wire into the holes drilled in the fuselage, bend them down, then cut to size. Presto!

olivato
_VISITCOMMUNITY
Distrito Federal, Argentina
Joined: August 16, 2005
KitMaker: 127 posts
AeroScale: 12 posts
Posted: Wednesday, July 10, 2013 - 01:51 PM UTC
Hi everyone!

I really enjoy following this campaign! Very niece pieces of work!!! I'd better rush or this will be another failed campaign for me.

I started with the Aires cockpit. This is my first resin cockpit and the details are really outstanding but hard to bring up. I probably need more practice.

I’ll keep on working with the Yak! I hope I have it ready on time.

See you soon!
JollyRoger
_VISITCOMMUNITY
Istanbul, Turkey / Türkçe
Joined: December 22, 2004
KitMaker: 1,241 posts
AeroScale: 616 posts
Posted: Wednesday, July 10, 2013 - 10:07 PM UTC
Hey? I thought this campaigne ended at the end of June??? Wait wait, I'll just pick up my Mustang...I was mourning about missing another campaigne...now I am happy...
JollyRoger
_VISITCOMMUNITY
Istanbul, Turkey / Türkçe
Joined: December 22, 2004
KitMaker: 1,241 posts
AeroScale: 616 posts
Posted: Friday, July 12, 2013 - 12:46 AM UTC
Ok, here is some update.


...aaaaaand here's the decals!!!!


We'll see how it ends...cheers.