Air Campaigns
Want to start or join a group build? This is where to start.
OFFICIAL: Anything Goes Campaign
Emeritus
_VISITCOMMUNITY
Uusimaa, Finland
Joined: March 30, 2004
KitMaker: 2,845 posts
AeroScale: 1,564 posts
Posted: Thursday, July 25, 2013 - 12:24 PM UTC
Masking? Nope, of course not! It's not what it looks like...

I noticed I had painted the metallic color portions of the engine intakes too long, so they had to be fixed to be one "segment" shorter. Fortunately there were no decals *yet* in the immediate vicinity, so mas... sorry, applying protective covering wasn't so tricky.
After thinking a little over an hour was enough drying for airbrushed coats of paint, I applied a sealing coat of Future with a brush. To my surprise, the green Vallejo paint reacted and wanted to come off. (no such effect on the Xtracrylics neutral grey) Fortunately, the damage was minor and the initially rough-looking lifting leveled off nicely. I've better let those touch-ups dry properly until morning before sealing them. When I get this repair painting done, I'm down to the very last couple of decals.

All the detail parts are also coming up nicely. I think I'll be making it before the deadline.

Btw, I could use an opinion or two on the exhaust nozzle. Does this look good for a burnt metal finish, or does it just look rusty? What do you think?

SaxonTheShiba
_VISITCOMMUNITY
United States
Joined: February 01, 2009
KitMaker: 1,233 posts
AeroScale: 663 posts
Posted: Thursday, July 25, 2013 - 12:34 PM UTC
Eetu---Beautiful work!!!!! In regards to the burner can, I think some post shading with Gun Metal or Burnt Iron may offset the "Rust Effect" and give it a slight sheen.


Regards, Ian
mrockhill
_VISITCOMMUNITY
Pennsylvania, United States
Joined: June 17, 2009
KitMaker: 566 posts
AeroScale: 507 posts
Posted: Thursday, July 25, 2013 - 01:55 PM UTC
I also think the burner can needs to look shinier. Would work perfect for the exhaust stacks I have yet to paint..if I make the deadline it will be by the skin of my teeth. Decaling currently in progress.
RedwingNev
_VISITCOMMUNITY
England - East Midlands, United Kingdom
Joined: February 07, 2004
KitMaker: 911 posts
AeroScale: 415 posts
Posted: Thursday, July 25, 2013 - 11:58 PM UTC
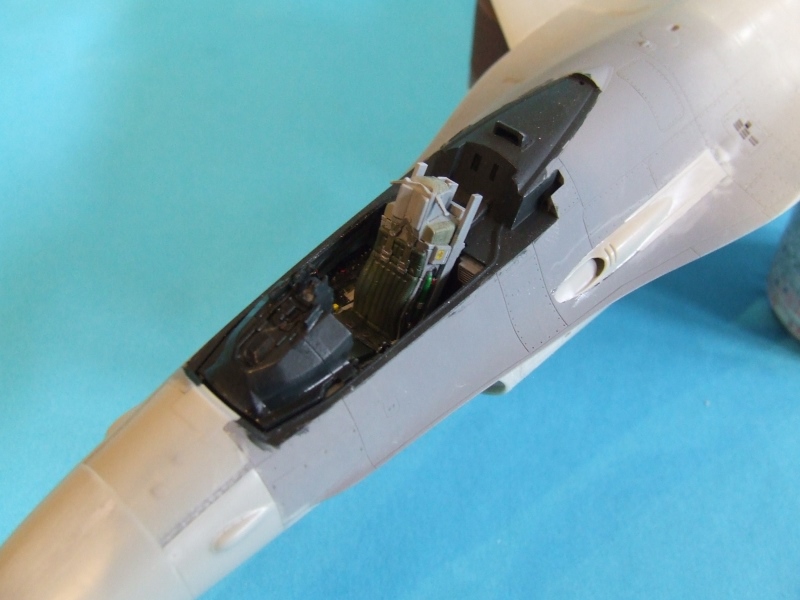
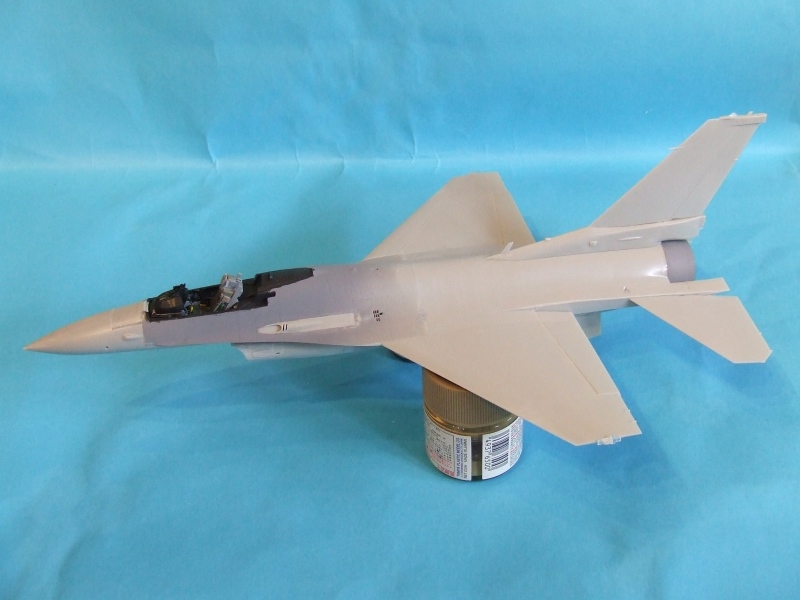
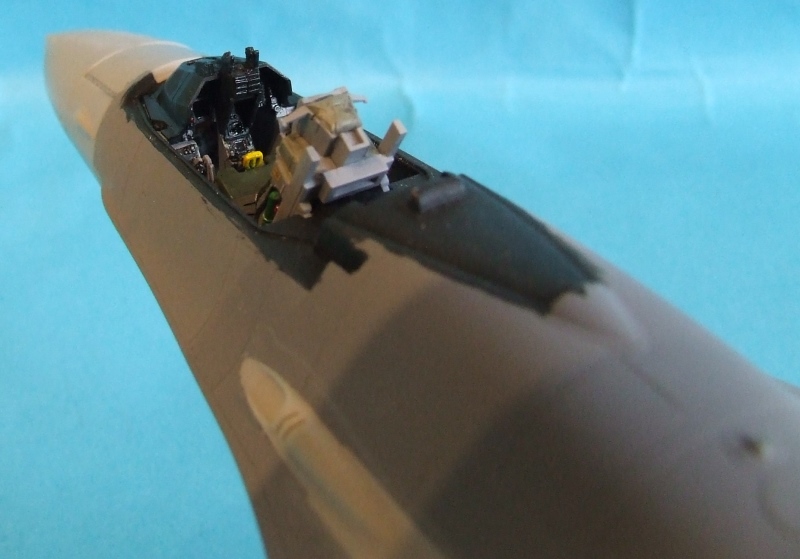
Well, its been ages since I posted in this campaign. The rare (for this country) being out all day, day after day, plus the Ashes, the TdF....well, I haven't got much modelling done lately. Here's where I'm up to.


I'm not going to get this done before the end of the campaign unless there's an extension....if not, its off to Hangar Queen 2013!
drabslab
_VISITCOMMUNITY
European Union
Joined: September 28, 2004
KitMaker: 2,186 posts
AeroScale: 1,587 posts
Posted: Friday, July 26, 2013 - 01:39 AM UTC
still fighting with my mustang

I have never made such long list of stupid errors before in my modelling life.

Putting a tamiya mustang togehter should be a piece of cake but i am making a horrible mess of it
vdejarnette
_VISITCOMMUNITY
Maryland, United States
Joined: February 25, 2013
KitMaker: 209 posts
AeroScale: 138 posts
Posted: Friday, July 26, 2013 - 02:07 AM UTC
Once again I am bringing up the rear of a campaign, but at this rate I should finish comfortably by next Wednesday.

Topside decals have gone on the Dart. I used the original anti-glare strip decal as a pattern to cut a new one from a black racing stripe for a 1/25 muscle car. The red line around the fuselage was stolen from the sheet for an F-94 starfire kit. The stars and bars are from an aftermarket sheet for postwar USAF insignia stencils.

Tomcat31
#042
_VISITCOMMUNITY
England - North East, United Kingdom
Joined: November 18, 2006
KitMaker: 2,828 posts
AeroScale: 1,720 posts
Posted: Friday, July 26, 2013 - 02:53 AM UTC
Hi all

Some great progress here and som many so close to the finish line as well, I have to admit that i almost gave up on this campaign but I dug out a 1/144 F-18 that i've been building when I get the odd 10 minutes here and there but like Neil the sun here has been too much of a temptation.

I have decided that although there won't be an official extension I will be willing to award a ribbon to anyone that finishes their entry with in a reasonable timescale of the campaign ending (lets say no more than 6 weeks) as I'm sure Sam would love to see some of these builds finished for her campaign that she sadly had to drop out of due to her medical condition.
phantom_phanatic309
#372
_VISITCOMMUNITY
United Kingdom
Joined: March 10, 2010
KitMaker: 2,568 posts
AeroScale: 1,619 posts
Posted: Friday, July 26, 2013 - 04:18 AM UTC
Eeetu. The Drakkens coming along nicely.

I should have my Camel finished up the next day or so. Afraid to say that I've written off a rig as a bad idea. Spent most of today wrestling with it and the Camel has come close to having a test flight across the room more than once. I do not how anyone can rig a biplane at any scale. I've tried all the methods I've seen with zero success. I've even used Aeroclubs elastic rigging thread, considered by many to be the best stuff for the job, and had no luck. It just resisted sticking to superglue. So now I have the job of trimming off blobs of superglue and touching up paint to at least make it presentable. I may give it another go on something larger one day, but for now I'm happy to leave it as is.
vdejarnette
_VISITCOMMUNITY
Maryland, United States
Joined: February 25, 2013
KitMaker: 209 posts
AeroScale: 138 posts
Posted: Friday, July 26, 2013 - 05:12 AM UTC
Stephen, CA glue works poorly in tension before it has fully cured. Basically, you need to anchor the ends of the rigging thread to something else while the glue sets at another point along the thread attached the plastic, then trim the excess thread to the glued location. One end of the rigging thread can normally be glued "butt joint" style to one end, but that end should be glued first before any tensile stress is applied to the thread. I've found CA glue accelerator is also a must to avoid the thread pulling free while drying. Were you using CA gel? That is the slowest drying of all and makes accelerator an absolute must.

Did you pre-drill holes for the rigging?

Maybe try doing some antennae wires for WWII airplanes first if you haven't already.

markchis
_VISITCOMMUNITY
Kuwait / لعربية
Joined: February 09, 2009
KitMaker: 467 posts
AeroScale: 60 posts
Posted: Friday, July 26, 2013 - 05:24 AM UTC
Eatu - sweet camo that really works to me !
Dave - the pfalz looks awesome -- its scares the heck out of me !! I dont think that is simple build by any standard.
Van - the paintwork is perfect - white is a nightmare on any build.

best
Mark
markchis
_VISITCOMMUNITY
Kuwait / لعربية
Joined: February 09, 2009
KitMaker: 467 posts
AeroScale: 60 posts
Posted: Friday, July 26, 2013 - 05:27 AM UTC
Neil - im in full agreement - the weather is way to nice to be stuck at a bench, also its pretty much a slog with all the heat plus paint fumes and stuff.

I really need to buckle down - thats why I could not get replies until today. 4 days to go but made big strides today and yesterday-- but i think it is going to be close as to if i can finish this in time !

best
Mark
phantom_phanatic309
#372
_VISITCOMMUNITY
United Kingdom
Joined: March 10, 2010
KitMaker: 2,568 posts
AeroScale: 1,619 posts
Posted: Friday, July 26, 2013 - 06:29 AM UTC
Got no problems with antenna. I usually use fine fishing line for that.
I did ever trick in the book. Pre-drilled holes, used gel superglue, put them under tension. The works. The problem was the damn stuff would not stick to the glue. I left the lines a good hour to set, pulled them through the bottom holes, tensioned the line, then PING! Out it came of the top hole. I've tried sticking a length to some scrap and the same thing happened, it just pulled clean through the hardened glue. I don't use accelerators as I've had poor results from them in the past. They may set the glue quicker but I always got left with an unsightly frosted white lump.
The mess that I've been left with after a days struggle has left me very frustrated and it will be a long time before I try again. Considering the scale I work at, I hardly think rigging is worth this hassle.
vdejarnette
_VISITCOMMUNITY
Maryland, United States
Joined: February 25, 2013
KitMaker: 209 posts
AeroScale: 138 posts
Posted: Friday, July 26, 2013 - 07:34 AM UTC
Steven,

http://bobes-hobby-house.myshopify.com/collections/ez-line

I've used this recently for an F4F Wildcat antennae wire and it is pretty great and went on easier than I could imagine in about 10 minutes with just a tiny dab of glue. I think it is because the thread is so stretchy that any internal tensile stress in the glue joint is resolved by the displacement (stretching) of the thread. It may be what you are looking for to do full rigging. Though admittedly I have not tried that yet, I will be doing it for my Bleriot XI in the Knights of the Sky build in the next couple months.


mrockhill
_VISITCOMMUNITY
Pennsylvania, United States
Joined: June 17, 2009
KitMaker: 566 posts
AeroScale: 507 posts
Posted: Friday, July 26, 2013 - 11:29 AM UTC
Decals done!


Hopefully I can get a coat of future on tonight and begin weathering tomorrow
strongarden
_VISITCOMMUNITY
Florida, United States
Joined: May 14, 2012
KitMaker: 730 posts
AeroScale: 15 posts
Posted: Friday, July 26, 2013 - 12:08 PM UTC
I've managed to find no bench time this past week, my sophmore has changed schools and all the docs and appts were due/scheduled this wk etc etc... sorry

Well I'll be going full bore this wknd (like a few others here, perhaps?) and hope to have primer on by Sunday.

@Eetu- Recessed lines from '72 is kinda rare, I hadn't even realised that. Your decaling and paint look great!

@Jessie- Good one, shoulda seen it coming!

@Mike- Waiting in anticipation for your Dora's completion! Nice!

@Neil- That's coming along nicely.

@Drab- What can I say, hang in there, don't give up!

@Allen- Thank You for any extra days, I might need it now. Hope Sam is doing good.

@Mark- Thanks I really needed that. It might not be simple, but I'm having fun so far! (w/ the rigging still a ways away)

@Stephen- I feel your pain Buddy, sorry for your frustration. I've never been succesful with rigging when I was a young-n'...
This biplane will be my first attempt in over 35 years. Admittedly a lil scary when doing it the first time.

@Van- Thanks for the riging tips, greatly appreciated. BTW- You can't be bringing up the rear, I am. With only a 160hp MB single prop, I'm far behind some of these speed demons!
However, when I see an enemy Observation Ballon, I'm gone!

Doesn't this pilot look better suited as a pilot of a '32 Duece Coupe?


And the ground crew looks to be stumbling out of the pub?


Cheers Dave
RedwingNev
_VISITCOMMUNITY
England - East Midlands, United Kingdom
Joined: February 07, 2004
KitMaker: 911 posts
AeroScale: 415 posts
Posted: Friday, July 26, 2013 - 07:44 PM UTC

Quoted Text

Hi all

Some great progress here and som many so close to the finish line as well, I have to admit that i almost gave up on this campaign but I dug out a 1/144 F-18 that i've been building when I get the odd 10 minutes here and there but like Neil the sun here has been too much of a temptation.

I have decided that although there won't be an official extension I will be willing to award a ribbon to anyone that finishes their entry with in a reasonable timescale of the campaign ending (lets say no more than 6 weeks) as I'm sure Sam would love to see some of these builds finished for her campaign that she sadly had to drop out of due to her medical condition.


Thanks Allen. How is Sam?
markchis
_VISITCOMMUNITY
Kuwait / لعربية
Joined: February 09, 2009
KitMaker: 467 posts
AeroScale: 60 posts
Posted: Friday, July 26, 2013 - 09:41 PM UTC
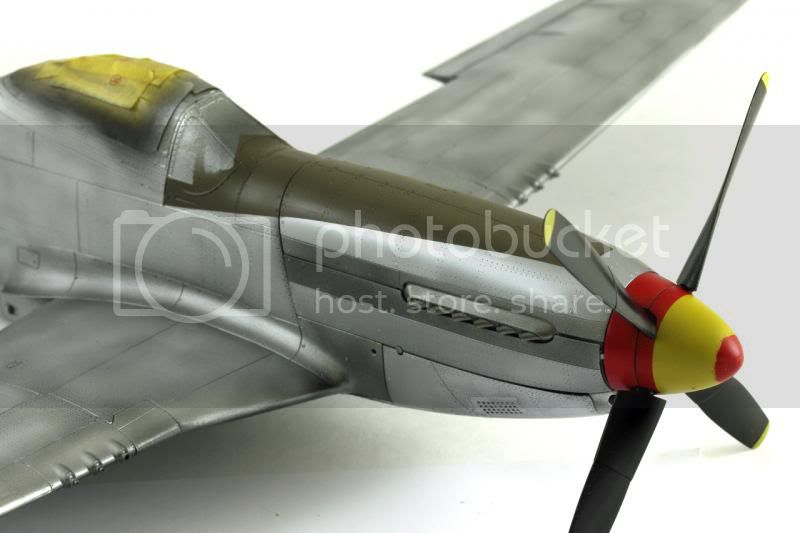
quick teaser of the `stang --


I put the aquagloss on last night - so its had a good turing time - so decals today i hope.


best
Mark
vdejarnette
_VISITCOMMUNITY
Maryland, United States
Joined: February 25, 2013
KitMaker: 209 posts
AeroScale: 138 posts
Posted: Saturday, July 27, 2013 - 01:37 PM UTC
Mark the paintjob on that Mustang is beautiful.

Anyway, my XF-92 Dart is almost done. All the decals are on, and only the anti-glare strip needs some extra attention to settle down over the compound curves. Nothing left now but the seal coat and to add the pitot tube.


Middle_Franconian
_VISITCOMMUNITY
Bayern, Germany
Joined: January 02, 2011
KitMaker: 279 posts
AeroScale: 239 posts
Posted: Saturday, July 27, 2013 - 08:14 PM UTC

Hello all! Long time no post I know... but time was limited during the last weeks. A lot of great models here!

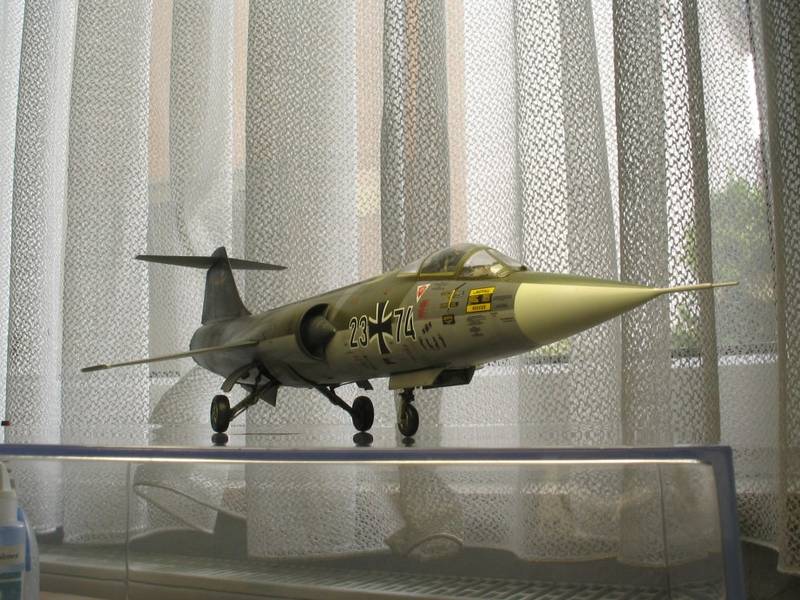
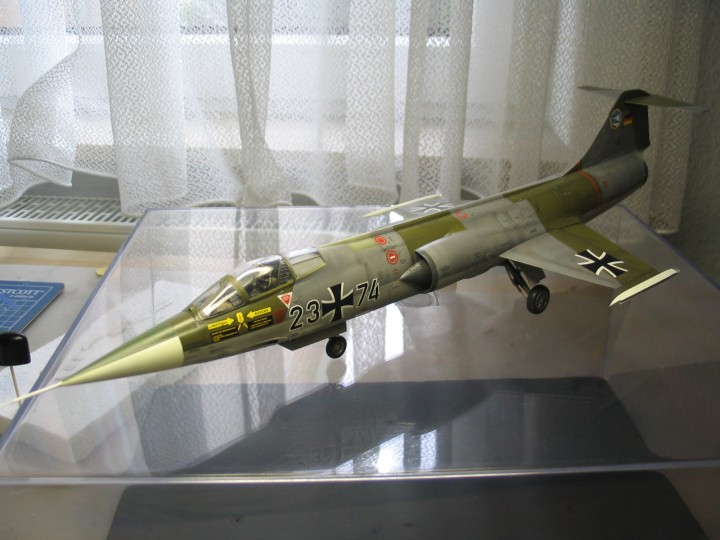
At least I have finished my contribution to this campaign and parked it in the photo gallery:

1:48 Hasegawa F-104G Starfighter, Luftwaffe JG (FW) 74, early 70s. Decals by DACO ( http://ultra.glo.be/daco/ ). Ejection seat MB GQ7 from Cutting Edge. Colors Gunze, Tamiya and Revell.


Regards from hot Germany (38 °C/100 °F),

Sebastian
JClapp
#259
_VISITCOMMUNITY
Massachusetts, United States
Joined: October 23, 2011
KitMaker: 2,265 posts
AeroScale: 1,715 posts
Posted: Sunday, July 28, 2013 - 04:44 AM UTC
I have finished the TB-25K.


more in the gallery. It is a wonderful gallery to browse too!

Delbert
#073
_VISITCOMMUNITY
Pennsylvania, United States
Joined: October 05, 2002
KitMaker: 2,659 posts
AeroScale: 209 posts
Posted: Sunday, July 28, 2013 - 05:35 AM UTC
Hello everyone

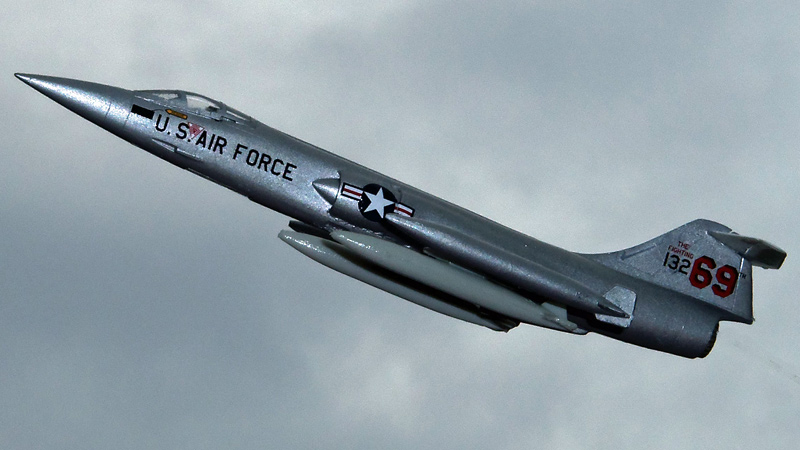
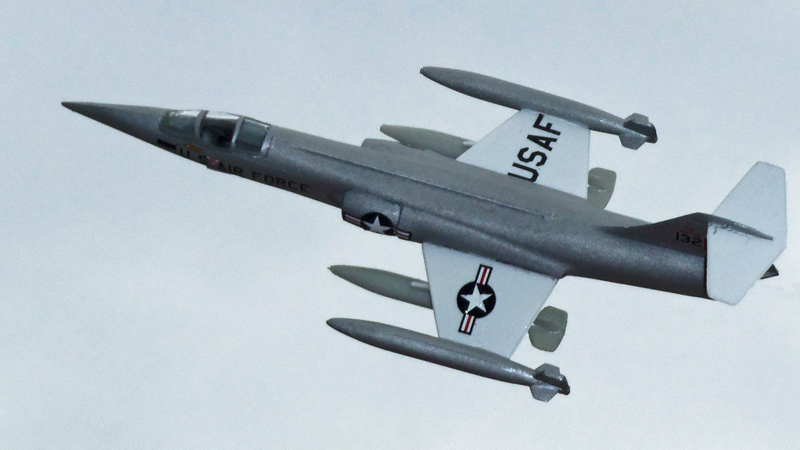
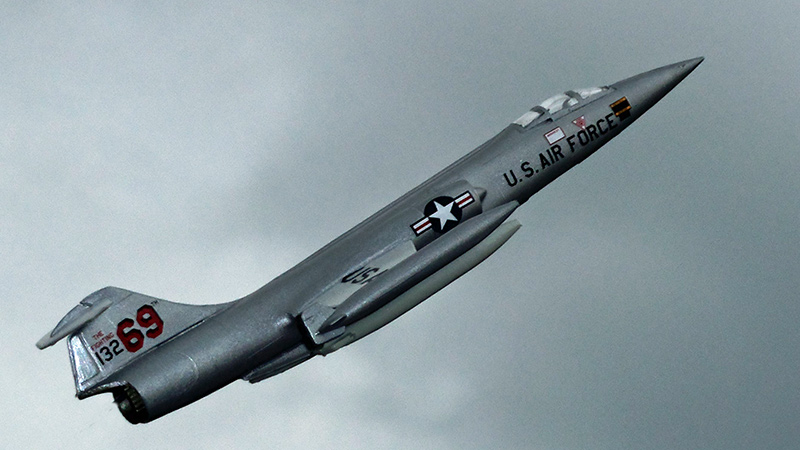
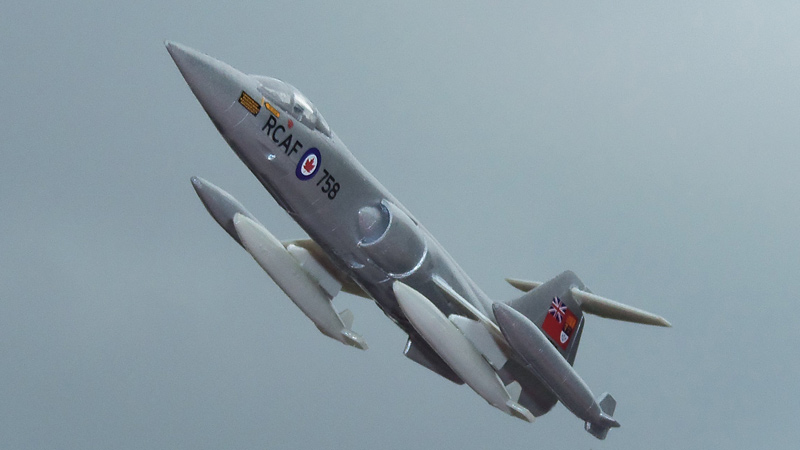
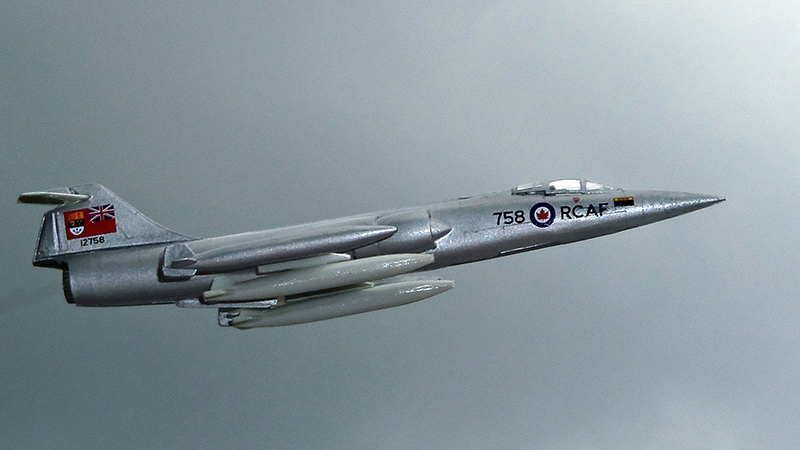
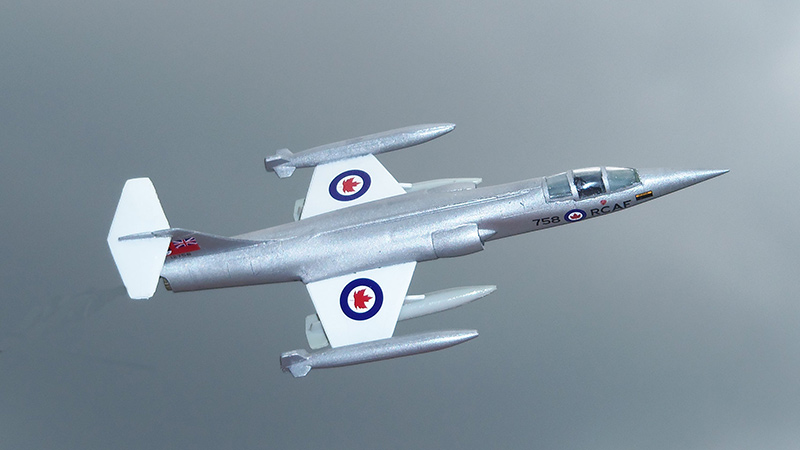
I finished my 2 F-104G Starfighters, one in US markings and the other in Canadian markings.

This is a Minicraft kit in 1/144 scale. Also this is my first 1/144 kit. I feel I did ok with them, but I will admit they are not my best builds.

Here are the pics enjoy... and they are in the gallery.


Thanks for a fun campaign. I mostly do ground, so its fun to do an aircraft now and then, and I learned a bit watching everyone else's great builds...

Delbert
Dragon164
#226
_VISITCOMMUNITY
British Columbia, Canada
Joined: February 20, 2012
KitMaker: 1,909 posts
AeroScale: 508 posts
Posted: Sunday, July 28, 2013 - 07:41 AM UTC
Sebastian,Jonathan,Delbert,
Very well done!

Sebastian,
Great finish on your 104.

Cheers Rob.
mrockhill
_VISITCOMMUNITY
Pennsylvania, United States
Joined: June 17, 2009
KitMaker: 566 posts
AeroScale: 507 posts
Posted: Sunday, July 28, 2013 - 08:04 AM UTC
Oil wash done! Im tempted to stop here but there are some more weathering issues to address. This a/c was supposedly repainted to this green scheme in feb 45, so I don't think much more is needed there. However the black and white crosses and swastika were hold overs from this airframes early construction (#210003 was 1st D-9 released for combat) and should be a bit more faded than the much newer JG26 bands, wave, and black "1". Not sure if im going to carefully over spray them or tryout using oils to weather them.

Some selective streaking and minor chipping and some exhaust stains should finish weathering, then finish up small parts and get her on her feet. Im sure a hundred other things im forgetting too

mykroft
_VISITCOMMUNITY
Ontario, Canada
Joined: November 14, 2009
KitMaker: 270 posts
AeroScale: 264 posts
Posted: Sunday, July 28, 2013 - 10:27 AM UTC
Well, the Spitfire IXc is done. Lovely kit, great decals, lots of bad luck made for a challenging build


AZModel Spitfire IXc 1/72 by mawz_models, on Flickr


AZModel Spitfire IXc 1/72 by mawz_models, on Flickr


AZModel Spitfire IXc 1/72 by mawz_models, on Flickr

Markings are for 401 Squadron, RCAF
Dragon164
#226
_VISITCOMMUNITY
British Columbia, Canada
Joined: February 20, 2012
KitMaker: 1,909 posts
AeroScale: 508 posts
Posted: Sunday, July 28, 2013 - 12:01 PM UTC
Nicely done Adam!

Cheers Rob.