Air Campaigns
Want to start or join a group build? This is where to start.
Want to start or join a group build? This is where to start.
Hosted by Frederick Boucher, Michael Satin
OFFICIAL: Western Front/ETO Campaign
KelticKnot

Joined: May 11, 2015
KitMaker: 768 posts
AeroScale: 656 posts

Posted: Saturday, July 01, 2017 - 02:32 AM UTC
Fantastic work Thomas and Oliver ! What a collection this campaign is building !
Antilles

Joined: March 22, 2015
KitMaker: 671 posts
AeroScale: 614 posts

Posted: Saturday, July 01, 2017 - 04:06 AM UTC
Bob, Clayton, Thomas, Jose and Paul: Thank´s for the kind comments.
Jose: I use normal static grass (Faller) and some bushes of GreenLine (Fredericus-Rex from Germany).
Thomas: Awesome butcher bird! Congrats on another greatly build kit! You sure should do an one thread for this one, I think!
Oliver
Jose: I use normal static grass (Faller) and some bushes of GreenLine (Fredericus-Rex from Germany).
Thomas: Awesome butcher bird! Congrats on another greatly build kit!
 You sure should do an one thread for this one, I think!
Oliver


Bigrip74

Joined: February 22, 2008
KitMaker: 5,026 posts
AeroScale: 2,811 posts

Posted: Saturday, July 01, 2017 - 08:04 AM UTC
Antilles

Joined: March 22, 2015
KitMaker: 671 posts
AeroScale: 614 posts

Posted: Saturday, July 01, 2017 - 07:46 PM UTC
Bob:
Very nice progress. I like those early Mustangs very much!
Oliver
Very nice progress. I like those early Mustangs very much!
Oliver


Bigrip74

Joined: February 22, 2008
KitMaker: 5,026 posts
AeroScale: 2,811 posts

Posted: Sunday, July 02, 2017 - 10:46 AM UTC
KelticKnot

Joined: May 11, 2015
KitMaker: 768 posts
AeroScale: 656 posts

Posted: Sunday, July 02, 2017 - 12:07 PM UTC
Lookin good Bob, you're nearly at the finish line with this one 

ltb073

Joined: March 08, 2010
KitMaker: 3,662 posts
AeroScale: 174 posts

Posted: Sunday, July 02, 2017 - 05:29 PM UTC
Looking good Bob are those invasion strips painted or decals?

Bigrip74

Joined: February 22, 2008
KitMaker: 5,026 posts
AeroScale: 2,811 posts

Posted: Sunday, July 02, 2017 - 06:54 PM UTC
@Paul: thanks for the comments, now for the detail wash and maybe an aerial 
@Sal: they are painted, my first successful attempt.
Bob

@Sal: they are painted, my first successful attempt.
Bob

goodn8

Joined: October 12, 2008
KitMaker: 709 posts
AeroScale: 651 posts

Posted: Sunday, July 02, 2017 - 08:31 PM UTC
Bob, Michael, Clayton, Paul, Oliver:
Thank you very much for your interest and the kind words!!!
Really appreciate
Bob: Great work, like it very much. Sure it will turn out beautiful.
Thomas
Thank you very much for your interest and the kind words!!!
Really appreciate

Bob: Great work, like it very much. Sure it will turn out beautiful.
Thomas


Bigrip74

Joined: February 22, 2008
KitMaker: 5,026 posts
AeroScale: 2,811 posts

Posted: Tuesday, July 04, 2017 - 01:28 AM UTC

Bigrip74

Joined: February 22, 2008
KitMaker: 5,026 posts
AeroScale: 2,811 posts

Posted: Saturday, July 08, 2017 - 01:18 AM UTC
Posted: Saturday, July 08, 2017 - 01:40 AM UTC
Very nice Bob, great job!

Bigrip74

Joined: February 22, 2008
KitMaker: 5,026 posts
AeroScale: 2,811 posts

Posted: Saturday, July 08, 2017 - 02:04 AM UTC
Clayton, thanks for the comments.
Can anyone guide me through how to post a photo in the gallery. Ive posted to my photo section, but cannot post to the campaign gallery. Or does it take time before the photo shows up?
Bob
Can anyone guide me through how to post a photo in the gallery. Ive posted to my photo section, but cannot post to the campaign gallery. Or does it take time before the photo shows up?
Bob
MichaelSatin


Joined: January 19, 2008
KitMaker: 3,909 posts
AeroScale: 2,904 posts

Posted: Saturday, July 08, 2017 - 04:08 AM UTC
Quoted Text
Clayton, thanks for the comments.
Can anyone guide me through how to post a photo in the gallery. Ive posted to my photo section, but cannot post to the campaign gallery. Or does it take time before the photo shows up?
Bob
Bob,
Looks to me like you've posted one to the gallery successfully.
Nice work, by the way!
Michael

Posted: Saturday, July 08, 2017 - 08:23 AM UTC
Crap, I hate cleaning up. Cleaned up the model table the other day and now the intake framework is missing.  Don't think you can build a P-47 without one. Got to figure out how to scratch one I guess.
 Don't think you can build a P-47 without one. Got to figure out how to scratch one I guess.
ltb073

Joined: March 08, 2010
KitMaker: 3,662 posts
AeroScale: 174 posts

Posted: Saturday, July 08, 2017 - 05:13 PM UTC
Bob
Great looking bird there👍🏻👍🏻👍🏻
How did you do the camo hand brush ?
Great looking bird there👍🏻👍🏻👍🏻
How did you do the camo hand brush ?

Bigrip74

Joined: February 22, 2008
KitMaker: 5,026 posts
AeroScale: 2,811 posts

Posted: Saturday, July 08, 2017 - 06:24 PM UTC
Sal, thanks for the kind comments. The scheme was a/b.
Bob
Bob
Posted: Saturday, July 08, 2017 - 07:20 PM UTC
Quoted Text
Crap, I hate cleaning up. Cleaned up the model table the other day and now the intake framework is missing.Don't think you can build a P-47 without one. Got to figure out how to scratch one I guess.

That's why I never clean up my table...


mrockhill

Joined: June 17, 2009
KitMaker: 566 posts
AeroScale: 507 posts

Posted: Sunday, July 09, 2017 - 01:05 AM UTC
The great photobucket debacle has hampered my posting over the last 2 weeks and there is much progress to report!
I have decided to set my 1/72 Fw190A-7 aside as it has grown to be complicated and in no way can it be finished on time. In it place Ive decided to build another 1/72 Hasegawa Fw 190 this time an A-5 model. This is being built OOB this time and in the markings of a mosquito chaser from 10./NJG 3

So far Building OOB has worked well as here Is where I am at with about 4 hrs invested, not far away from some paint! Just some minor filling and sanding to finish most is already done. Then on to attaching and masking the canopy.

I havent taken the time yet to set up new photo hosting yet, using KM in the meanwhile
I have decided to set my 1/72 Fw190A-7 aside as it has grown to be complicated and in no way can it be finished on time. In it place Ive decided to build another 1/72 Hasegawa Fw 190 this time an A-5 model. This is being built OOB this time and in the markings of a mosquito chaser from 10./NJG 3

So far Building OOB has worked well as here Is where I am at with about 4 hrs invested, not far away from some paint! Just some minor filling and sanding to finish most is already done. Then on to attaching and masking the canopy.

I havent taken the time yet to set up new photo hosting yet, using KM in the meanwhile
MichaelSatin


Joined: January 19, 2008
KitMaker: 3,909 posts
AeroScale: 2,904 posts

Posted: Sunday, July 09, 2017 - 07:01 PM UTC
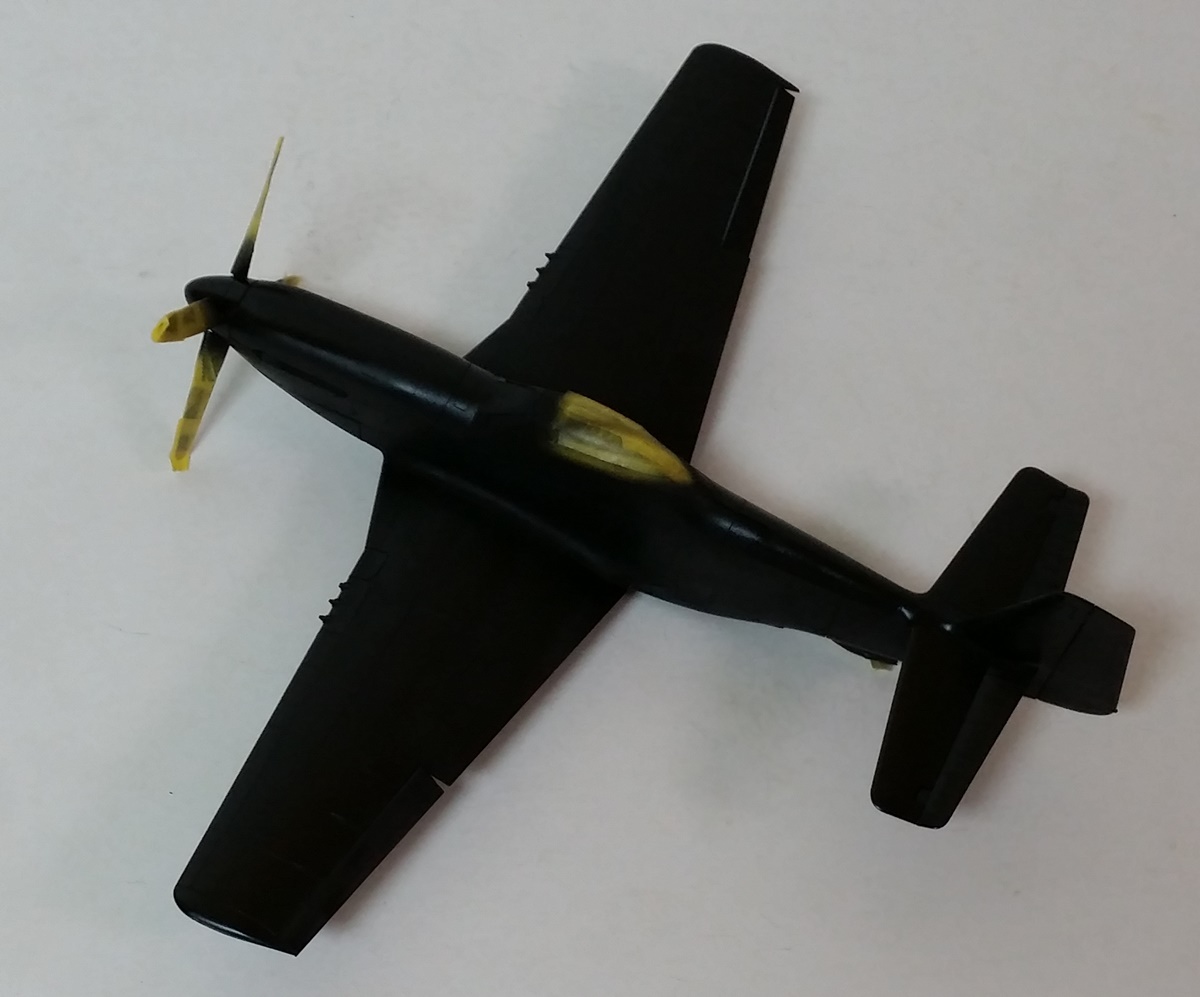
Getting there on the Tamiya 1/32 P-51D.
Alclad black primer.
My intention was to use Alclad Airframe Aluminum but honestly, it just didn't look right to me. So I fell back on my old standby Floquil Bright Silver.
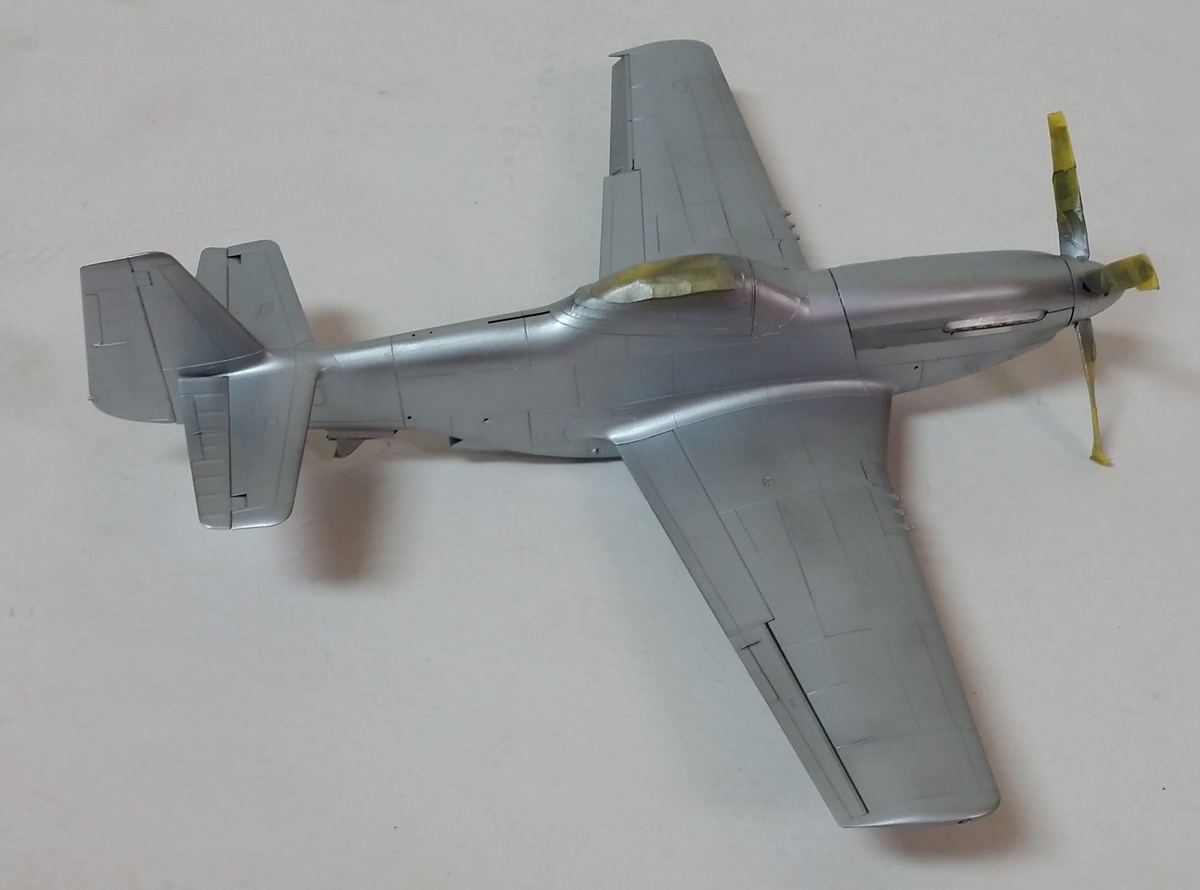
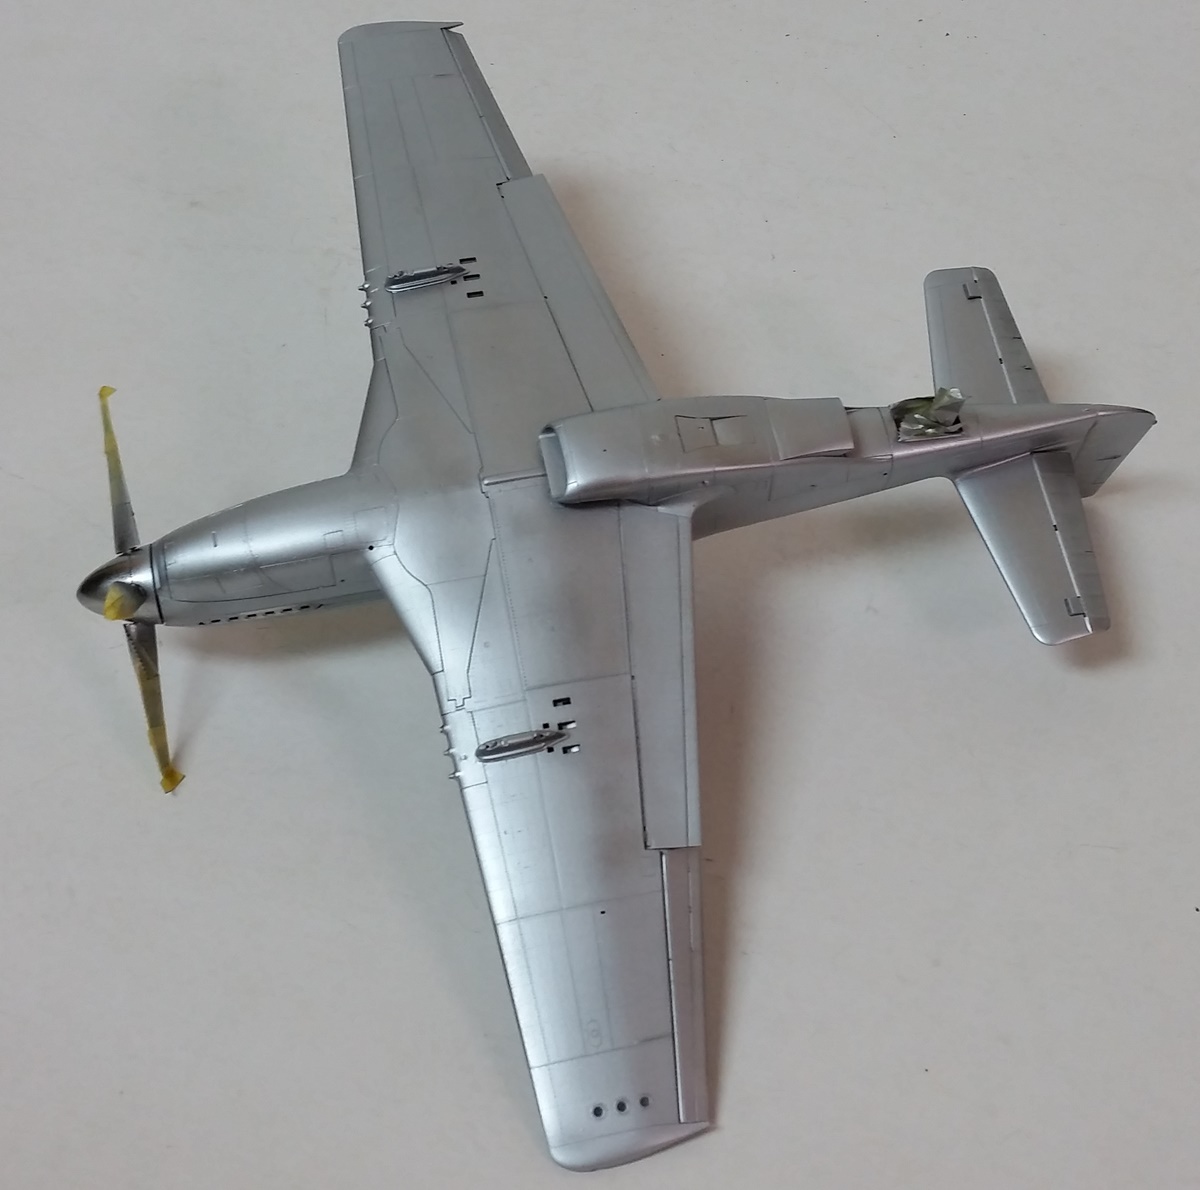
I just think this looks better, especially on a WWII aircraft. I might polish some panels out a bit, but this is what I'm going with.
Don't know if I'll get it done on time, might need an extension. Anyone else?
Michael
Alclad black primer.

My intention was to use Alclad Airframe Aluminum but honestly, it just didn't look right to me. So I fell back on my old standby Floquil Bright Silver.


I just think this looks better, especially on a WWII aircraft. I might polish some panels out a bit, but this is what I'm going with.
Don't know if I'll get it done on time, might need an extension. Anyone else?
Michael

Posted: Monday, July 10, 2017 - 02:25 AM UTC
Quoted Text
Getting there on the Tamiya 1/32 P-51D.
Alclad black primer.
My intention was to use Alclad Airframe Aluminum but honestly, it just didn't look right to me. So I fell back on my old standby Floquil Bright Silver.
I just think this looks better, especially on a WWII aircraft. I might polish some panels out a bit, but this is what I'm going with.
Don't know if I'll get it done on time, might need an extension. Anyone else?
Michael
Unfortunately, I was a little over-optimistic about my energy levels...I have had to choose between completing this campaign and the Six Day War Campaign, and have chosen the latter, saving the C-47 for a future group...


Bigrip74

Joined: February 22, 2008
KitMaker: 5,026 posts
AeroScale: 2,811 posts

Posted: Monday, July 10, 2017 - 06:59 AM UTC
Clayton, I understand the time thing. See you on the Six Day campaign.
Michael, the 51 is looking nice.
Bob
Michael, the 51 is looking nice.
Bob
Posted: Tuesday, July 11, 2017 - 08:35 AM UTC
Hi all,
Bob good job on the Mustang! I like how the wash turned out.
Michael, I like the Old Silver, it's convincing. Where do you put all these big planes? Seriously, I do like how the build is going, I will have an update tomorrow. You asked about an extension. I say "Please sir!". My reasons will become apparent soon.
John

SpeedyJ

Joined: September 17, 2013
KitMaker: 1,617 posts
AeroScale: 212 posts

Posted: Tuesday, July 11, 2017 - 09:41 AM UTC
Hi Michael. Extension would be more than welcome.
Kind regards,
Robert Jan
Kind regards,
Robert Jan
Posted: Wednesday, July 12, 2017 - 07:49 AM UTC
Hi all,
Time for an update. Using this jig has resulted in straight booms that, with the addition of the wheel wells and covers produced a pretty strong assembly. Clean up on the other hand looks to be an issue that will plague the build. With the covers on, this bird will be done in flight, more on the bird later. First a pilot is needed!
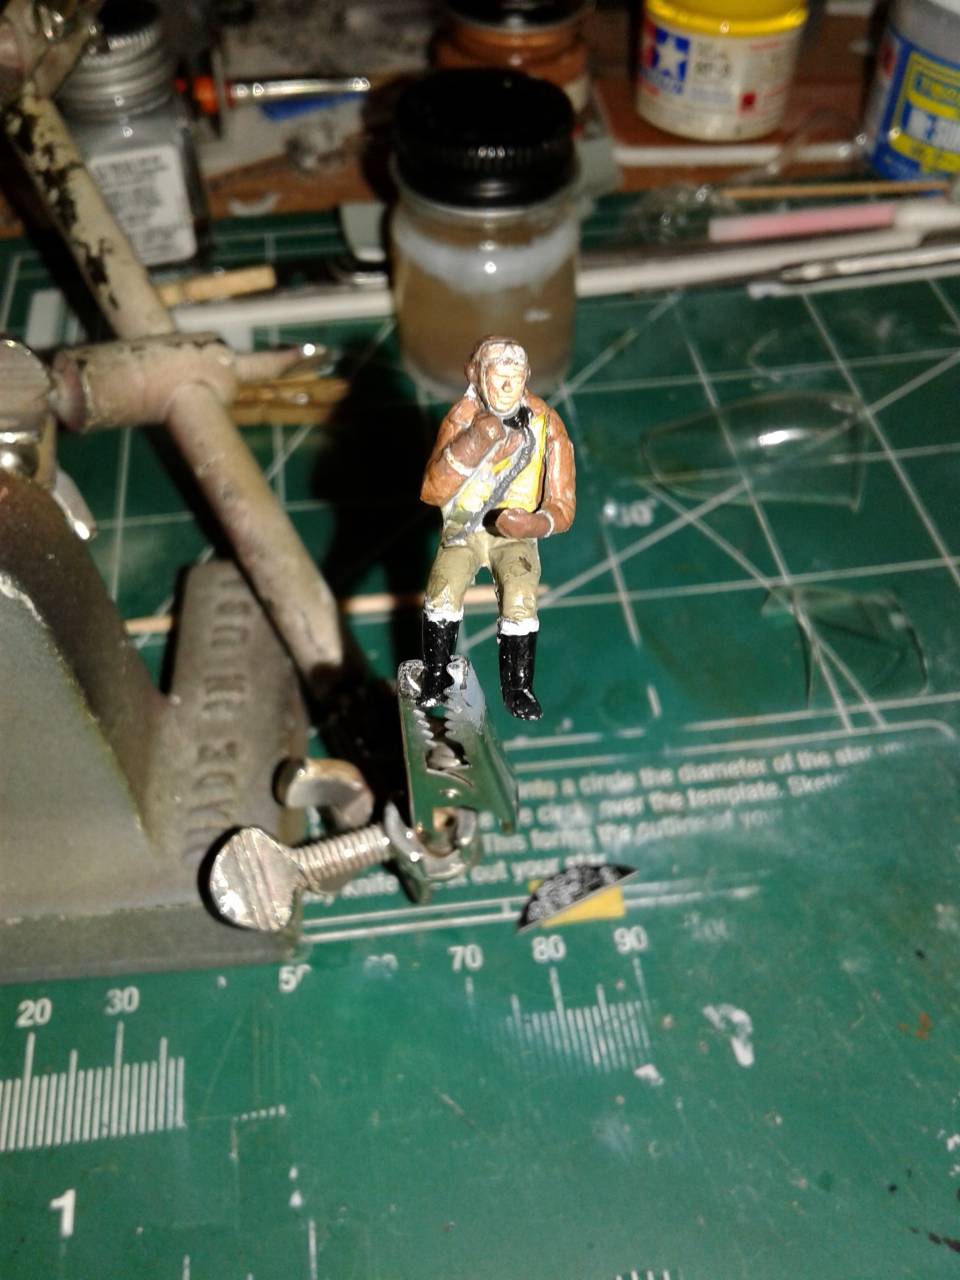
The first candidate had a mix up with his orders. The Tamiya pilot can’t be worked into the cockpit without some serious rework of both pilot and cockpit. So he’s been transferred to the MTO and will transition to P-51’s once his legs heal. In his stead is a seasoned veteran from the Monogram P-47 1968 kit. I had to spread his legs and add a bit of putty to the back of his left arm, but he turned out well, and is very excited to transition into the realm of Photo Recon!
Here’s Jim sporting the standard ETO pilot attire with some wool cuffs to boot
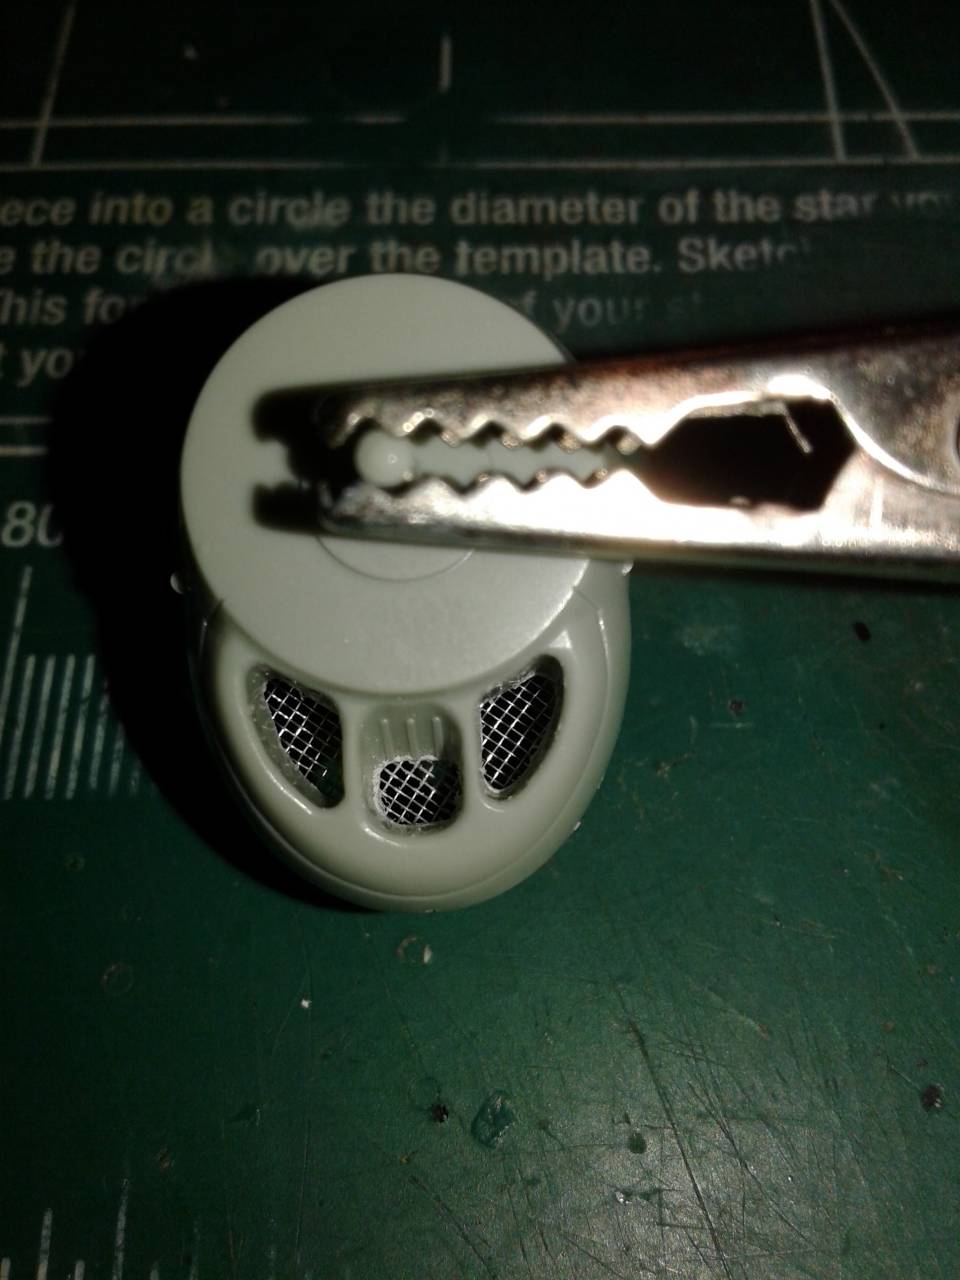
Academy’s intakes lacked believable grills, so these were drilled and filed out. I found some cool screen material in the form of smoking pipe screens (available in brass and silver, 5 for 0.99 cents US). I cut these to size and then glued them in place with super glue. I also added them to the intake vents on the booms (a little tricky). I recall seeing them firsthand at an air show and thought they were pretty prominent standing in front of them, so I opted to add them to this build. The kit does represent this up front (not on the boom intakes), though after painting I think they’d disappear.
Next I added the front of the nacelles to the booms, and this is where the fun with Mr. Surfacer 500 and 1200 began in earnest. Three applications to almost all the seams were done. It’s a good thing that sanding is therapeutic to my right hand (past surgery), so I didn’t mind.
I then completed the cockpit, making sure that Jim would fit and look the part. It was then time to mate the upper and lower halves of the wing assembly. I started at the cockpit and worked out towards the wingtips in two stages.
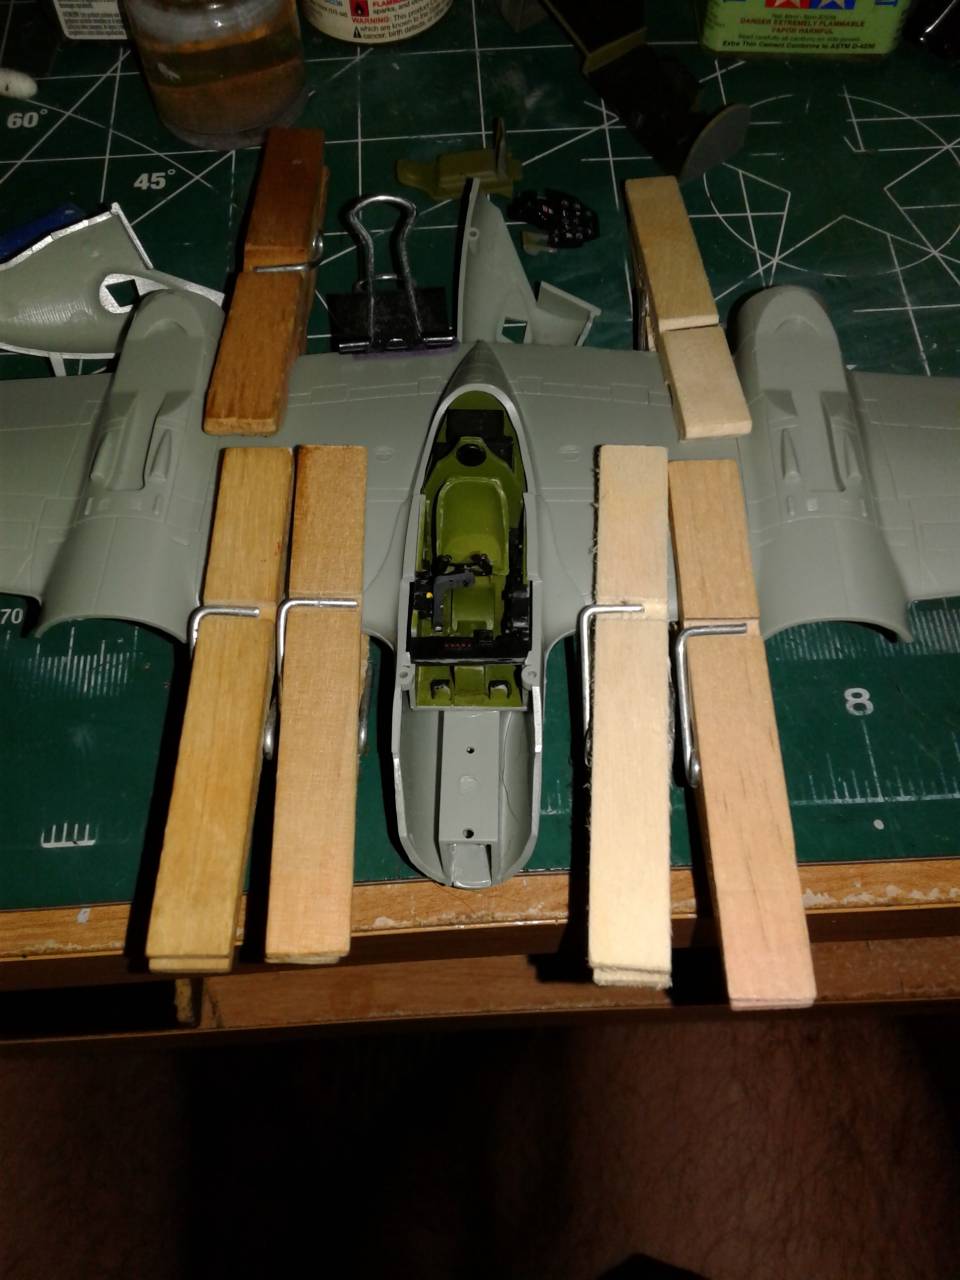
The fit here was less than banner, but I was armed with plenty of Mr. Surfacer! Next came the outer wings. My wife Rosie is a teacher, and while in Malaysia I accompanied her to the “Teachers” supply store and found these neat little clothes pins. These work just like their larger cousins, but I liked them here on the trailing edge because they held fast. I also noted that the trailing edge was a bit thick, needing more sanding…
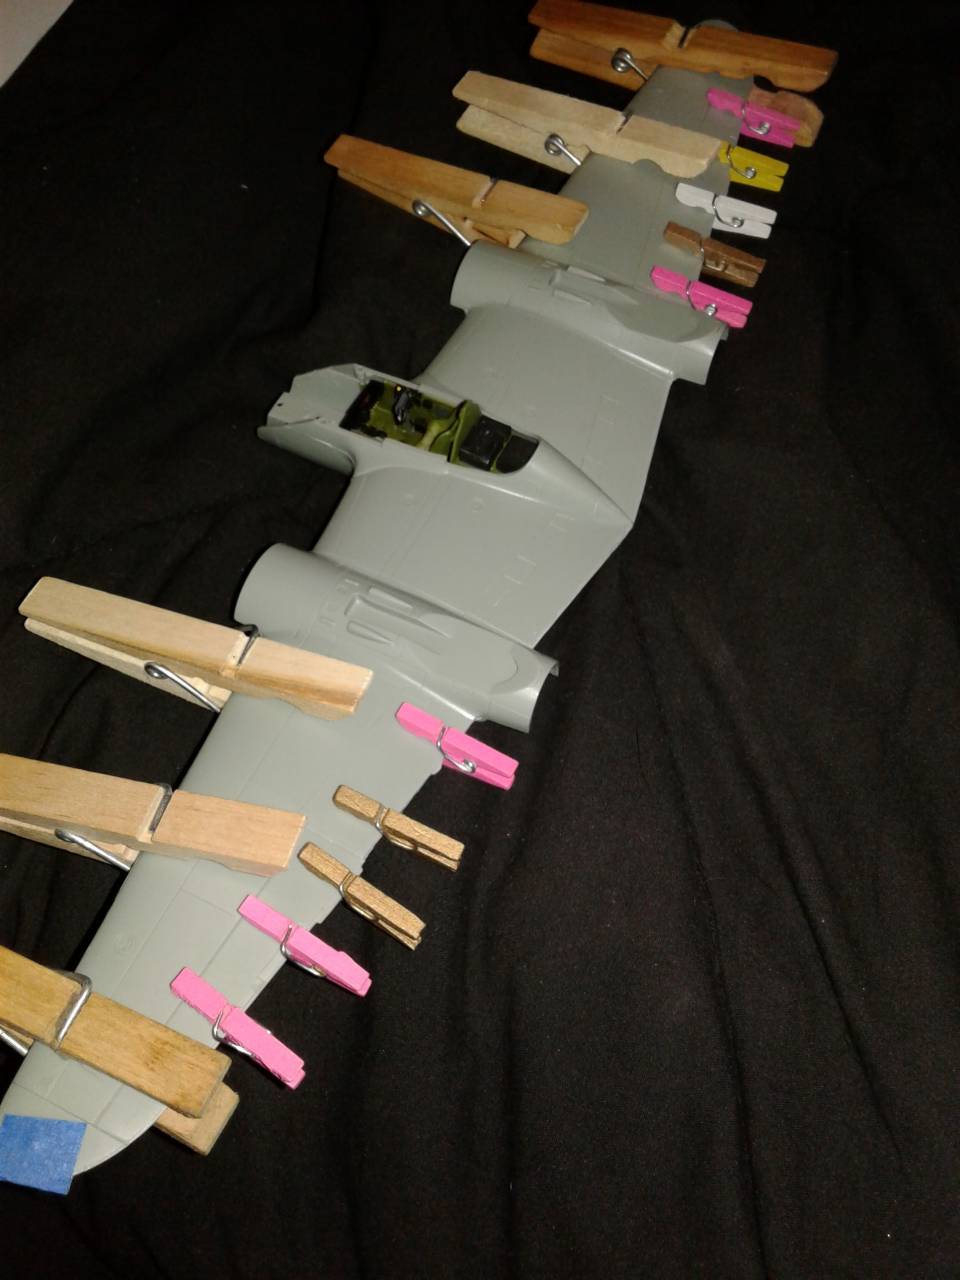
Again I cleaned this assembly by filling, sanding and repeating two to three times.
The time finally came that I could use the second part of the jig!
The mating of the booms to the wing assembly was done in three steps over the course of a day. Having previously cut the wood, I got an early start on it as the day promised to be a hot one.
Alignment was the key, as I followed Paul Budzik’s plans, I got the tail to line up, though not as well as I’d of liked.
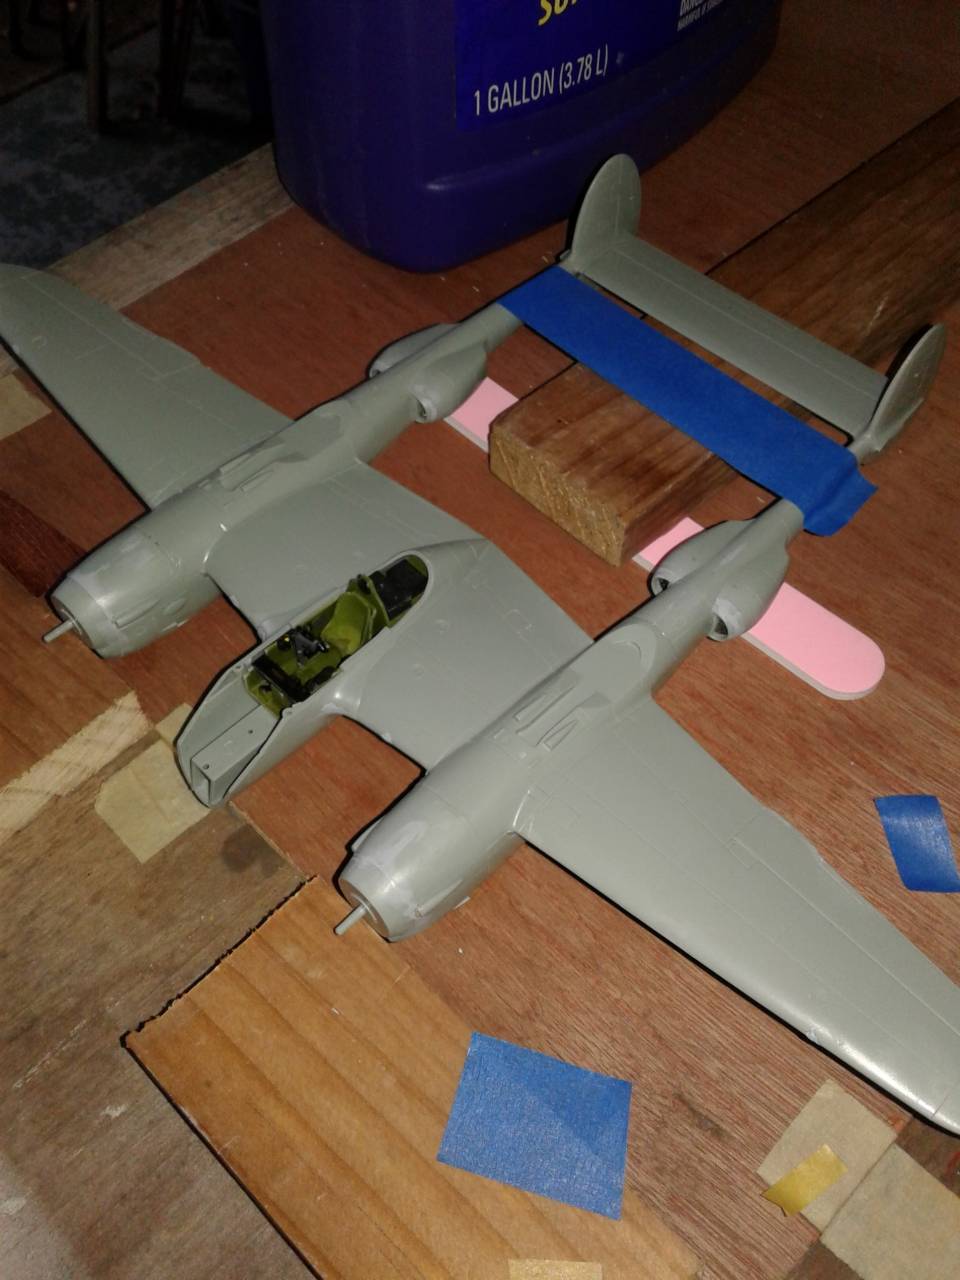
Next was the back boom to wing mating surfaces, and this was not good at all, oddly the front ends seemed to align pretty well on their own.
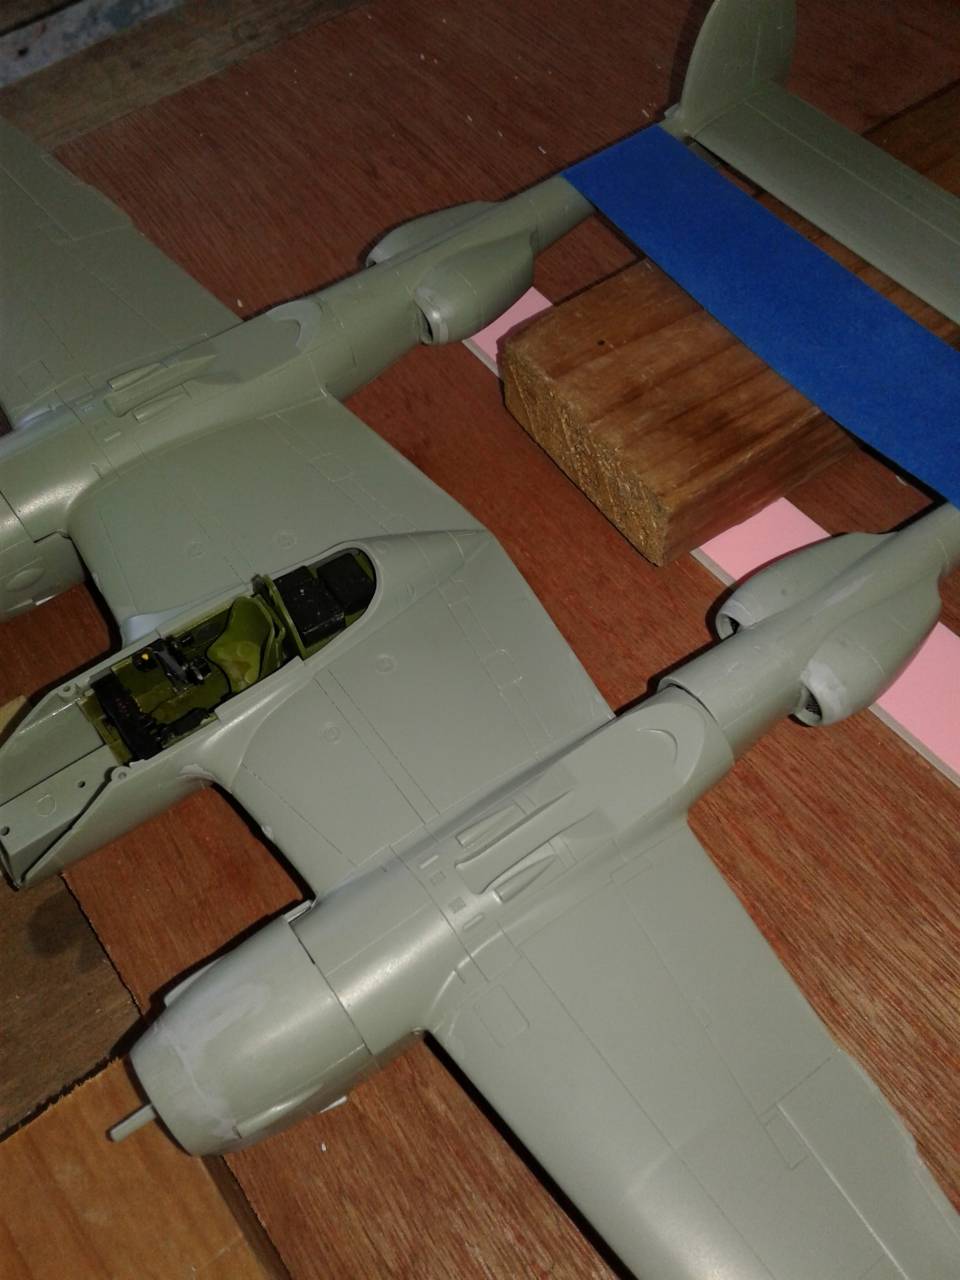
Not wanting to chance anything at this point I aligned the front nacelles with the wings and once tacky I added blue painters tape to hold it all secure for a few more hours.
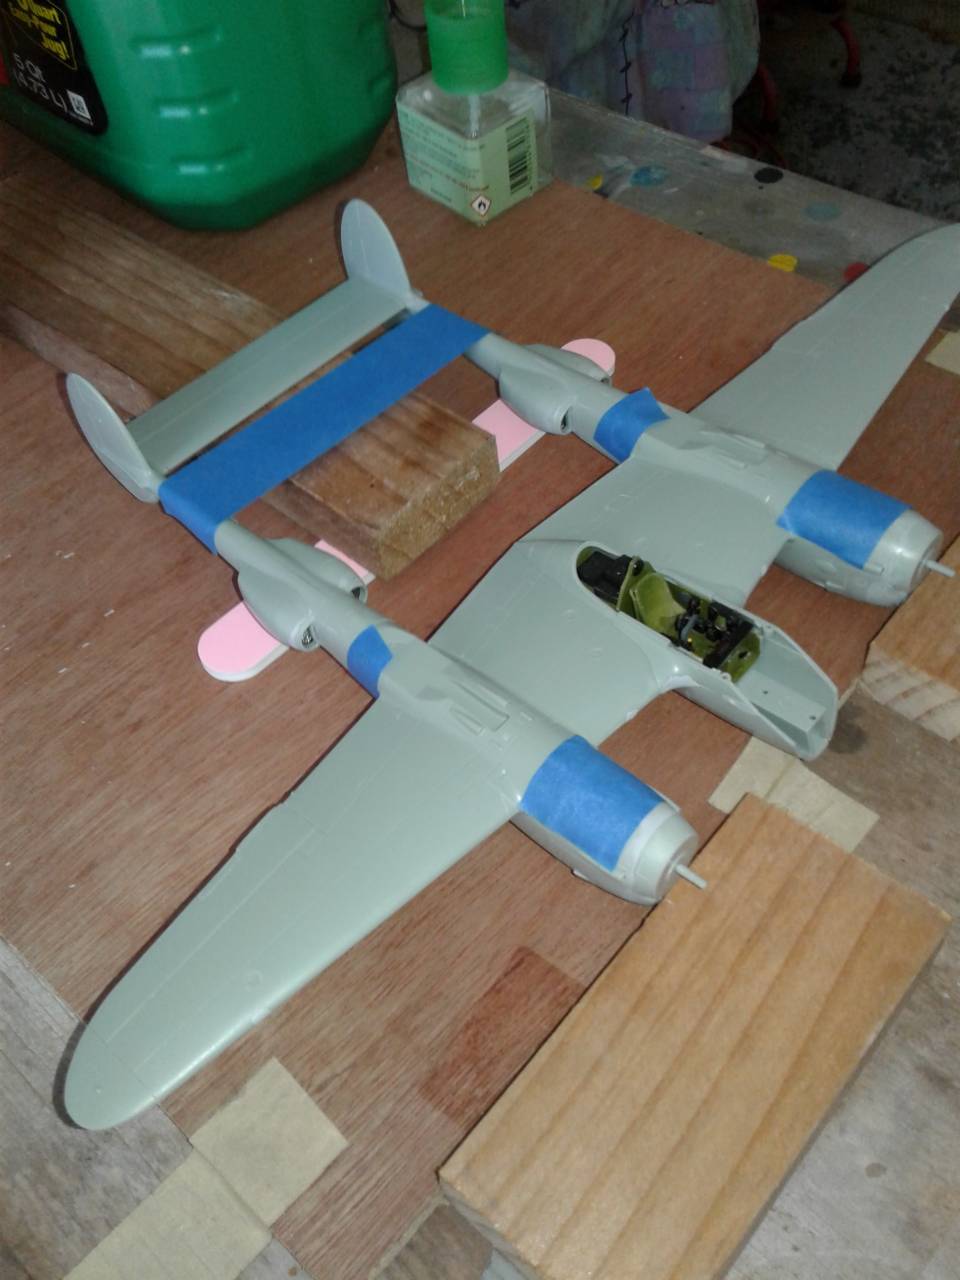
I started this process at 0700, and took it all inside at 2130, making for a long and often frustrating day. Normally after such an ordeal I’d feel a sense of accomplishment or euphoria, but for me this was not the case. With all the parts assembled and the glue dried I inspected the alignment. It is aligned! Yay team!!
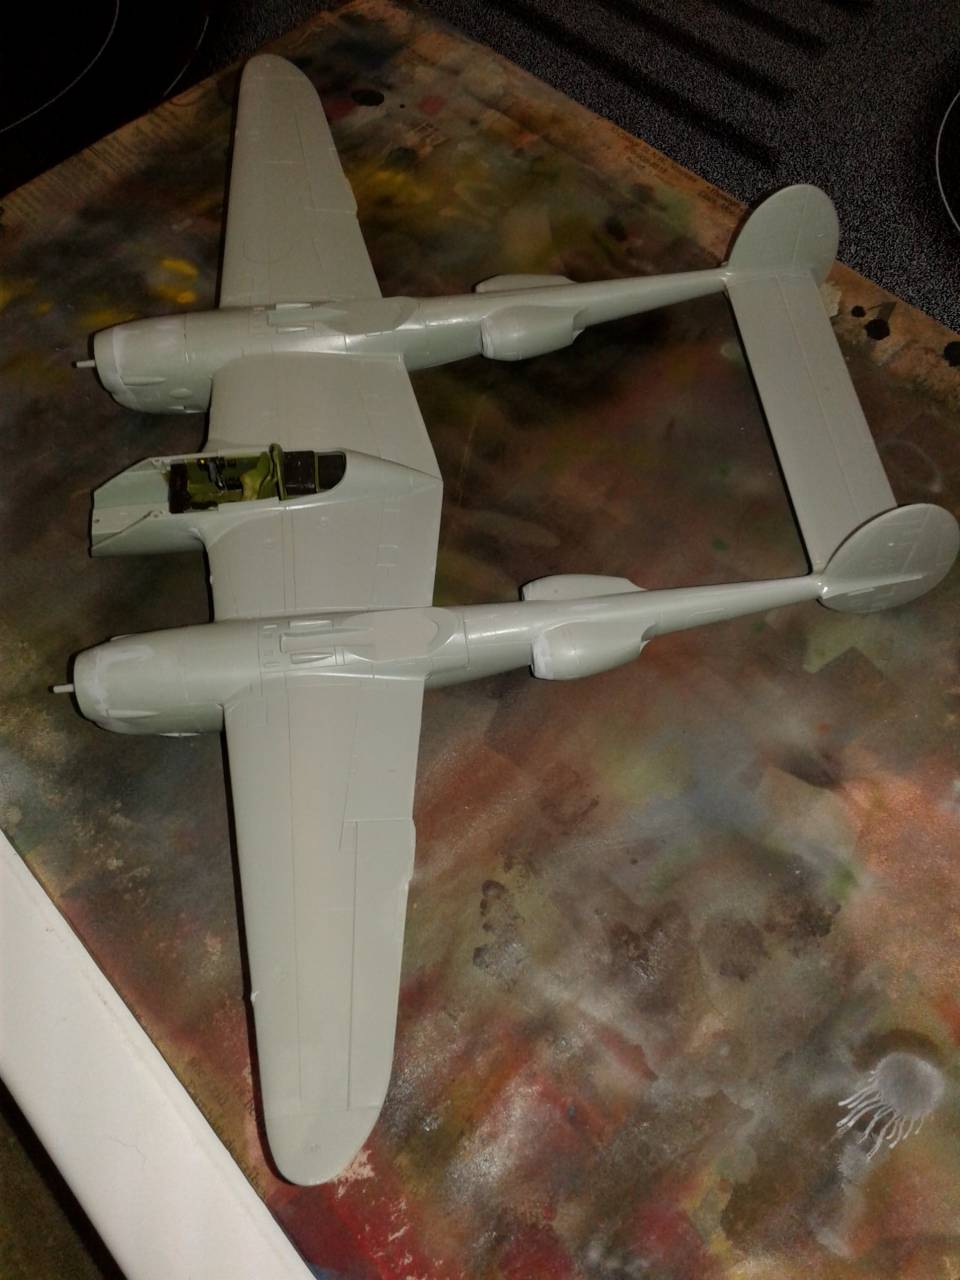
The fit is atrocious! I’ve pulled out the files and mean Mr. sanding stick (~250 grit) to first even all the parts out, and then will be round two of fill, sand repeat. For me this will be the best aligned P-38 I’ve built, though getting to the finish line will be a major undertaking. Now this whole time it may seem that I bash the Academy kit for fit, which it’s not the greatest, however, the sub-assemblies do fit ok with just some seam clean up needed. It’s the putting the sub-assemblies together that produces some major gaps. The canopy also isn’t made to fit too well either… so perhaps this kit doesn’t fit so well after all. That said, it is the only F-5E variant out there, so I’ll hush and get back to sanding.
More to follow. Thanks for reading my little rant.
John
Time for an update. Using this jig has resulted in straight booms that, with the addition of the wheel wells and covers produced a pretty strong assembly. Clean up on the other hand looks to be an issue that will plague the build. With the covers on, this bird will be done in flight, more on the bird later. First a pilot is needed!
The first candidate had a mix up with his orders. The Tamiya pilot can’t be worked into the cockpit without some serious rework of both pilot and cockpit. So he’s been transferred to the MTO and will transition to P-51’s once his legs heal. In his stead is a seasoned veteran from the Monogram P-47 1968 kit. I had to spread his legs and add a bit of putty to the back of his left arm, but he turned out well, and is very excited to transition into the realm of Photo Recon!
Here’s Jim sporting the standard ETO pilot attire with some wool cuffs to boot

Academy’s intakes lacked believable grills, so these were drilled and filed out. I found some cool screen material in the form of smoking pipe screens (available in brass and silver, 5 for 0.99 cents US). I cut these to size and then glued them in place with super glue. I also added them to the intake vents on the booms (a little tricky). I recall seeing them firsthand at an air show and thought they were pretty prominent standing in front of them, so I opted to add them to this build. The kit does represent this up front (not on the boom intakes), though after painting I think they’d disappear.

Next I added the front of the nacelles to the booms, and this is where the fun with Mr. Surfacer 500 and 1200 began in earnest. Three applications to almost all the seams were done. It’s a good thing that sanding is therapeutic to my right hand (past surgery), so I didn’t mind.
I then completed the cockpit, making sure that Jim would fit and look the part. It was then time to mate the upper and lower halves of the wing assembly. I started at the cockpit and worked out towards the wingtips in two stages.

The fit here was less than banner, but I was armed with plenty of Mr. Surfacer! Next came the outer wings. My wife Rosie is a teacher, and while in Malaysia I accompanied her to the “Teachers” supply store and found these neat little clothes pins. These work just like their larger cousins, but I liked them here on the trailing edge because they held fast. I also noted that the trailing edge was a bit thick, needing more sanding…

Again I cleaned this assembly by filling, sanding and repeating two to three times.
The time finally came that I could use the second part of the jig!
The mating of the booms to the wing assembly was done in three steps over the course of a day. Having previously cut the wood, I got an early start on it as the day promised to be a hot one.
Alignment was the key, as I followed Paul Budzik’s plans, I got the tail to line up, though not as well as I’d of liked.

Next was the back boom to wing mating surfaces, and this was not good at all, oddly the front ends seemed to align pretty well on their own.

Not wanting to chance anything at this point I aligned the front nacelles with the wings and once tacky I added blue painters tape to hold it all secure for a few more hours.

I started this process at 0700, and took it all inside at 2130, making for a long and often frustrating day. Normally after such an ordeal I’d feel a sense of accomplishment or euphoria, but for me this was not the case. With all the parts assembled and the glue dried I inspected the alignment. It is aligned! Yay team!!

The fit is atrocious! I’ve pulled out the files and mean Mr. sanding stick (~250 grit) to first even all the parts out, and then will be round two of fill, sand repeat. For me this will be the best aligned P-38 I’ve built, though getting to the finish line will be a major undertaking. Now this whole time it may seem that I bash the Academy kit for fit, which it’s not the greatest, however, the sub-assemblies do fit ok with just some seam clean up needed. It’s the putting the sub-assemblies together that produces some major gaps. The canopy also isn’t made to fit too well either… so perhaps this kit doesn’t fit so well after all. That said, it is the only F-5E variant out there, so I’ll hush and get back to sanding.
More to follow. Thanks for reading my little rant.
John
 |


