MichaelSatin
 Campaigns Administrator
Colorado, United States
Joined: January 19, 2008
KitMaker: 3,909 posts
AeroScale: 2,904 posts
Posted: Saturday, October 14, 2017 - 05:44 PM UTC
Very nice work, Earnest! The SBD really is one of Trumpeter's best kits. And don't worry about your work being hidden; after all, YOU know it's there!
Michael

On the bench:
Sorta depends on your definition of "on the bench"...
Nordrhein-Westfalen, Germany
Joined: March 22, 2015
KitMaker: 671 posts
AeroScale: 614 posts
Posted: Saturday, October 14, 2017 - 08:45 PM UTC
Ernest,
the interior details look really nice. Don´t worry, you will still have the photos to look at them
.
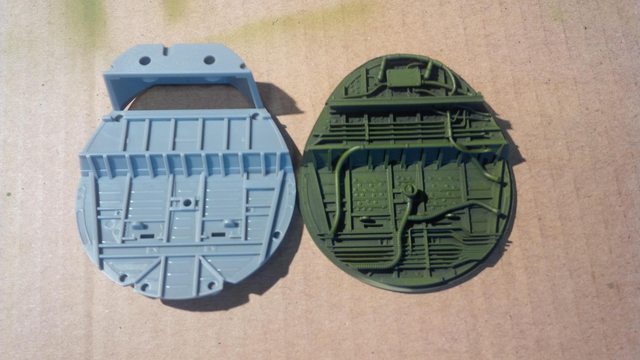
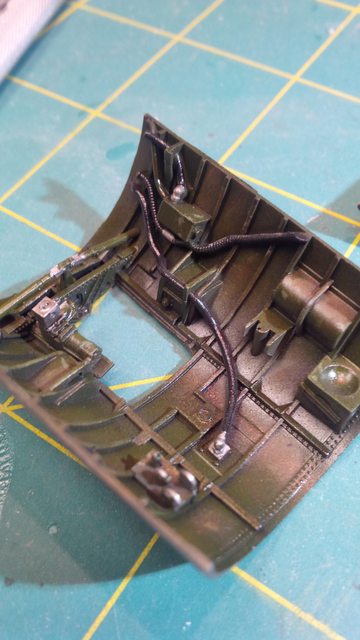
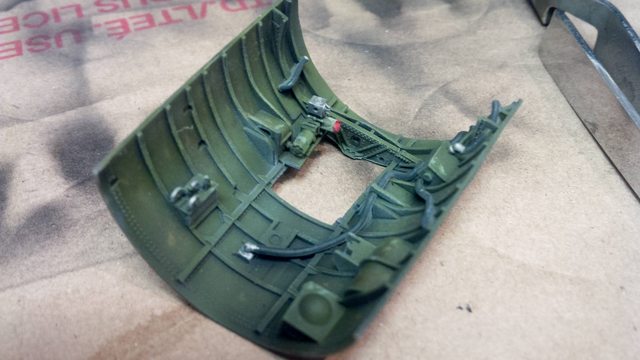
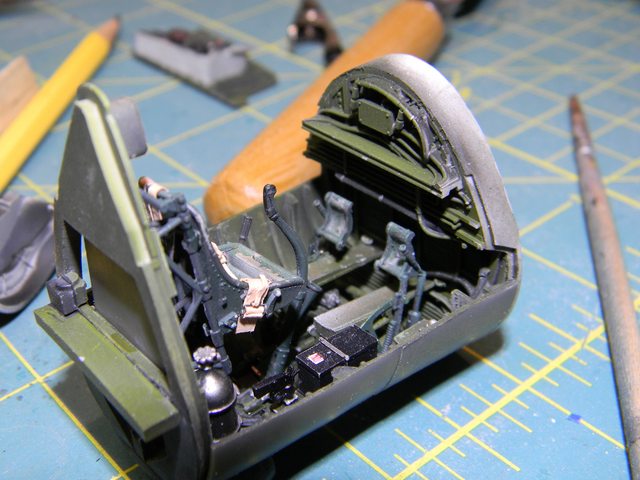
The enginge of the Kate is ready so far.
As I have found no details of the Kate´s cockpit in the net, most of the details are more or less "invented".
Plumbed up the interior:
The interior was painted Nakajima Green.
Oliver

On the desk: Probably a Panzer III.
Bayern, Germany
Joined: January 17, 2006
KitMaker: 673 posts
AeroScale: 492 posts
Posted: Saturday, October 14, 2017 - 10:41 PM UTC
Thank you for the kind words Mike, and thank you for running yet another great campaign!
Sincerely,
Ernest
Bayern, Germany
Joined: January 17, 2006
KitMaker: 673 posts
AeroScale: 492 posts
Posted: Saturday, October 14, 2017 - 10:43 PM UTC
Hallo Oliver, super anfang mit das Kate! The Sakai Engine looks very nice indeed. Are the seatbelts self made, or are they Eduard PE or HGW fabric?
Sincerely,
Ernest

#363
Pennsylvania, United States
Joined: January 08, 2014
KitMaker: 425 posts
AeroScale: 401 posts
Posted: Sunday, October 15, 2017 - 01:21 AM UTC
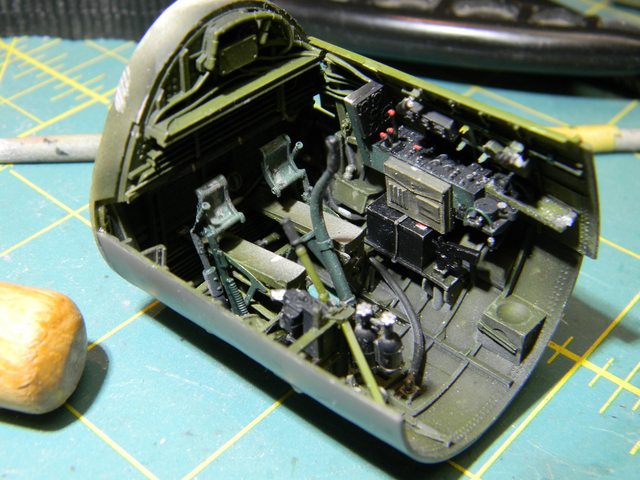
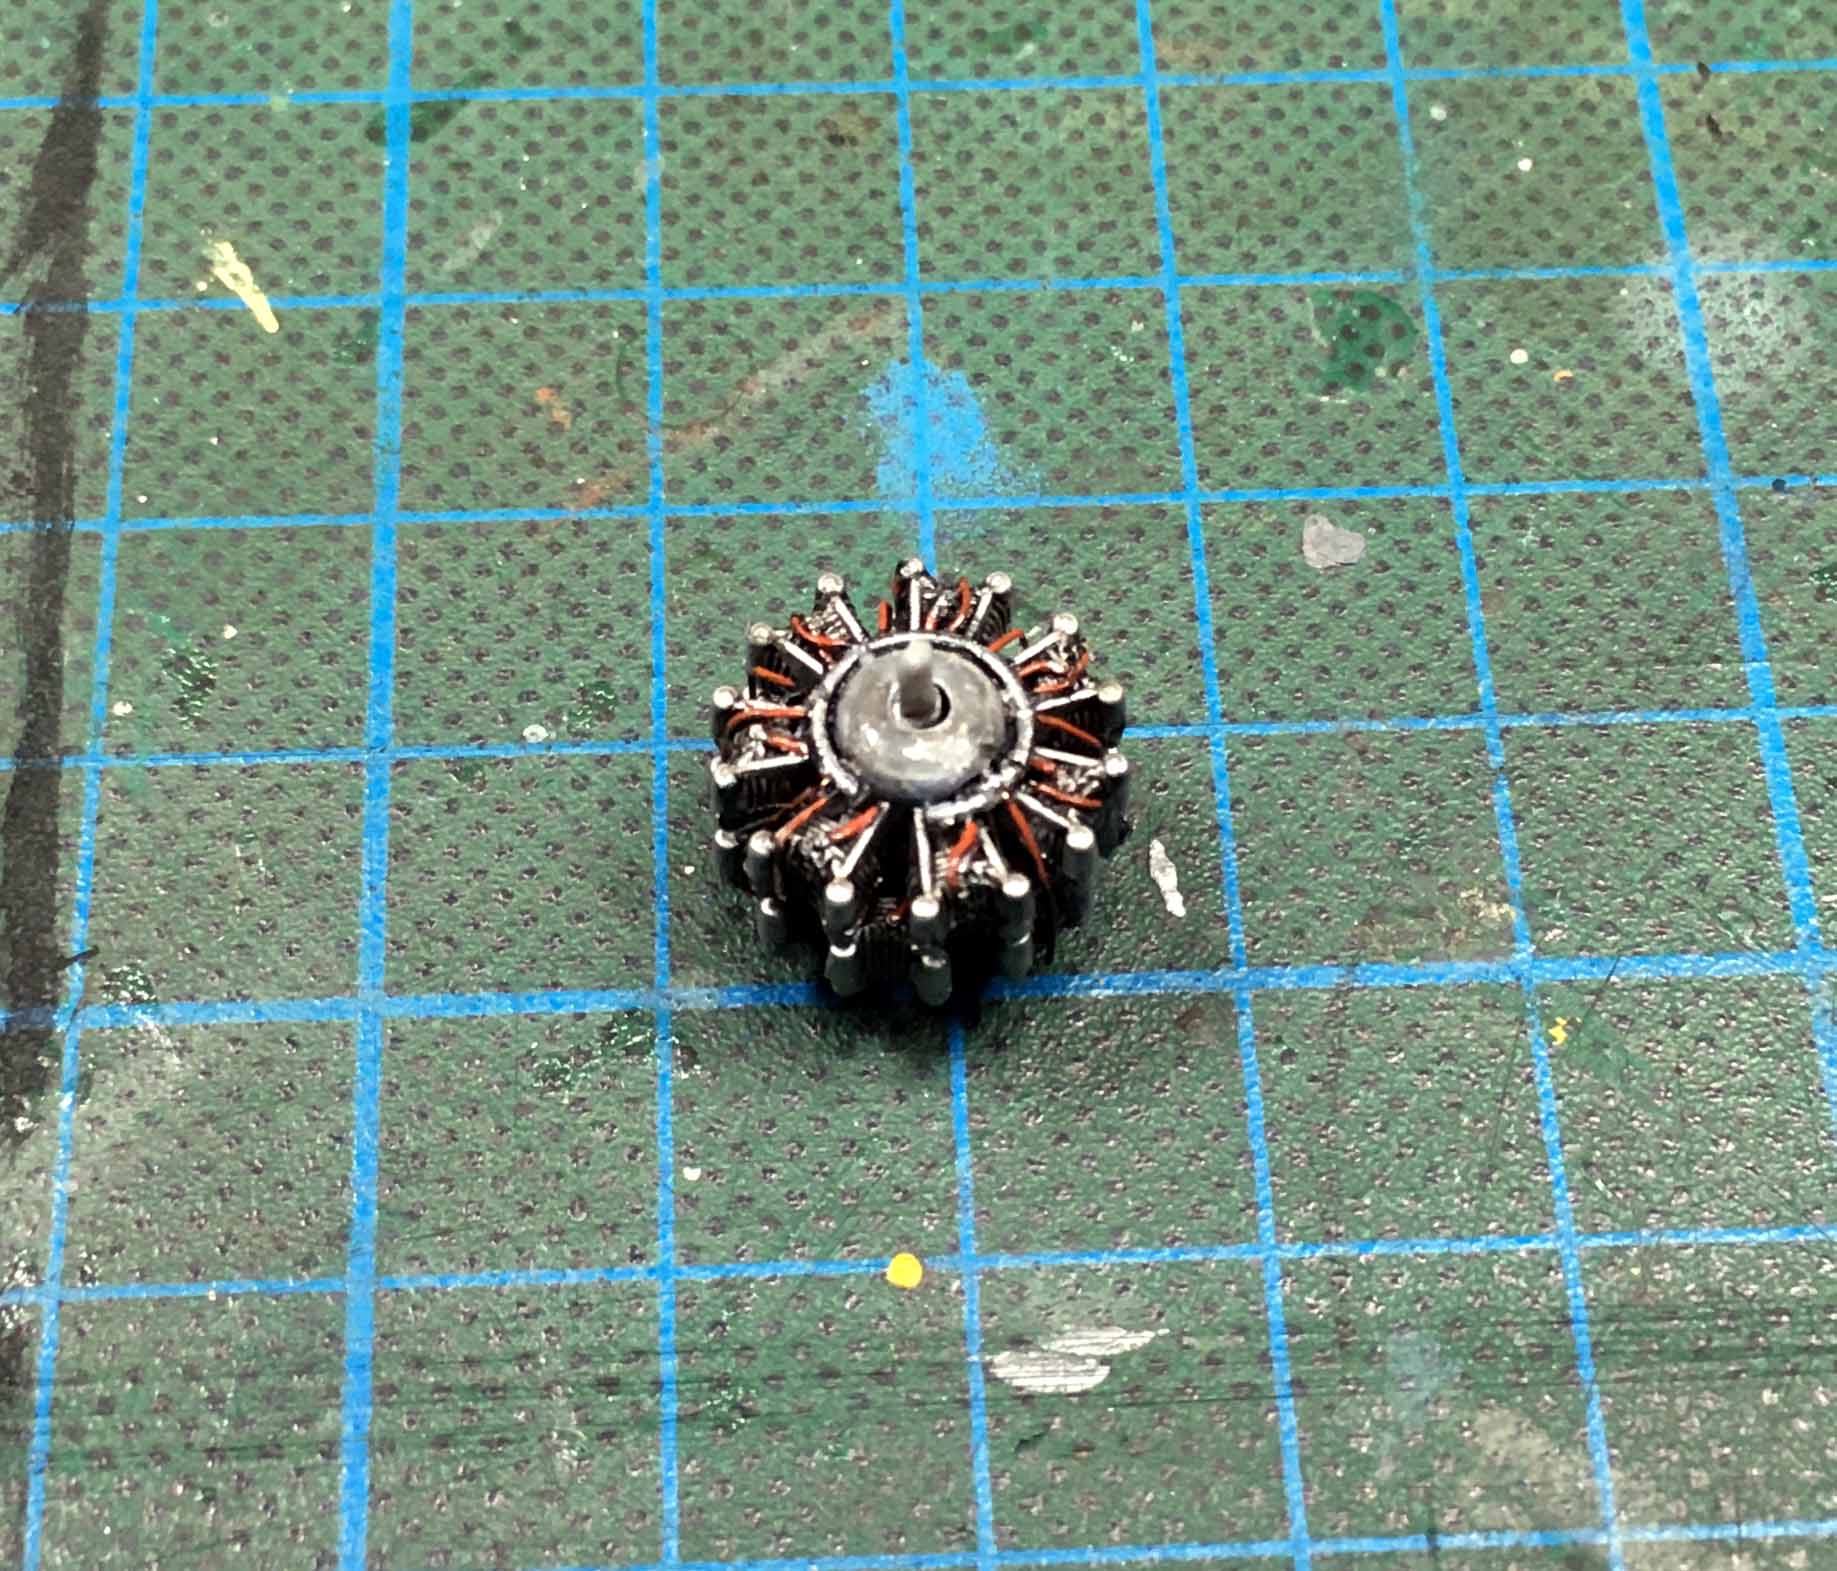
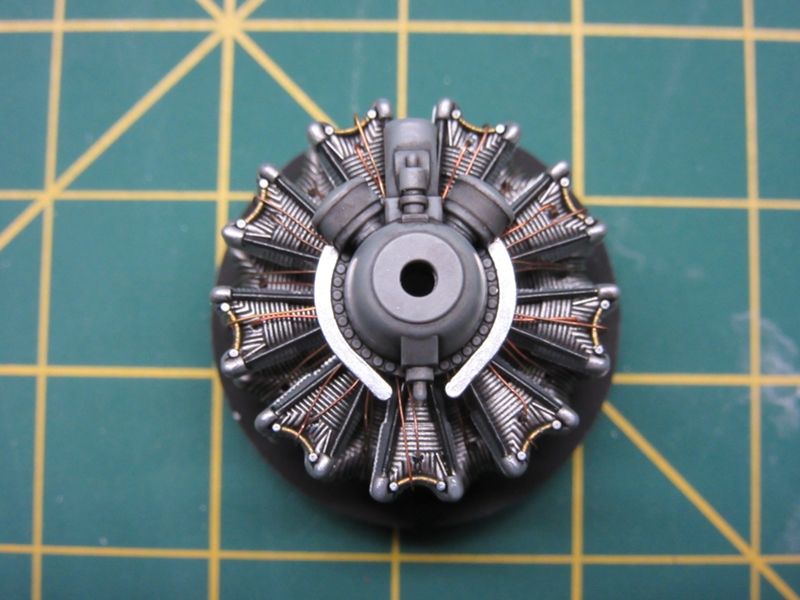
Tamiya 1:48 F4U-1D CorsairThe engine is painted and wired, for some reason I decided to start with it instead of the cockpit. I need to tweak some of the wires a bit with tweezers before I'll be totally satisfied, but so far so good.
On the Bench:
The Big Three: Eduard 1:48 Bf 109G-2 Trop
Radial Fighters: Hasegawa 1:48 Ki84 Frank
The Mighty Eighth: Eduard 1:48 P-51D-10
Ontario, Canada
Joined: July 22, 2012
KitMaker: 771 posts
AeroScale: 763 posts
Posted: Sunday, October 15, 2017 - 04:21 AM UTC
Quoted Text
As I have found no details of the Kate´s cockpit in the net
Oliver
;-)
Matt Odom
I've been known to build a few things
Bayern, Germany
Joined: January 17, 2006
KitMaker: 673 posts
AeroScale: 492 posts
Posted: Sunday, October 15, 2017 - 03:53 PM UTC
That is one very nice P&W engine Paul. The wiring harness looks the biz and you did a very nice job on the cylinder heads! Did you use Alclad II for the metallic colors? Again, very, very nice engine!
Ernest
Quoted Text
Tamiya 1:48 F4U-1D Corsair
The engine is painted and wired, for some reason I decided to start with it instead of the cockpit. I need to tweak some of the wires a bit with tweezers before I'll be totally satisfied, but so far so good.
Nordrhein-Westfalen, Germany
Joined: March 22, 2015
KitMaker: 671 posts
AeroScale: 614 posts
Posted: Sunday, October 15, 2017 - 06:59 PM UTC
Paul,
the engine looks fantastic!
Matt,
thank´s for the tip. But, nearly all pictures are of the 1/48 Hasegawa cockpit. I think, no complete Kates can be found today.
Only wrecks "survived". But, there are some interesting articles about these wrecks.
https://www.pacificwrecks.com/aircraft/b5n/jacquinot/index.htmlhttp://www.warbirdsnews.com/warbirds-news/nakajima-kate-unveiled-pacific-aviation-museum-pearl-harbor.htmlBut, as most of the details will be nearly invisible when the canopy is on, I am satisfied with the result.
Oliver
On the desk: Probably a Panzer III.
Nordrhein-Westfalen, Germany
Joined: March 22, 2015
KitMaker: 671 posts
AeroScale: 614 posts
Posted: Monday, October 16, 2017 - 11:53 PM UTC
Quoted Text
Hallo Oliver, super anfang mit das Kate! The Sakai Engine looks very nice indeed. Are the seatbelts self made, or are they Eduard PE or HGW fabric?
Sincerely,
Ernest
s
Hallo Ernest,
sorry for the late reply. The belts are made of Tamiya tape and some thin thread, bent in shape.
Oliver
On the desk: Probably a Panzer III.
Berlin, Germany
Joined: October 12, 2008
KitMaker: 709 posts
AeroScale: 651 posts
Posted: Monday, October 16, 2017 - 11:56 PM UTC
Wow, great choices of kits! Those 32 scale builds will be very enjoyable to follow.
Ernest: Very nicely done so far on the cockpit and the P&W looks spot on!
Oliver: Great work on detailing, pit and engine. This scale needs a sharp eye and steady hand.
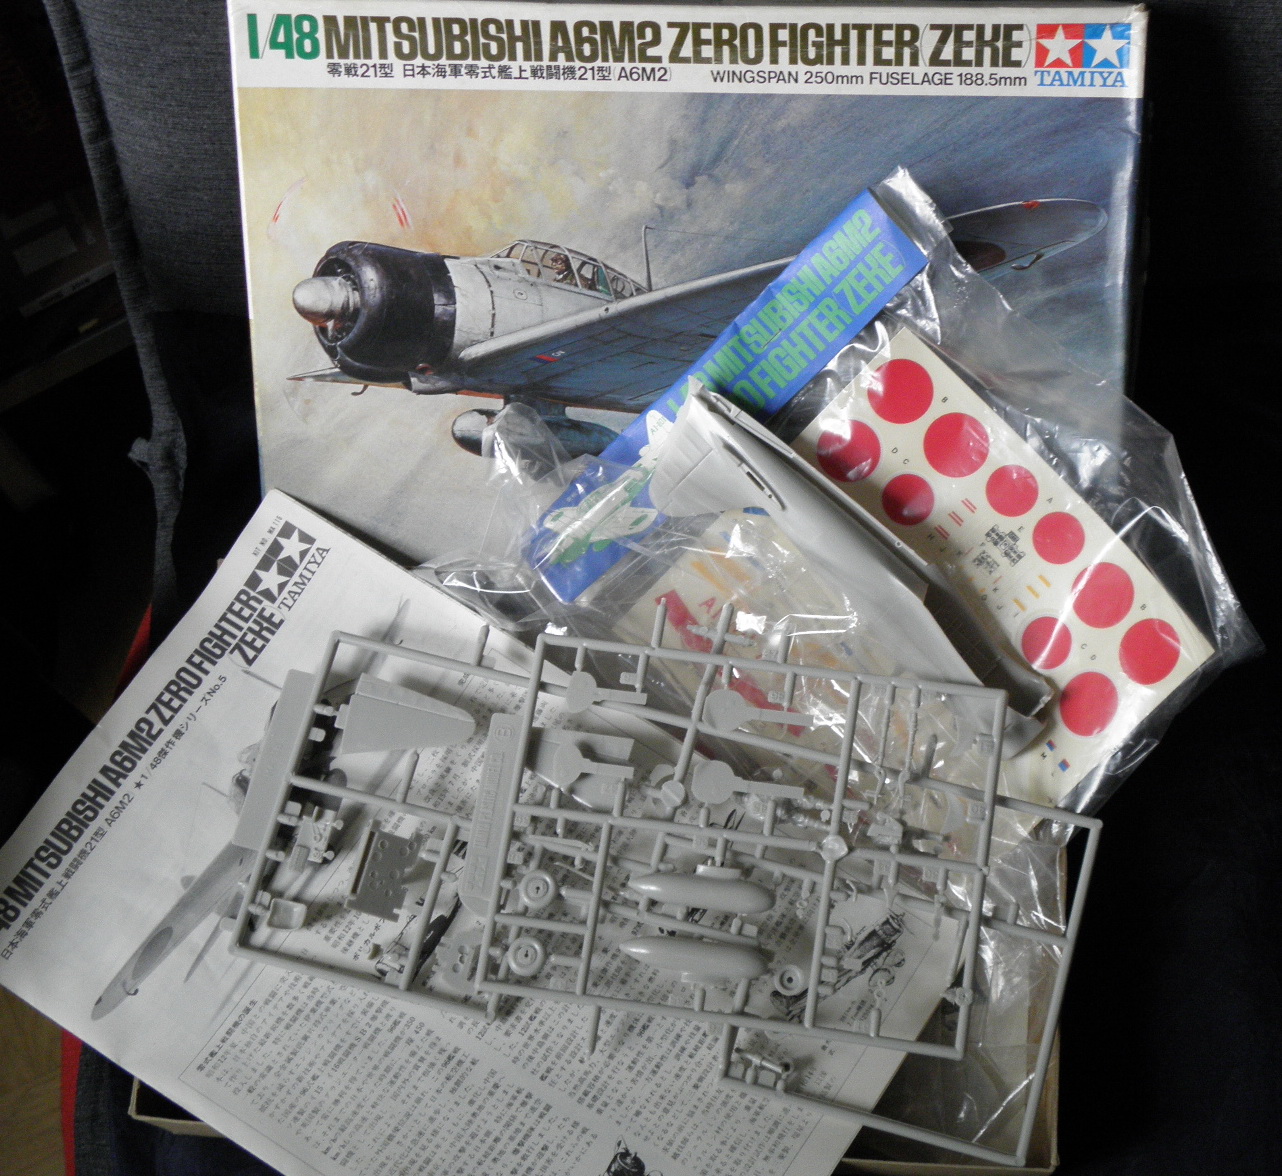
Now I think it's time to share the fun...
While I was undecided about a kit to build I just blindfolded pick one out - and it was:
... o.k., another Japanese a/c (and here I can only repeat the state of Mike (TacFireGuru)
Quoted Text
Note how the kit "ages" itself: yellowing decals and instructions all in Japanese...
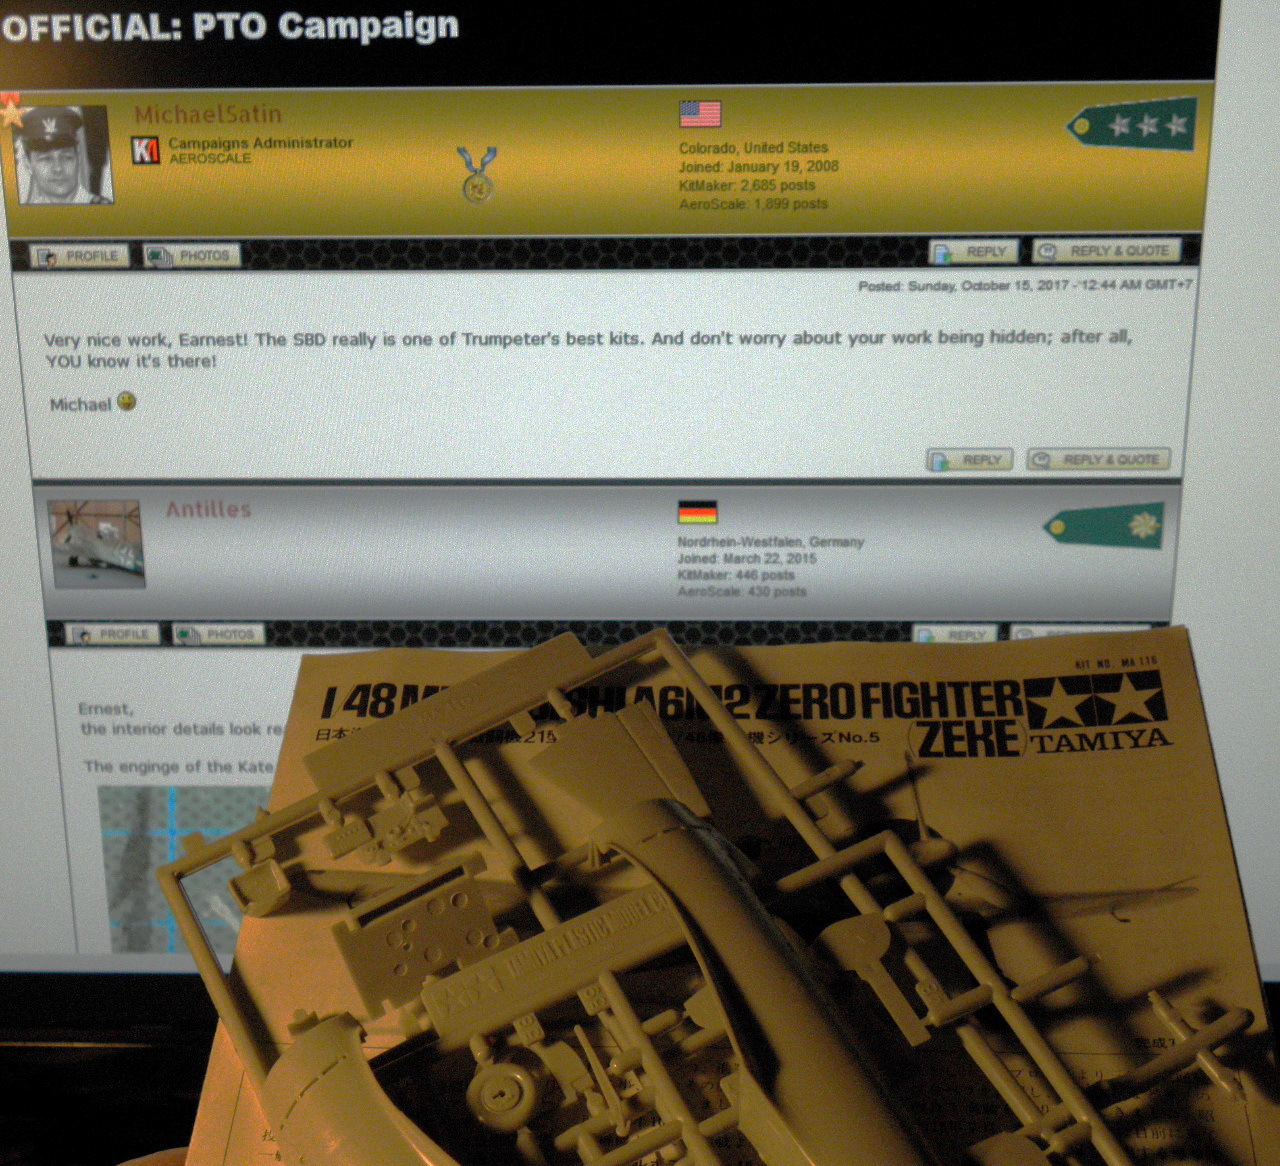
 Tamiya's A6M2 ZERO 1/48
 from the late 70's
Let's see what I can do with it...

Thomas
Sometimes you need to distance yourself to see things clearly - Lao Tzu -
... in scale and in real life -T.
Nordrhein-Westfalen, Germany
Joined: March 22, 2015
KitMaker: 671 posts
AeroScale: 614 posts
Posted: Tuesday, October 17, 2017 - 12:46 AM UTC
Thomas: Thank's for the kind words and good choice!
The old Tamiya kit looks fine. I love these old box arts!
Oliver
On the desk: Probably a Panzer III.
#363
Pennsylvania, United States
Joined: January 08, 2014
KitMaker: 425 posts
AeroScale: 401 posts
Posted: Tuesday, October 17, 2017 - 01:02 AM UTC
@Oliver - Thank you, I like the way the P&W came out. Drilling out the 36 spark plug wires was a bit tedious, I ended up breaking 3 little #78 bits before I decided I didn't need to drill completely through the cylinders.
@Ernest - Thanks, in fact its not Alclad II. I used decanted Tamiya TS-17 Gloss Aluminum with their black Panel Line Wash, then picked out the push rods and drain tubes with Vallejo black and bronze respectively. The chrome ignition cable assembly is probably going to end up too bright. I am hoping once the cowl is in place it ends up with some nice metallic sheen inside to make things pop a bit.
I started spraying the cockpit parts but have quite a bit of work to do before I have anything more to post.
On the Bench:
The Big Three: Eduard 1:48 Bf 109G-2 Trop
Radial Fighters: Hasegawa 1:48 Ki84 Frank
The Mighty Eighth: Eduard 1:48 P-51D-10
Pennsylvania, United States
Joined: June 17, 2009
KitMaker: 566 posts
AeroScale: 507 posts
Posted: Tuesday, October 17, 2017 - 08:43 AM UTC
My submission for the PTO campaign will be....
The Tamiya 1/48 P-51D mustang in the markings of the 47th FS, 15th FG flying VLR (very long range) bomber escort missions from Iwo Jima. In particular "Lil Butch"
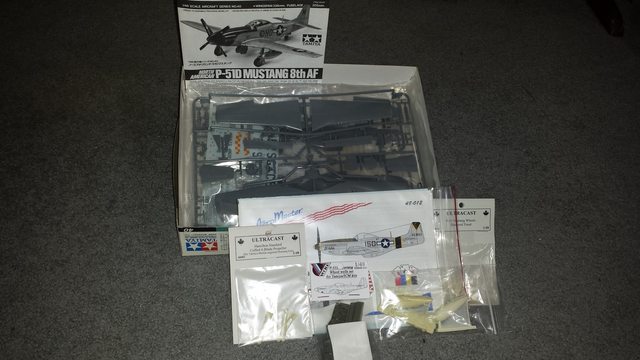
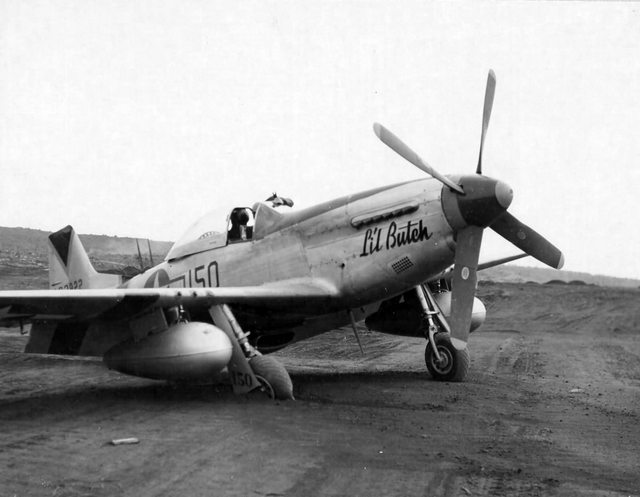
With the Airfix mustang just about here and apparently an Eduard mustang on the horizon, I figure I should get at least one of the Tamiya kits built! Several resin bits on hand and others to be raided and traded from other kits in the stash. Only one Im using for sure is the lone star models VLR drop tanks.
"...Fat, drunk, and stupid is no way to go through life son"
Ontario, Canada
Joined: July 22, 2012
KitMaker: 771 posts
AeroScale: 763 posts
Posted: Wednesday, October 18, 2017 - 04:26 AM UTC
Quoted Text
thank´s for the tip. But, nearly all pictures are of the 1/48 Hasegawa cockpit.
I generally assume that when there are dozens of photos of completed models that you can canvas them for common details and/or details that appeal to you in order to help you complete yours.
Seeing as there is only one surviving (partial) airframe, you can make things up as you go along and no one would ever be able to call you on having this colour wrong or that detail wrong.
Matt Odom
I've been known to build a few things
Colorado, United States
Joined: December 25, 2004
KitMaker: 3,770 posts
AeroScale: 201 posts
Posted: Wednesday, October 18, 2017 - 08:28 PM UTC
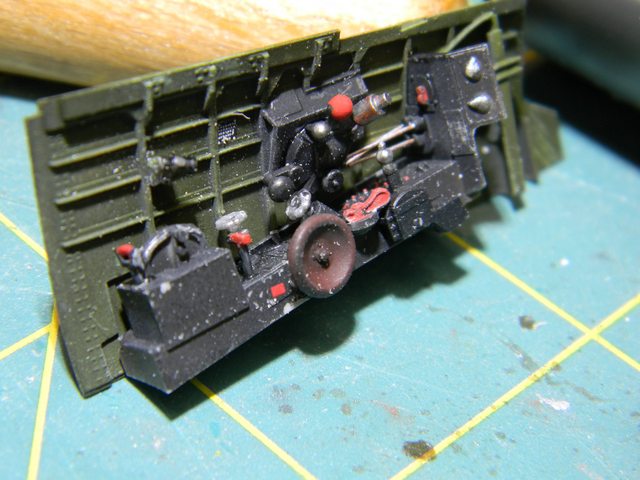
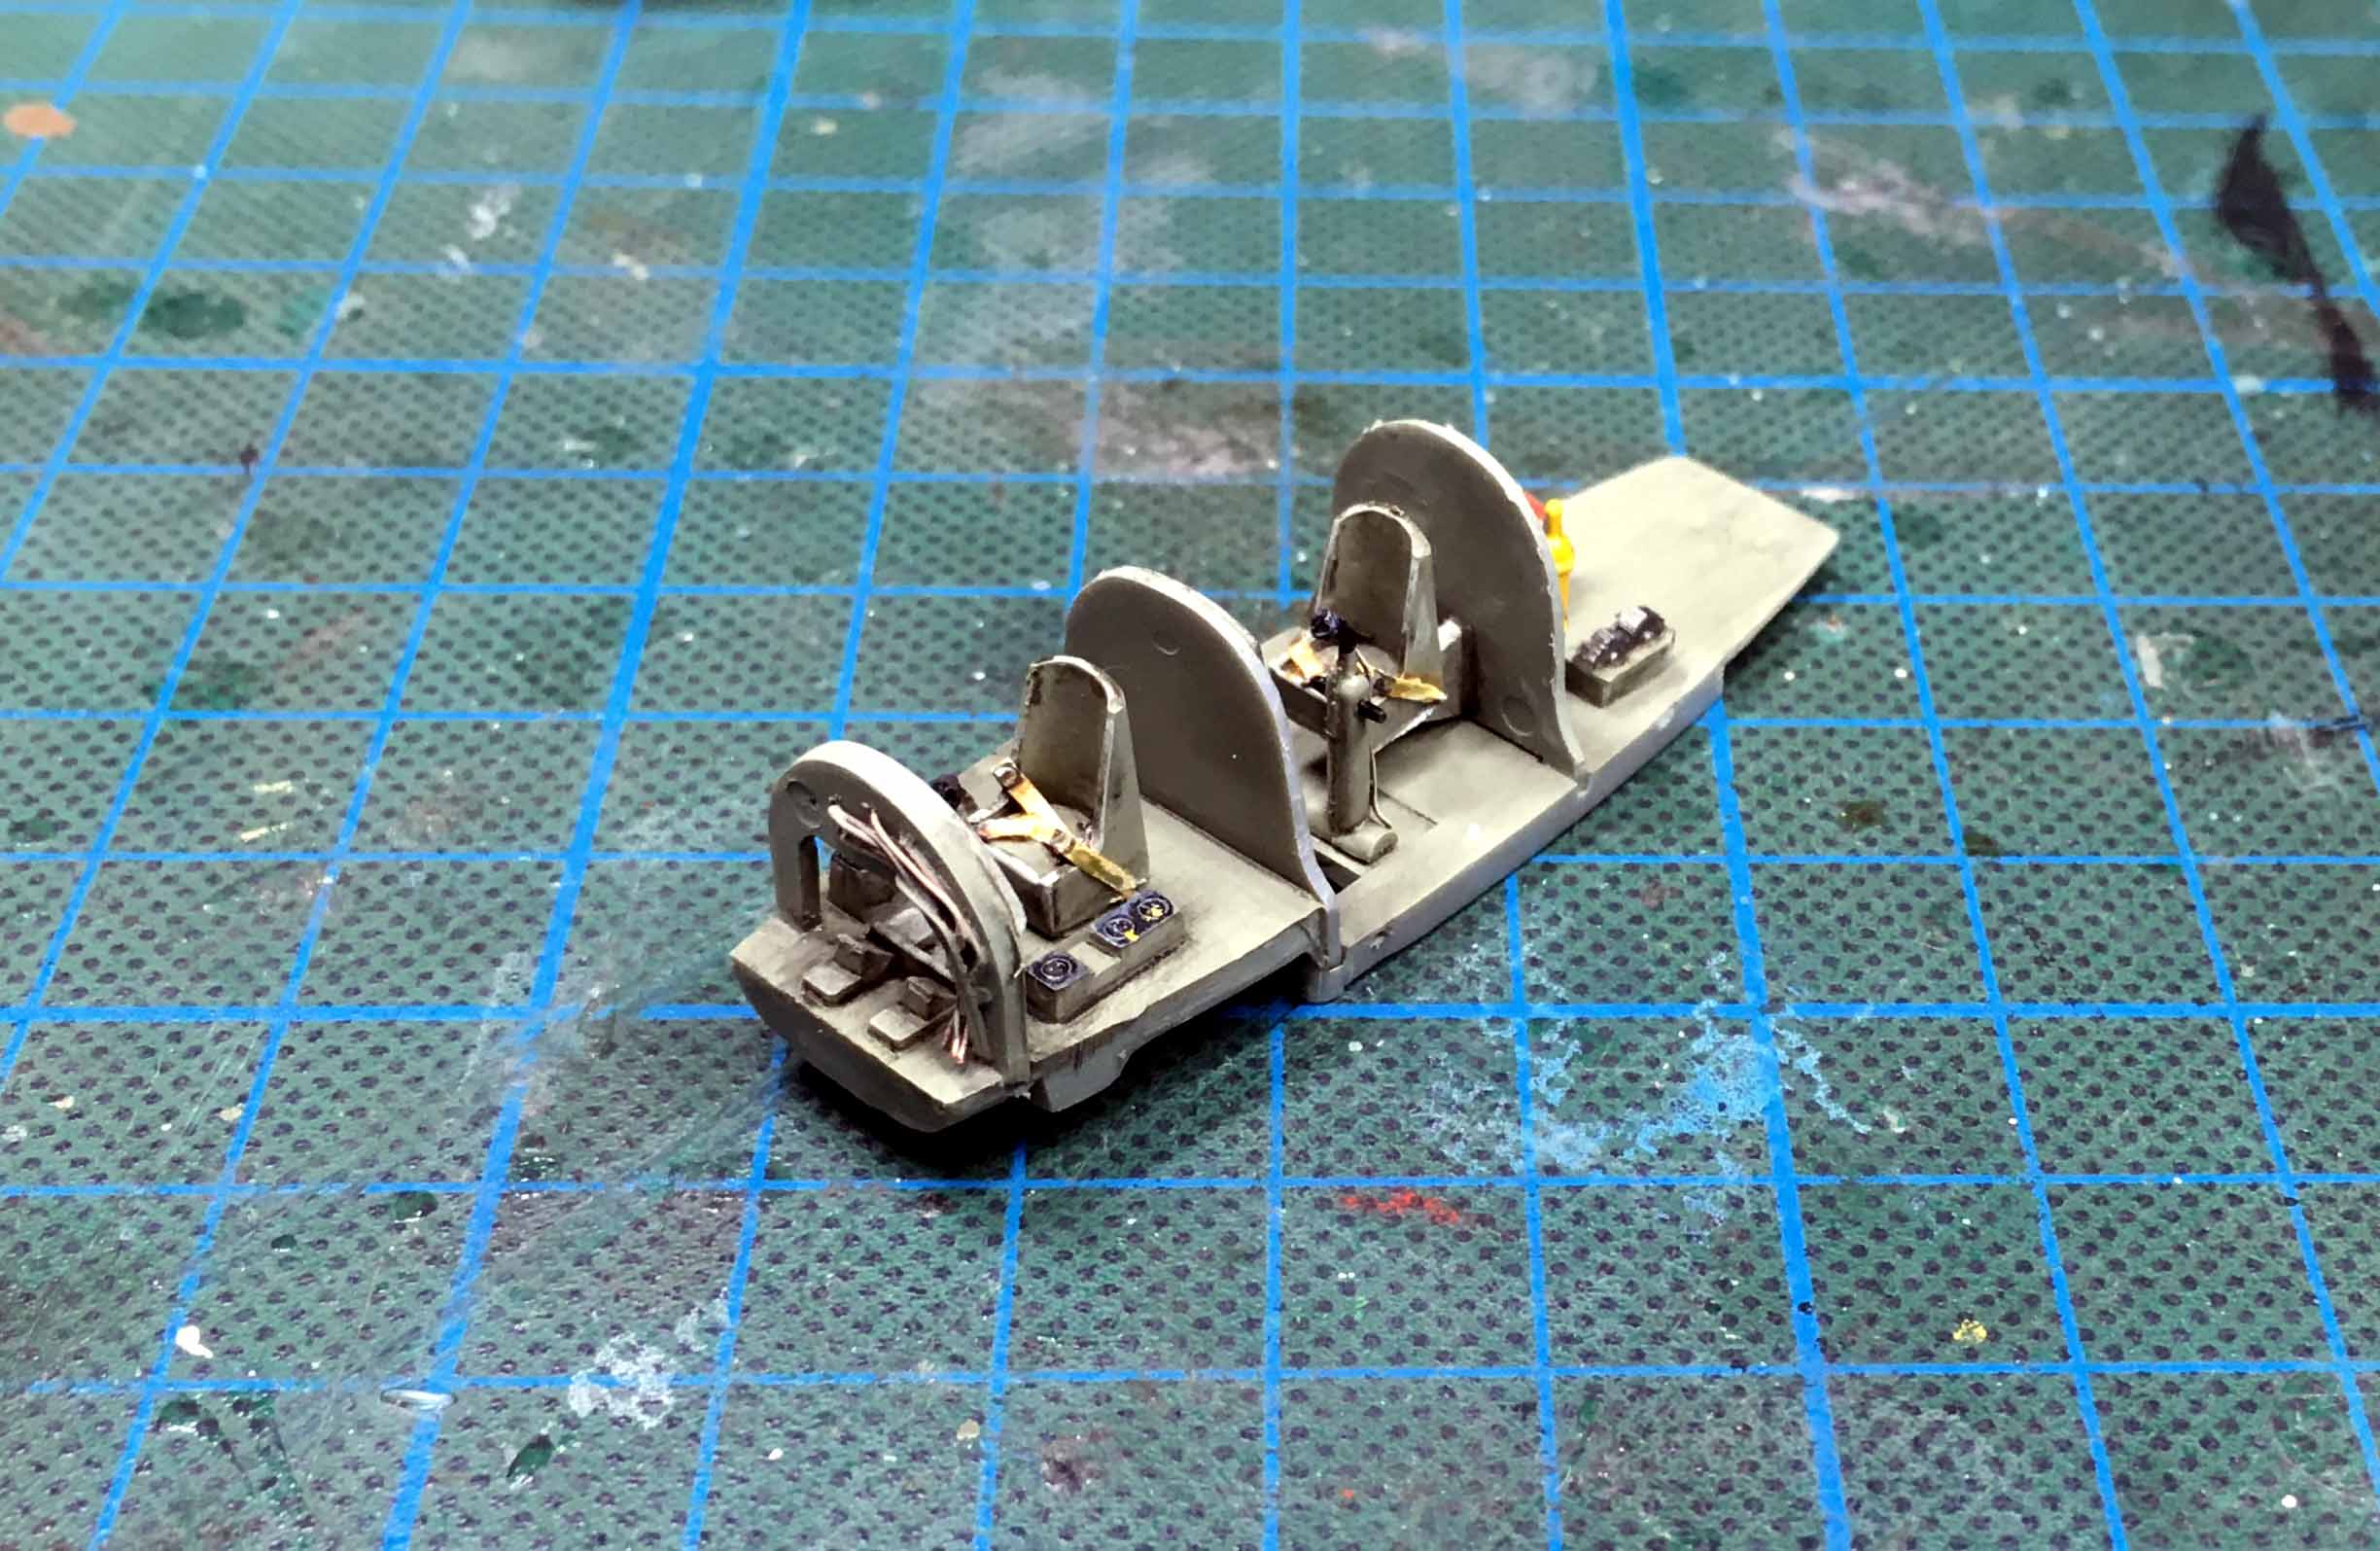
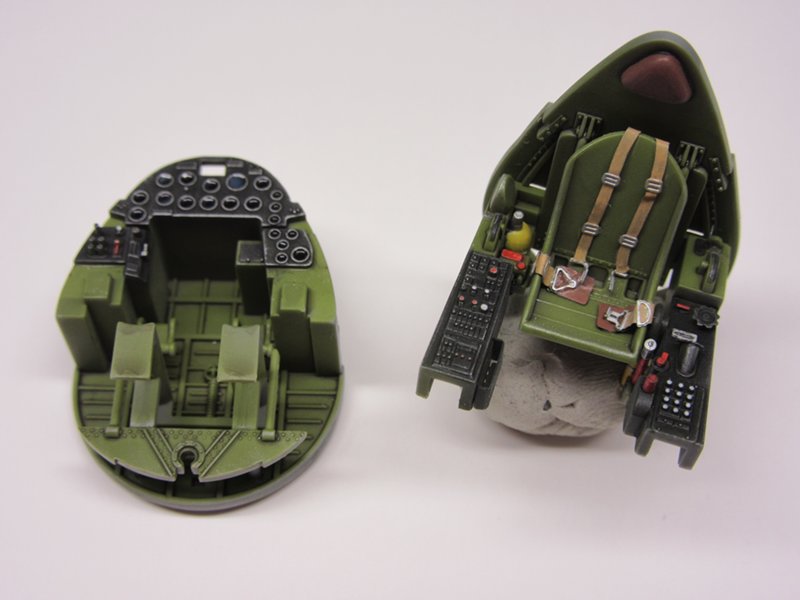
A bit of cockpit work.
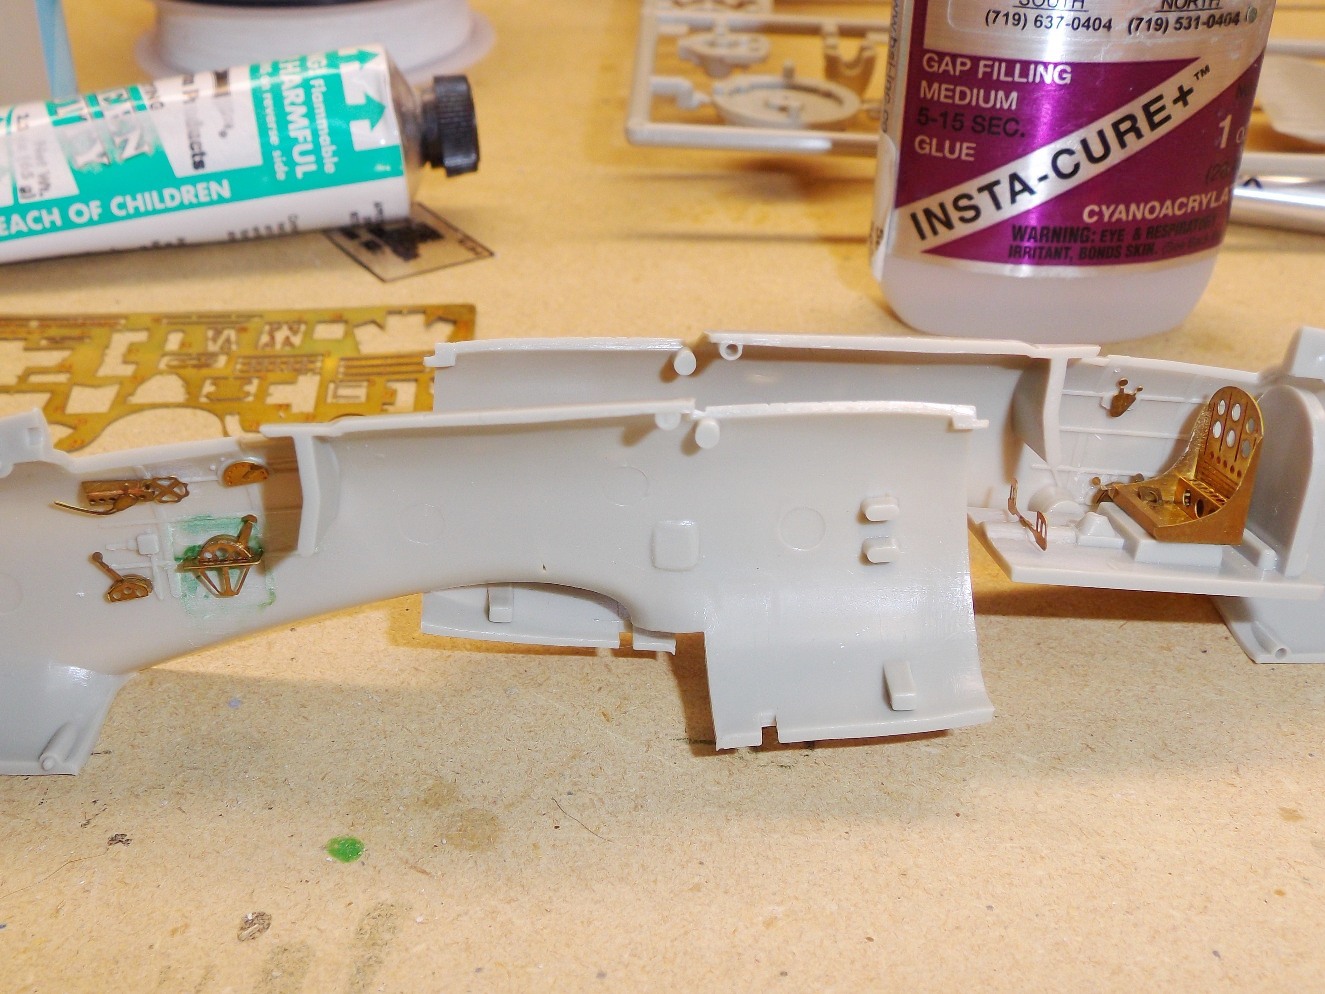
The Eduard instructions show their age; poorly defined placement diagrams. I "think" the controls are where their supposed to be - or at least close. I'm content.
Tamiya IJN Cockpit color.
Mike
Pennsylvania, United States
Joined: June 17, 2009
KitMaker: 566 posts
AeroScale: 507 posts
Posted: Thursday, October 19, 2017 - 02:50 AM UTC
Nice work Mike! The old Eduard etch really adds to Tamiya's rather barren cockpit. I wish I done that when I built mine (still on shelf of doom awaiting sanding, scribing and paint). I just used the pilot figure to block the view inside. The split instrument panel and single decal instruments were interesting

"...Fat, drunk, and stupid is no way to go through life son"
Bas-Rhin, France
Joined: September 22, 2016
KitMaker: 224 posts
AeroScale: 191 posts
Posted: Friday, October 20, 2017 - 03:32 PM UTC
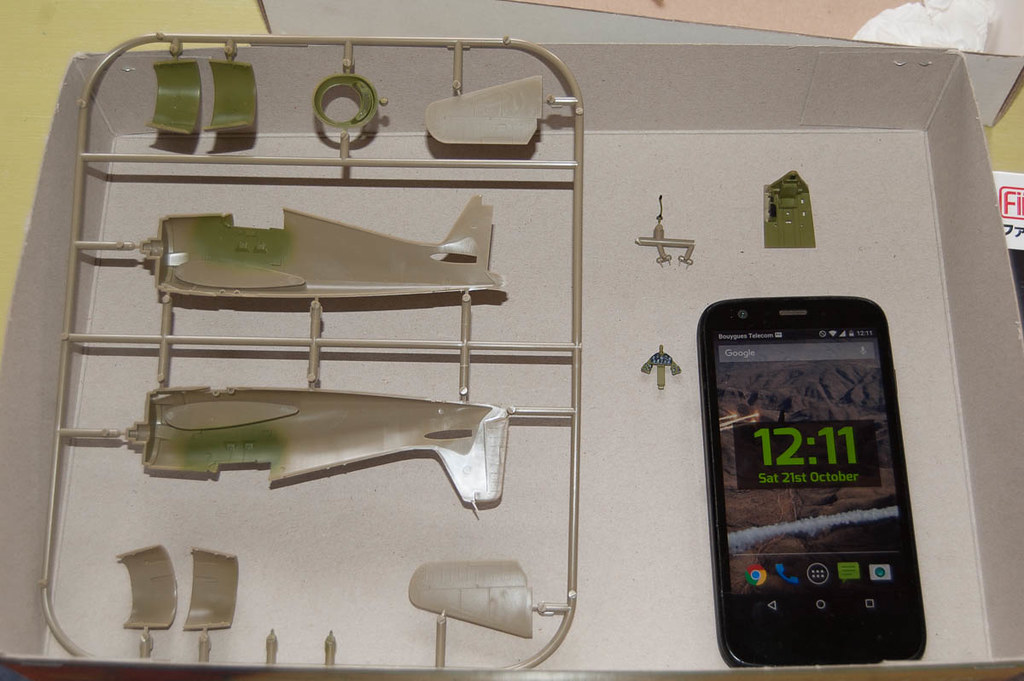
I'm enlist for this campaign with a MXY-7 Okha and a hellcat mk.II
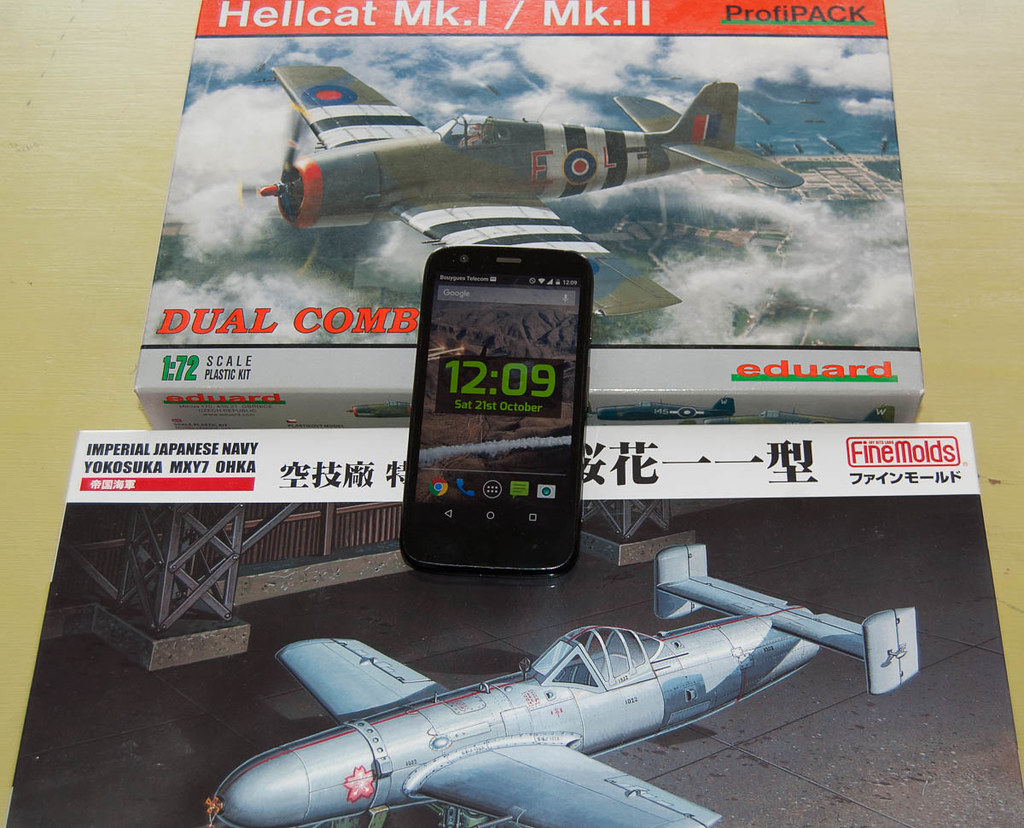
I've started the hellcat mk.II two years ago. Only a few parts are painted. He will wear a british camo depicting a plane who fought over okinawa.
Berlin, Germany
Joined: October 12, 2008
KitMaker: 709 posts
AeroScale: 651 posts
Posted: Friday, October 20, 2017 - 04:25 PM UTC
Mike: Very nice work on the office! The paint and the etched parts look really good.
Franck: Beautiful choice of kits - sure will follow that
Thomas
Sometimes you need to distance yourself to see things clearly - Lao Tzu -
... in scale and in real life -T.
#363
Pennsylvania, United States
Joined: January 08, 2014
KitMaker: 425 posts
AeroScale: 401 posts
Posted: Saturday, October 21, 2017 - 02:51 AM UTC
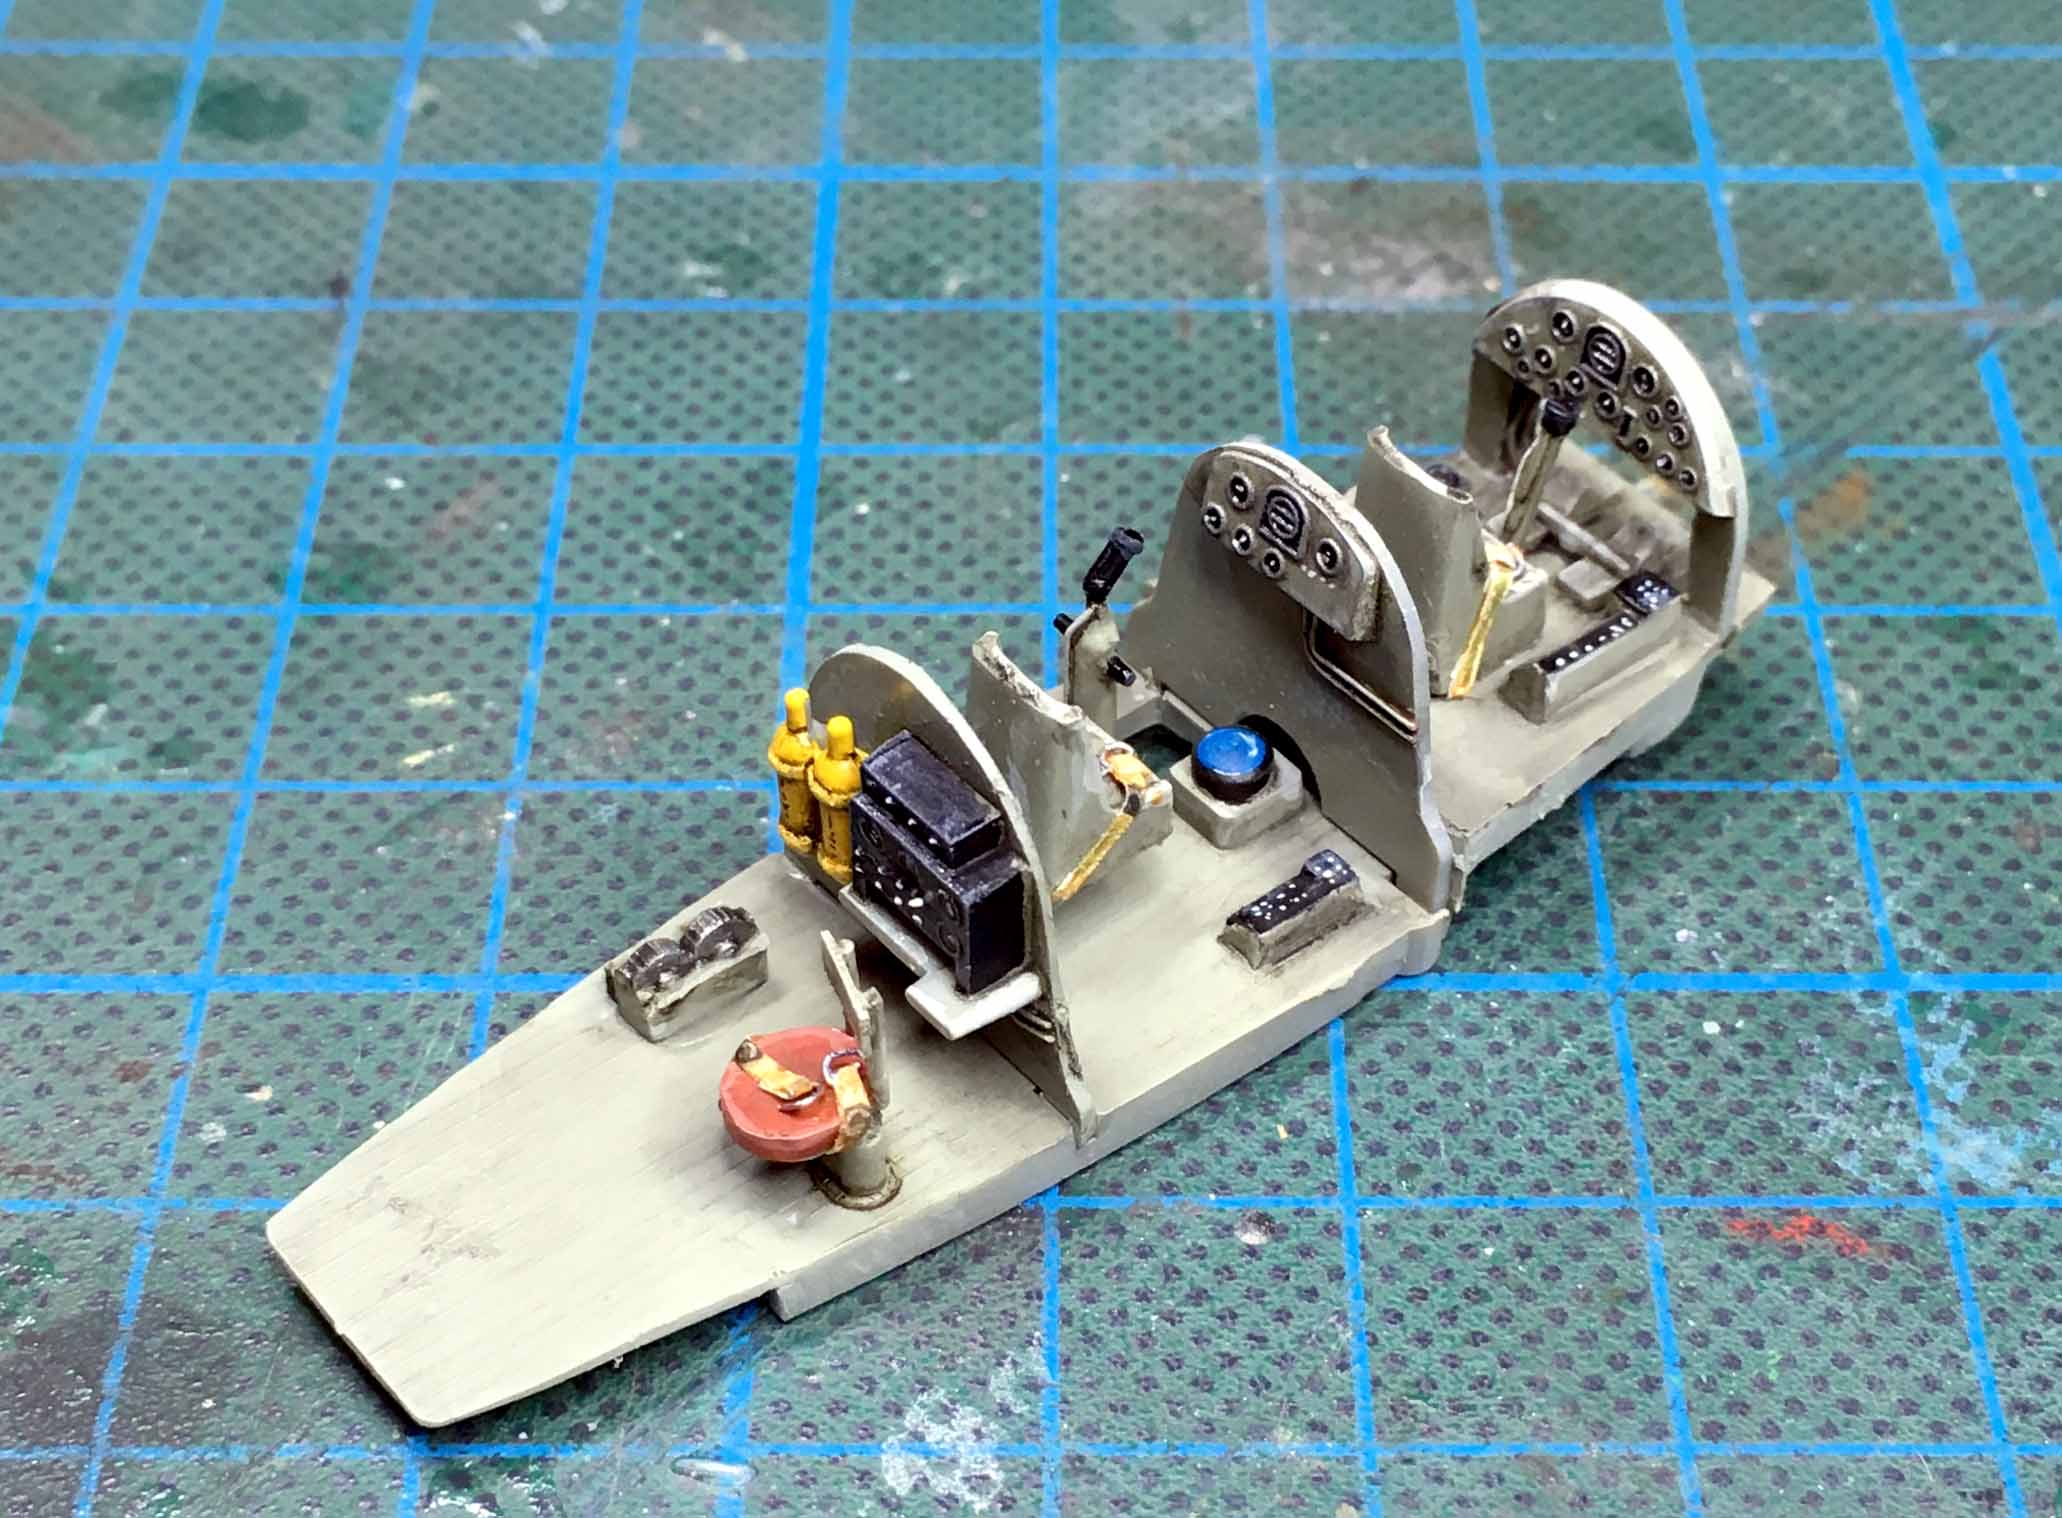
Tamiya 1:48 F4U-1D CorsairThe cockpit is all finished up. I added a few PE bits and bobs to liven it up but didn't go crazy. I don't think you'll be able to see much inside at all with the wings folded.
On the Bench:
The Big Three: Eduard 1:48 Bf 109G-2 Trop
Radial Fighters: Hasegawa 1:48 Ki84 Frank
The Mighty Eighth: Eduard 1:48 P-51D-10
Ontario, Canada
Joined: July 22, 2012
KitMaker: 771 posts
AeroScale: 763 posts
Posted: Saturday, October 21, 2017 - 03:32 AM UTC
Matt Odom
I've been known to build a few things
Nordrhein-Westfalen, Germany
Joined: March 22, 2015
KitMaker: 671 posts
AeroScale: 614 posts
Posted: Saturday, October 21, 2017 - 03:46 AM UTC
Mike: Nice start. Installed and painted parts of the interior look good, especially the pilots seat is real eye catching!
Paul: The finish of Your cockpit is outstanding!
Matt : You are definitely right. The details of the interior are great!
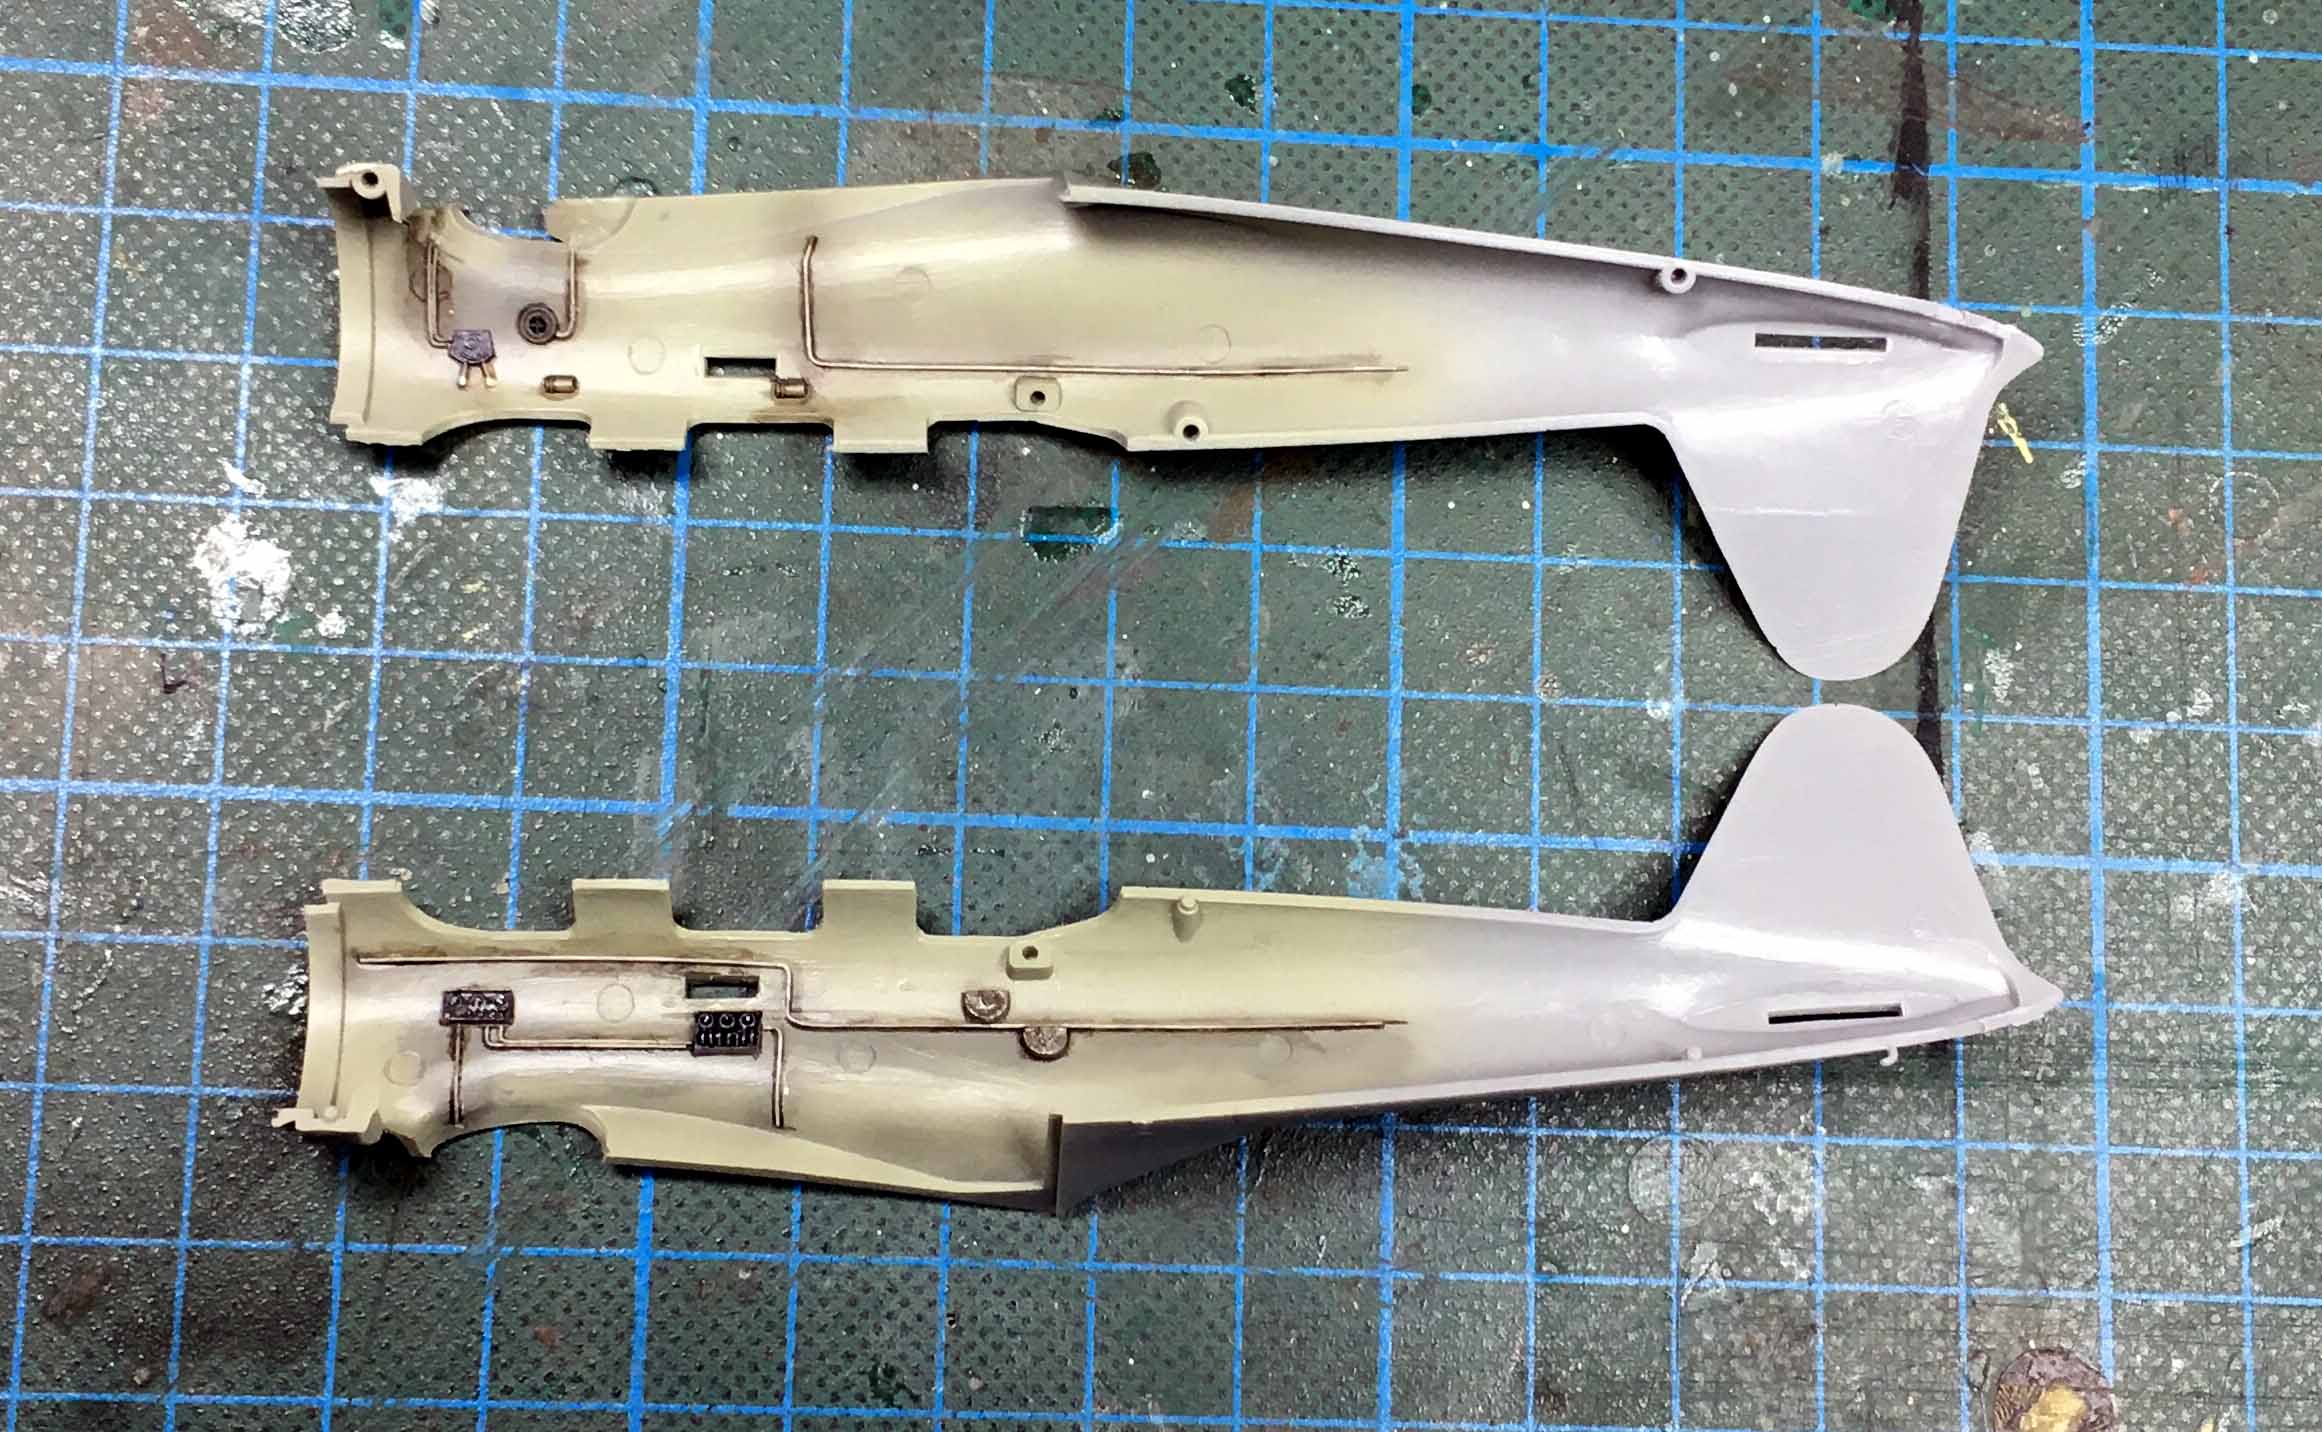
On my Kate I closed the cockpit, but not much can be seen of the work done inside. The old kit is nice, but it has some flaws in the fit of the wings ( or probably I am a bit clumsy). I will post some pics, when I have finished the putty and sanding action.
Oliver
On the desk: Probably a Panzer III.
Ontario, Canada
Joined: July 22, 2012
KitMaker: 771 posts
AeroScale: 763 posts
Posted: Saturday, October 21, 2017 - 05:39 AM UTC
Quoted Text
Oliver
There are plenty of photos in the Mikesh book on WWII Japanese Aircraft Interiors.
Matt Odom
I've been known to build a few things
Bas-Rhin, France
Joined: September 22, 2016
KitMaker: 224 posts
AeroScale: 191 posts
Posted: Sunday, October 22, 2017 - 12:34 PM UTC
Quoted Text
Franck: Beautiful choice of kits - sure will follow that
Thanks !
For the okha i've ordered the MXY-7 type 22 from Brengun last week. And i think, i'll make a buildlog with the okha from finemolds and from brengun in parallel from this campaign.
But at first: i need to finish the campaigns who i'm enlisted
Berlin, Germany
Joined: October 12, 2008
KitMaker: 709 posts
AeroScale: 651 posts
Posted: Sunday, October 22, 2017 - 08:40 PM UTC
Quoted Text
But at first: i need to finish the campaigns who i'm enlisted
... same to me
Paul: very nice progress and good start on the cockpit! Did you fill the dials on the istrument panel with clear coat or something similar? This is always good to simulate the glass.
Matt: great work on the office! Paints, shading, wash and detailing look fantastic!
Thomas
Sometimes you need to distance yourself to see things clearly - Lao Tzu -
... in scale and in real life -T.
Colorado, United States
Joined: December 25, 2004
KitMaker: 3,770 posts
AeroScale: 201 posts
Posted: Sunday, October 22, 2017 - 09:25 PM UTC
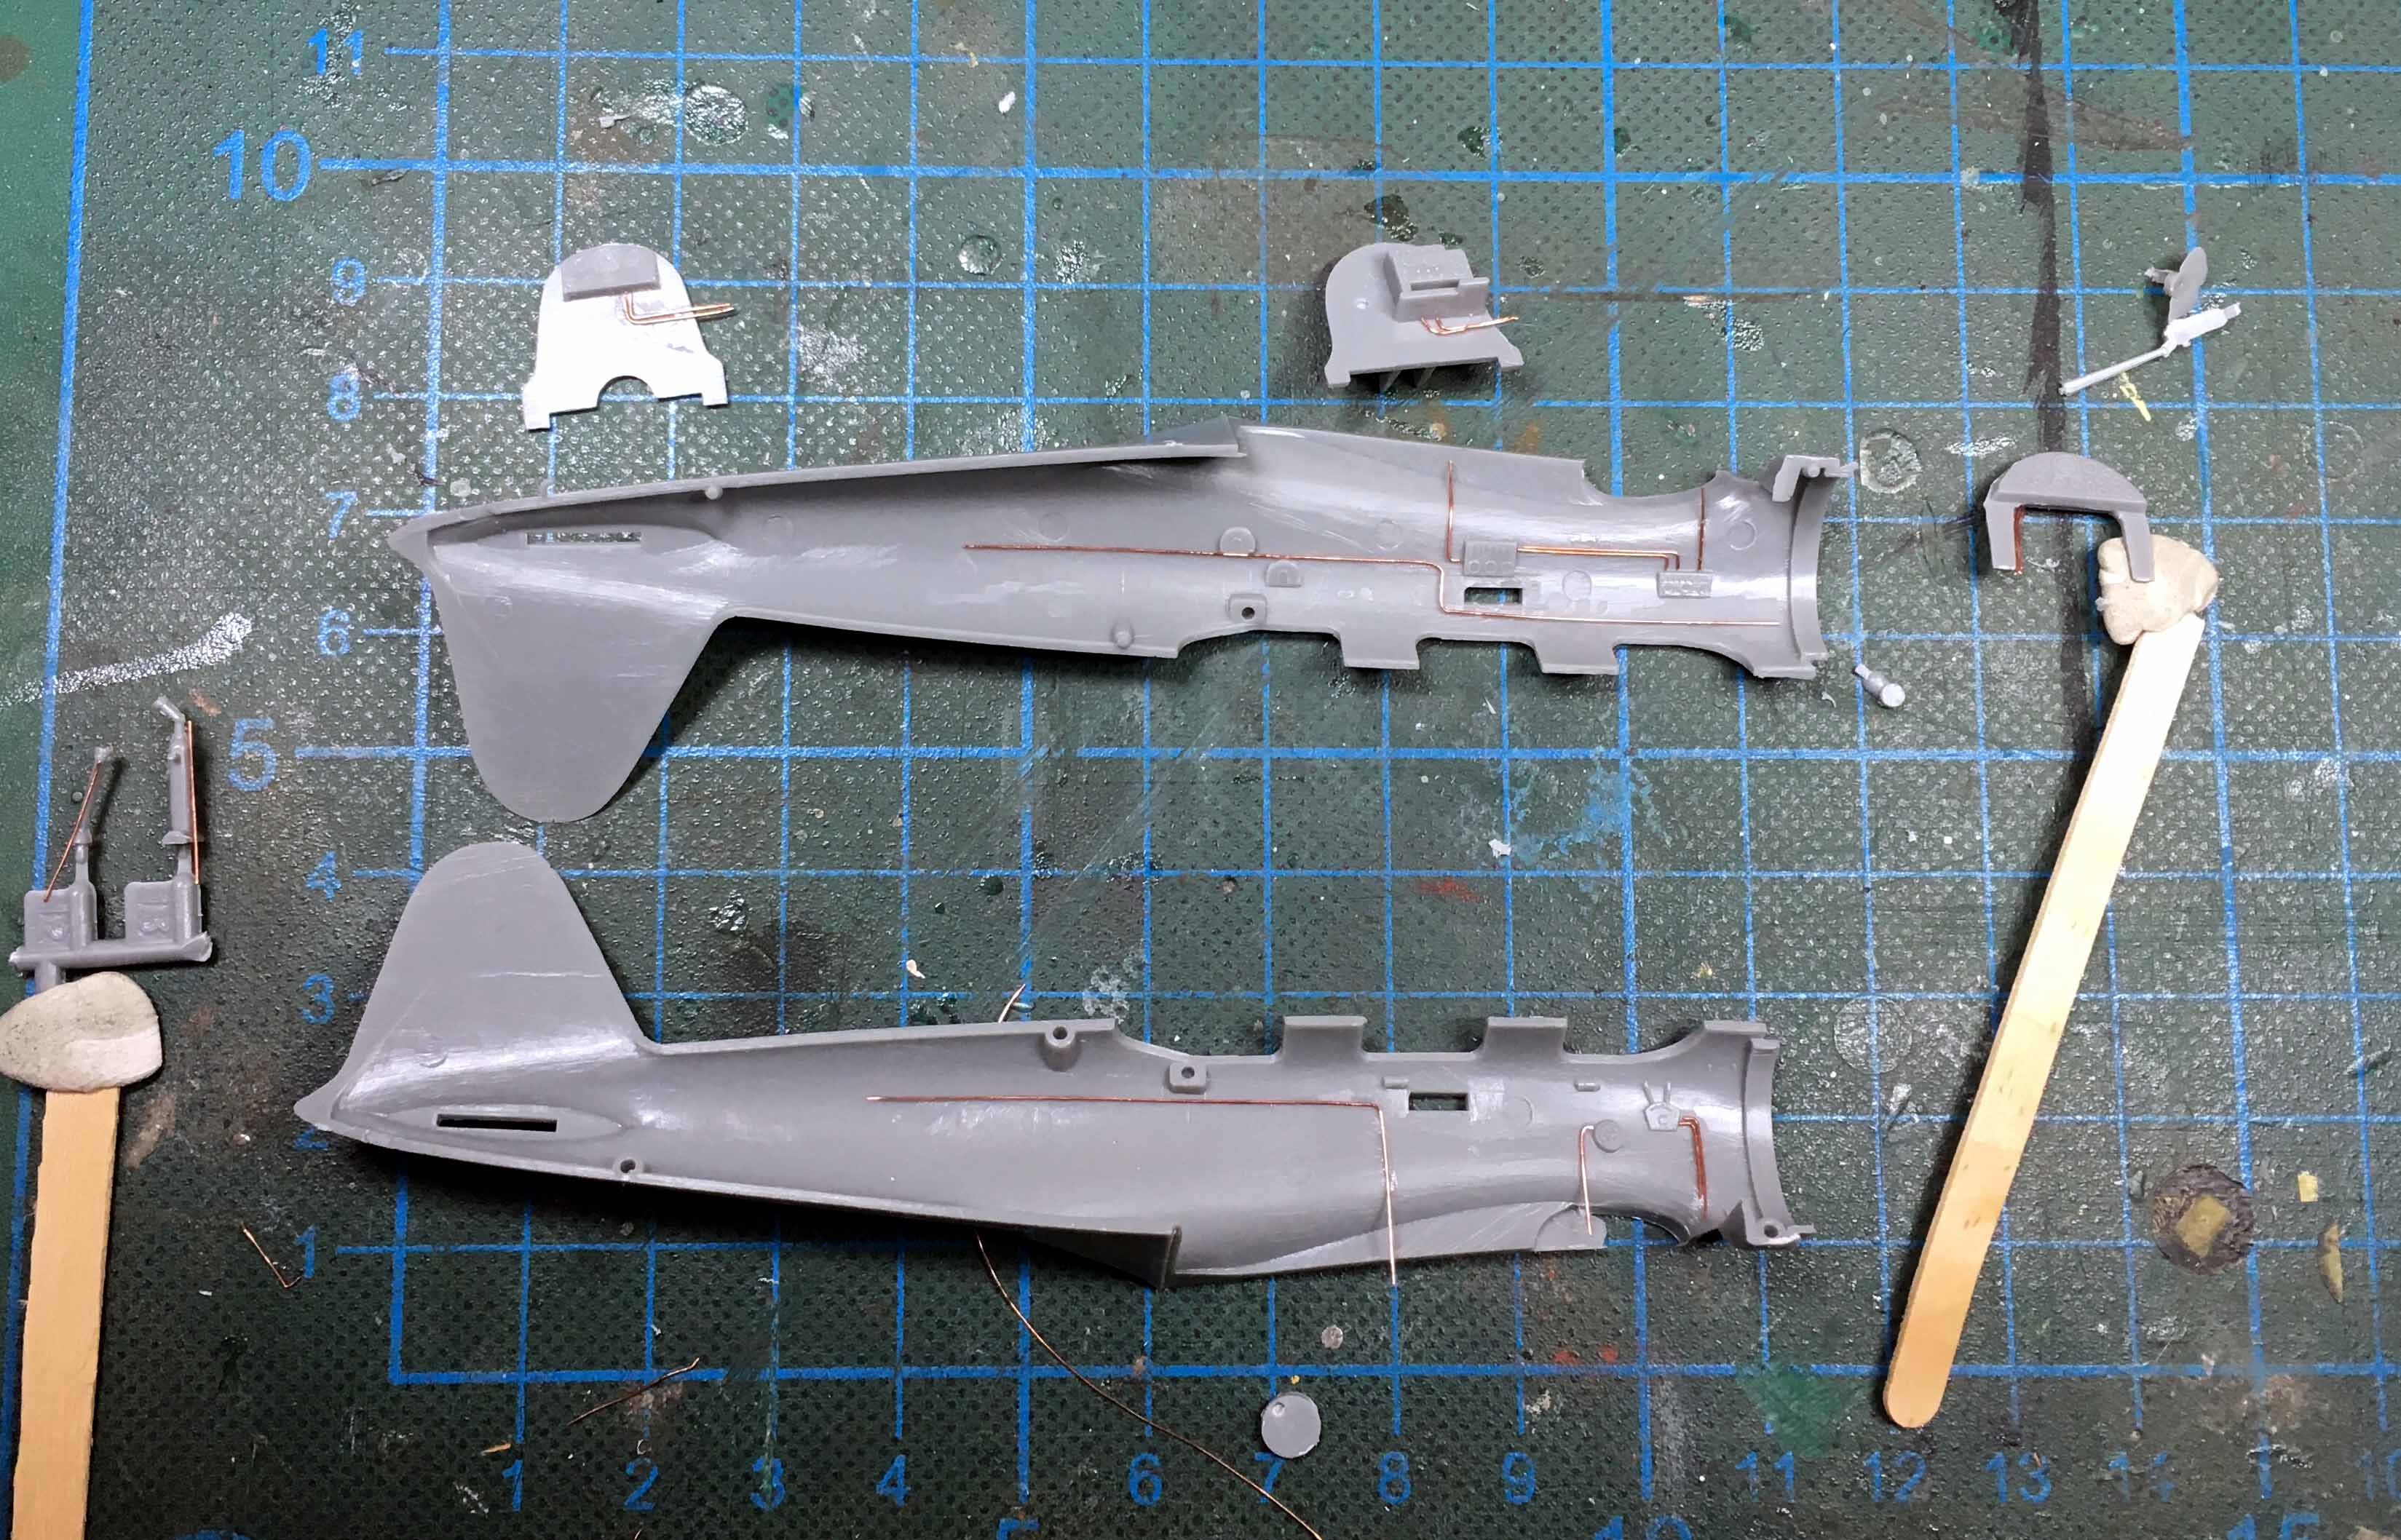
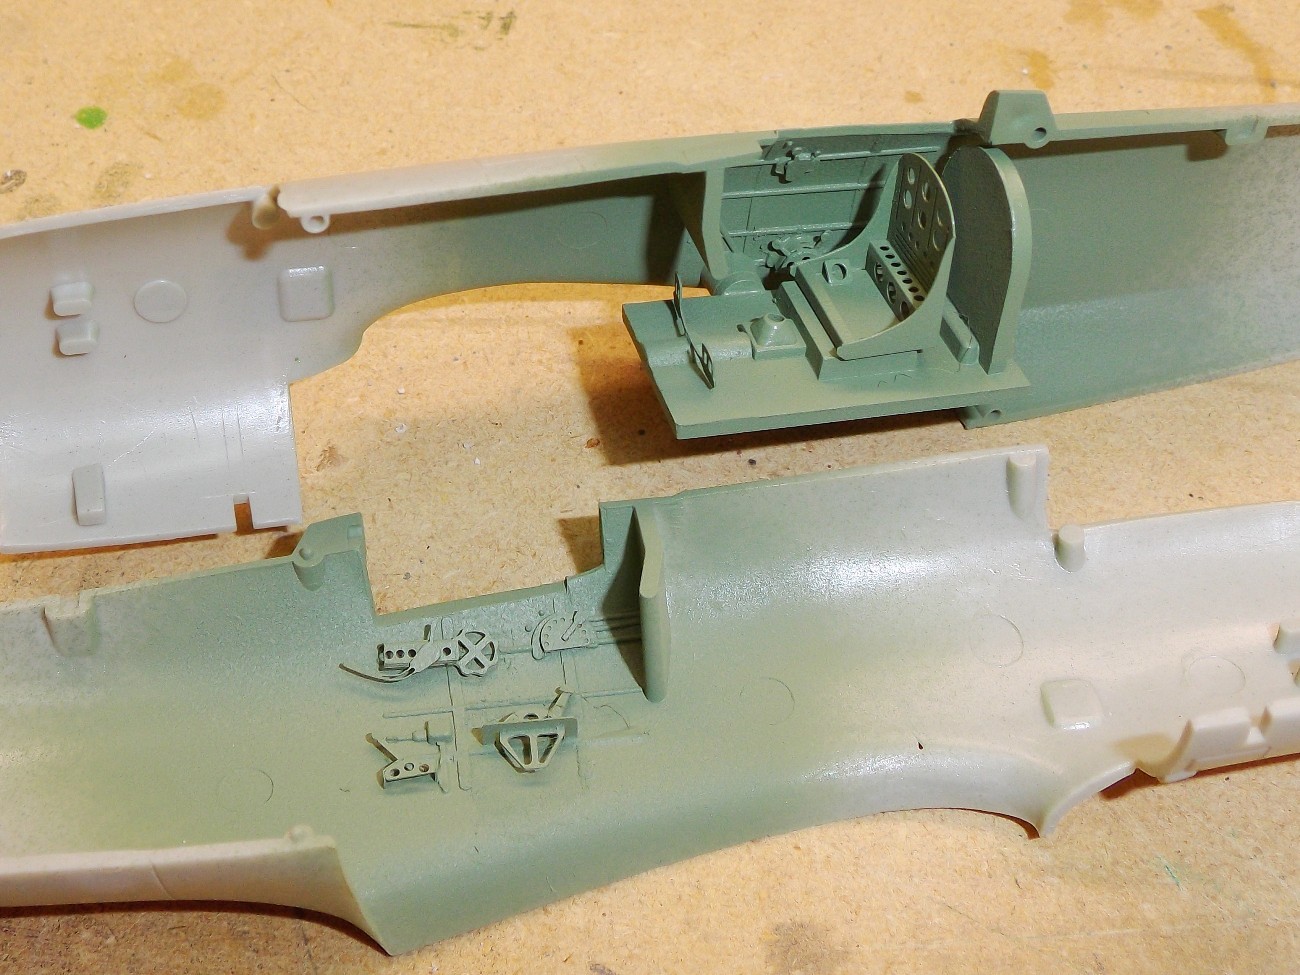
Closed up the fuselage and added the main wings. My "go-to" fillers are Squadron Green and Vallejo 401 (which you can see on the wing roots - run a light bead and wipe with a damp Q-tip).
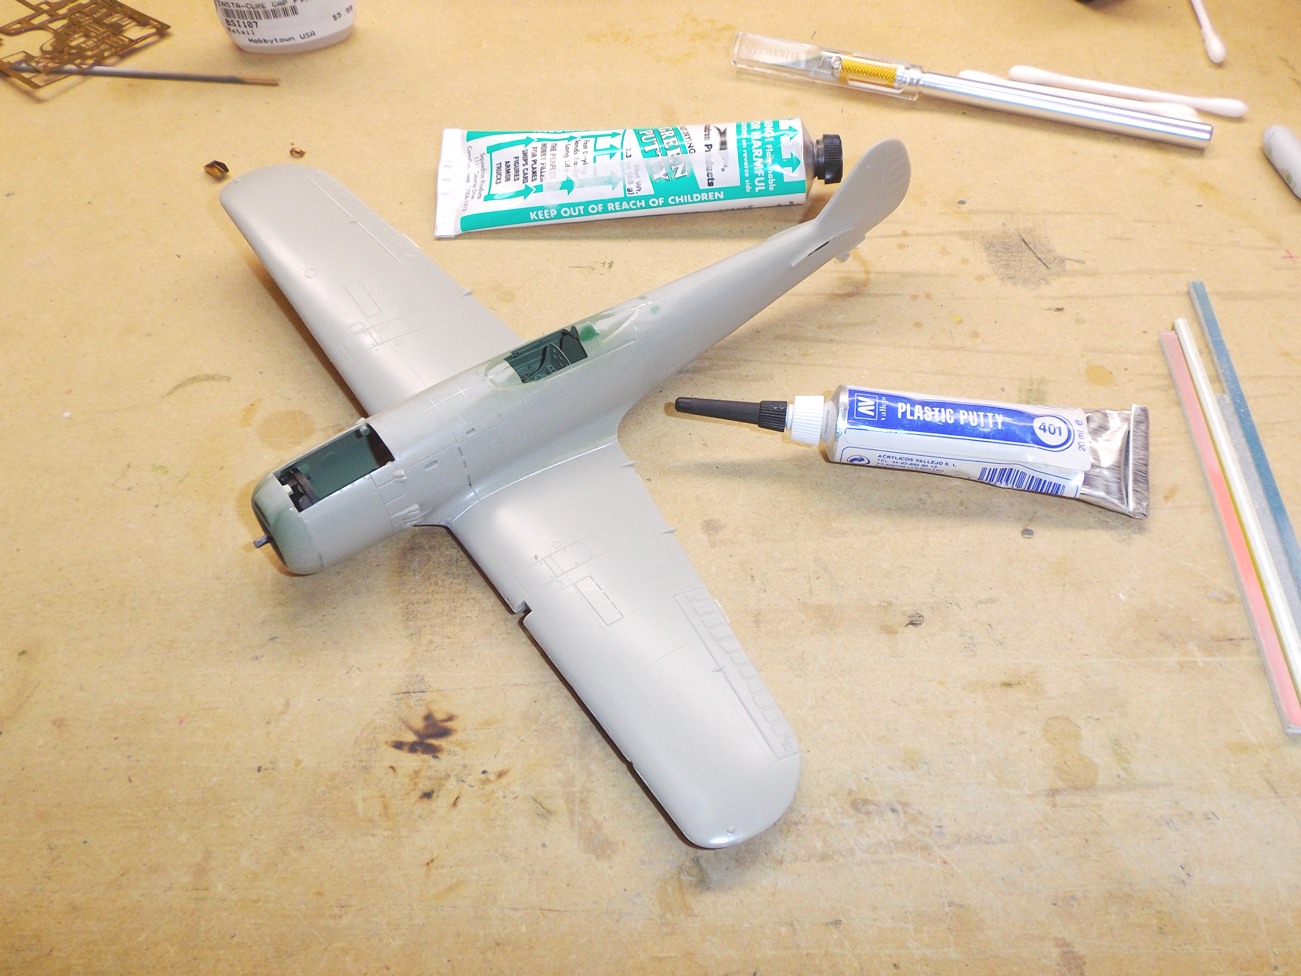
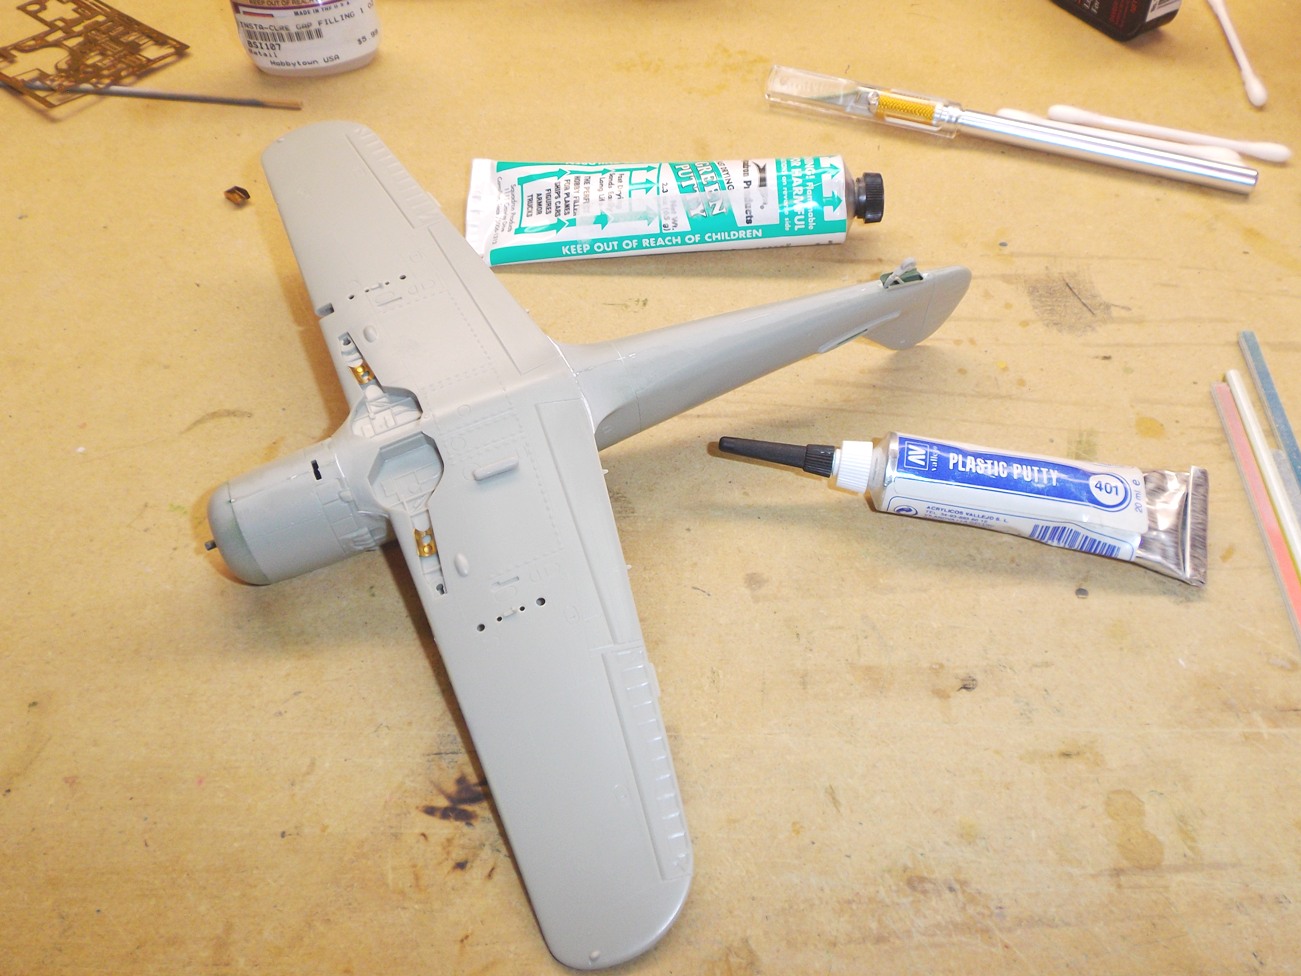
I'll add the tail "wings" today and work on the landing gear.
Mike