Twin Boom 2010 Official Campaign Thread
New Jersey, United States
Joined: May 28, 2009
KitMaker: 239 posts
AeroScale: 95 posts
Posted: Sunday, January 03, 2010 - 01:50 AM UTC
Quoted Text
There you have some great choices, Scott!  Olive Widows (though I prefer the black ones) with really colourful nose arts. How will you manage the clear nose? The Monogram kit has only solid black parts. Is there something in the aftermarket? Or do you paint it just white as it was used to through all the years?
Ciao
Torsten 
I'll probably paint it white... unless I can find what Damian posted.
I ordered the exterior detail set from Roll Models. Unfortunately they're shipping is S.L.O.W. so I won't have it for a few weeks.
But that'll give me time to finish my seaplane headache.
Alberta, Canada
Joined: January 19, 2008
KitMaker: 6,743 posts
AeroScale: 6,151 posts
Posted: Sunday, January 03, 2010 - 05:30 AM UTC
Sorry D , but I won't be signing up for this one after all . Way to much of other things in the pipe and on the bench for me to really commit to the GB . Two 32 scale kits sure take up a lot of work space on the bench !
I was planning on doing the same kit Justen has , but with a lot of scratchbuilding or Dragons P-61B 1/72 . Wonderful little kit , just a few gaps ever where . Good luck to all of you guy's on your builds !
European Union
Joined: August 09, 2009
KitMaker: 1,732 posts
AeroScale: 1,336 posts
Posted: Sunday, January 03, 2010 - 05:42 AM UTC
Actually I can't find a clear nose in that package you posted, Damian. It looks to me as if it contains just the canopy parts in resin but I've never seen these parts anywhere, so painting the nose white might be your only choice, Scott. Maybe one day Hasegawa gives us a new Black Widow (one can dream ....

) also with a clear nose ....
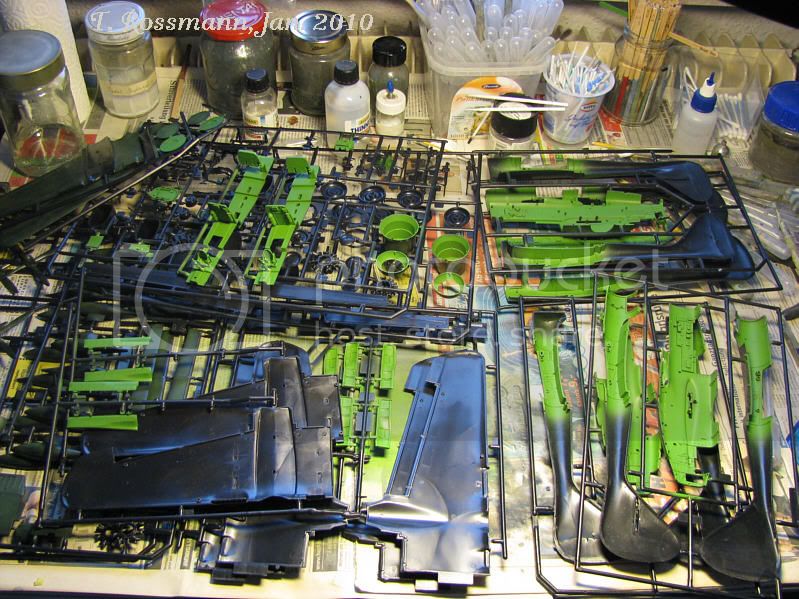
By the way, this is how my workbench looked this afternoon after some hours of airbrushing. Yes, it was an orgy!

Do you think it's a bit overcrowded? Both cockpits should be finished in the next days.
Happy modelling
Torsten
My campaigns for 2020:
MiGs - Done !
The Big Three - Done !
65 years Bundeswehr - Done !
40 years Leopard 2 - Done !
Land Lease - Done !
England - North East, United Kingdom
Joined: October 20, 2005
KitMaker: 1,045 posts
AeroScale: 622 posts
Posted: Sunday, January 03, 2010 - 06:35 AM UTC
Hope you don't mind a late sign up from me. Ive just this minute ordered my kit and I have gone for Academy's 1/72 P-38J lightning 'European Theater'. Its a sentimental kit for me as it was my first ever review kit I did when I started writing for the SAM Publications team (Dec '05 time flies when your having fun)I got it just before it hit the shelves. (Ive got better with reviews and features I now write for three mags)
The original review I did I finished as the 'Arkansas Traveller' this one I am going to do OOB (limited on time with other review kits

) and Im going to do this campaign one as the other option 'California Cutie' and I will be airbrushing all the invasion stripes on.
Hopefully will be able to get to work as soon as the kit arrives depending on how long Hannants take to post it and the set of resin engines Ive ordered for Tomcat's P-61 Black Widow for his twin boom campaign entry (see Im a very nice fiancé to him

)
Angel by day, Devil by night

#047
England - East Anglia, United Kingdom
Joined: September 13, 2005
KitMaker: 2,016 posts
AeroScale: 475 posts
Posted: Sunday, January 03, 2010 - 07:18 AM UTC
Hi Damian
I've gone for the Focke Wulf TL-Jäger "Flitzer",
I'll get started when it lands from Ebay
Andy
Major Caryle,
"Shall we have a go at the far end now,sir?"
Lt Colonel "Johnny" Frost,
"Having a go,is hardly text book terminology Harry"
Major Caryle,
"But you'll let us try sir?"
A Bridge Too Far
Lottery Campaign "Oh de Vichy"
#042
England - North East, United Kingdom
Joined: November 18, 2006
KitMaker: 2,828 posts
AeroScale: 1,720 posts
Posted: Sunday, January 03, 2010 - 07:48 AM UTC
Quoted Text
Hopefully will be able to get to work as soon as the kit arrives depending on how long Hannants take to post it and the set of resin engines Ive ordered for Tomcat's P-61 Black Widow for his twin boom campaign entry (see Im a very nice fiancé to him )
Ahh you do treat me well

Looks like I'm doing Dragon's 1/72 P-61B then
Modellers Creed: This is my toolbox. There are many like it, but this one is mine. My toolbox is my best friend. It is my life. I must master it as I must master my life. My toolbox, without me, is useless. Without my toolbox, I am useless.
AussieReg
 Associate Editor
#007
Victoria, Australia
Joined: June 09, 2009
KitMaker: 8,156 posts
AeroScale: 3,756 posts
Posted: Sunday, January 03, 2010 - 09:26 AM UTC
Hi Terri,
Quoted Text
Sorry D , but I won't be signing up for this one after all . Way to much of other things in the pipe and on the bench for me to really commit to the GB . Two 32 scale kits sure take up a lot of work space on the bench !
I was planning on doing the same kit Justen has , but with a lot of scratchbuilding or Dragons P-61B 1/72 . Wonderful little kit , just a few gaps ever where . Good luck to all of you guy's on your builds !
No problems at all. It's better to be honest with yourself and not get started than to over-commit and get nothing finished. Good luck with your other builds and just keep us in mind if you get some spare time later.
Cheers, D
ON the bench
Revell 1/24 '53 Corvette (building as '54)
Revell 1/24 BMW 507 Coupe and Cabrio
Italeri 1/48 Me262 B-1a/U1 Nightfighter
Monogram 1/24 '57 Chevy Nomad
Dragon 1/350 USS Frank Knox DD-742
AussieReg
Associate Editor #007
Victoria, Australia
Joined: June 09, 2009
KitMaker: 8,156 posts
AeroScale: 3,756 posts
Posted: Sunday, January 03, 2010 - 09:29 AM UTC
Hi Sam, never too late to join the party.
Quoted Text
Hope you don't mind a late sign up from me. Ive just this minute ordered my kit and I have gone for Academy's 1/72 P-38J lightning 'European Theater'.
Welcome aboard and good luck with your Lighning.
Andy, great choice and more diversity for the campaign.
Allen,
Quoted Text
Hopefully will be able to get to work as soon as the kit arrives depending on how long Hannants take to post it and the set of resin engines Ive ordered for Tomcat's P-61 Black Widow for his twin boom campaign entry (see Im a very nice fiancé to him )
She's a keeper mate !
Roll Call updated.
Cheers, D
ON the bench
Revell 1/24 '53 Corvette (building as '54)
Revell 1/24 BMW 507 Coupe and Cabrio
Italeri 1/48 Me262 B-1a/U1 Nightfighter
Monogram 1/24 '57 Chevy Nomad
Dragon 1/350 USS Frank Knox DD-742
North Carolina, United States
Joined: September 28, 2005
KitMaker: 347 posts
AeroScale: 179 posts
Posted: Sunday, January 03, 2010 - 09:32 AM UTC
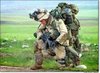
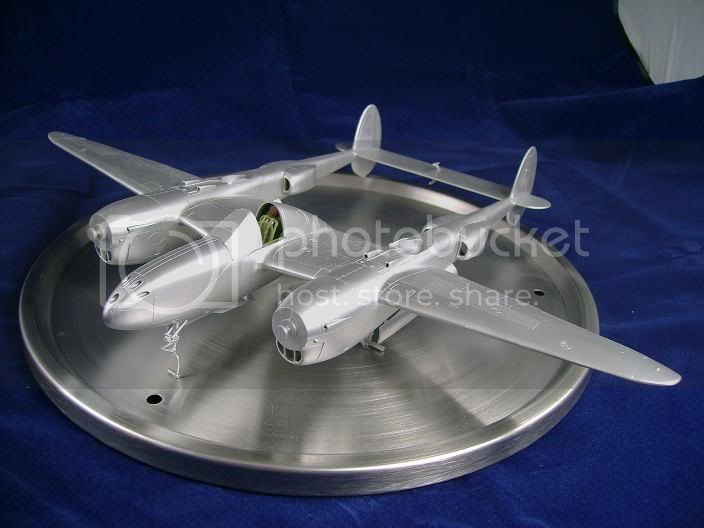
Here's the P-38 I'll be building. I dont think I'll be doing a lot of extra work mostly OOB I think.
On the workbench:
1/48 Spitfire Mk V & Mk VIII (Spitfire Campaign)
1/72 Challenger II (British Armor Campaign)
1/48 AH-64D Apache (CAS)
AussieReg
Associate Editor #007
Victoria, Australia
Joined: June 09, 2009
KitMaker: 8,156 posts
AeroScale: 3,756 posts
Posted: Sunday, January 03, 2010 - 09:56 AM UTC
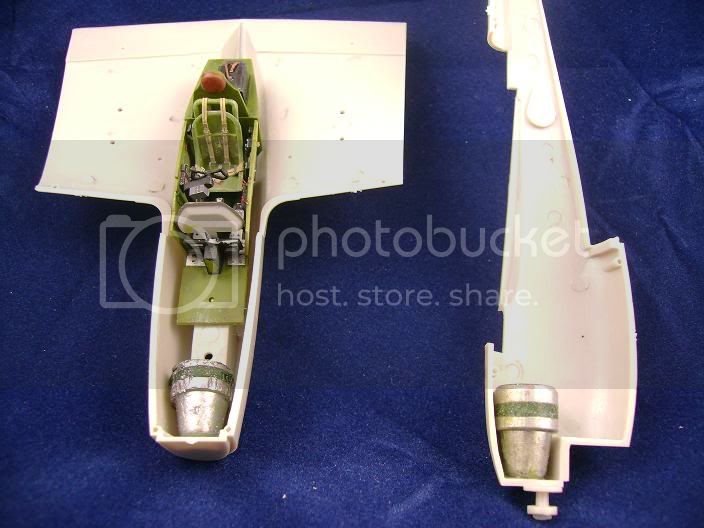
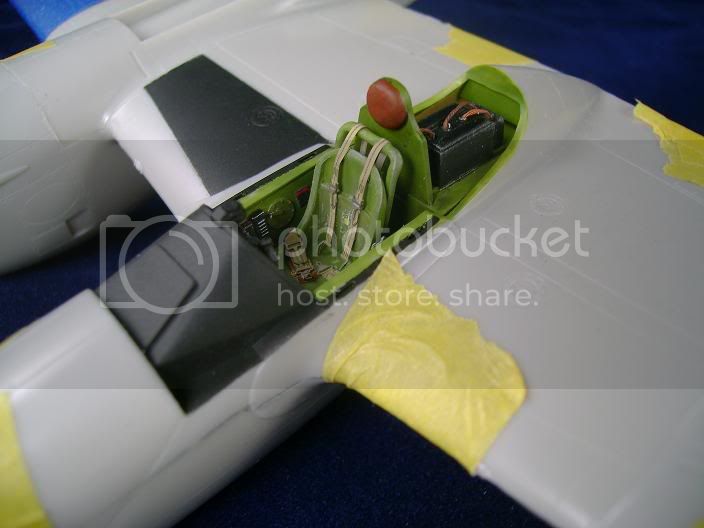
A quick update, some "Gizmology" to fill the void behing the rear seats.
Should have both cabins finished and wings on today.
Cheers, D
ON the bench
Revell 1/24 '53 Corvette (building as '54)
Revell 1/24 BMW 507 Coupe and Cabrio
Italeri 1/48 Me262 B-1a/U1 Nightfighter
Monogram 1/24 '57 Chevy Nomad
Dragon 1/350 USS Frank Knox DD-742
North Carolina, United States
Joined: November 28, 2005
KitMaker: 2,216 posts
AeroScale: 1,080 posts
Posted: Sunday, January 03, 2010 - 10:23 AM UTC
D, not trying to butt in but make sure you add some weight to the nose before you button her up.
Looks great BTW!
Hermon

"Those who would give up Essential Liberty
to purchase a little Temporary Safety,
deserve neither Liberty nor Safety."
Benjamin Franklin
Florida, United States
Joined: January 14, 2009
KitMaker: 2,798 posts
AeroScale: 2,443 posts
Posted: Sunday, January 03, 2010 - 11:22 AM UTC
Nice work D big improvement.....
Build On,
Justin
"From time to time, the tree of liberty must be watered with the blood of
tyrants and patriots."
- Thomas Jefferson
IPMS#47611
Florida, United States
Joined: January 14, 2009
KitMaker: 2,798 posts
AeroScale: 2,443 posts
Posted: Sunday, January 03, 2010 - 12:45 PM UTC
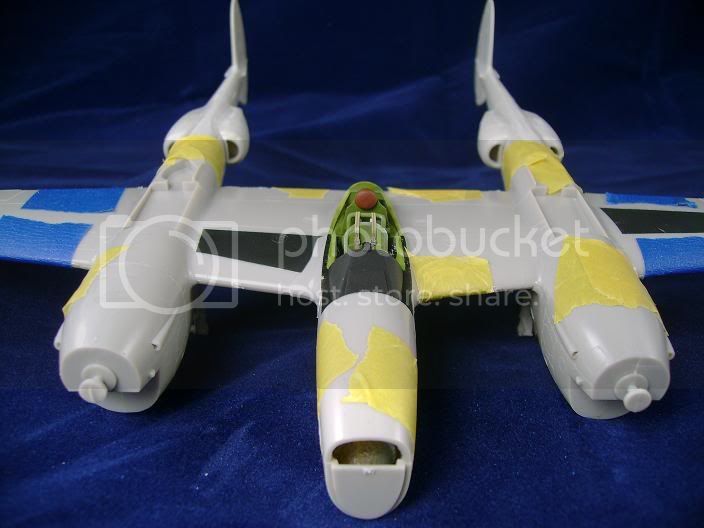
So progress for the day...I started by installing .45's in the nose and engine cowlings to add weight and get it to sit right....
I then assembled the engine booms and fuselage together and tried pre-shading a few panels for the first time will see how it turns out......

Build On,
Justin
"From time to time, the tree of liberty must be watered with the blood of
tyrants and patriots."
- Thomas Jefferson
IPMS#47611
AussieReg
Associate Editor #007
Victoria, Australia
Joined: June 09, 2009
KitMaker: 8,156 posts
AeroScale: 3,756 posts
Posted: Sunday, January 03, 2010 - 07:15 PM UTC
Hermon, thanks for the heads-up
Quoted Text
D, not trying to butt in but make sure you add some weight to the nose before you button her up.
Looks great BTW!
Hermon
I just caught that one in time
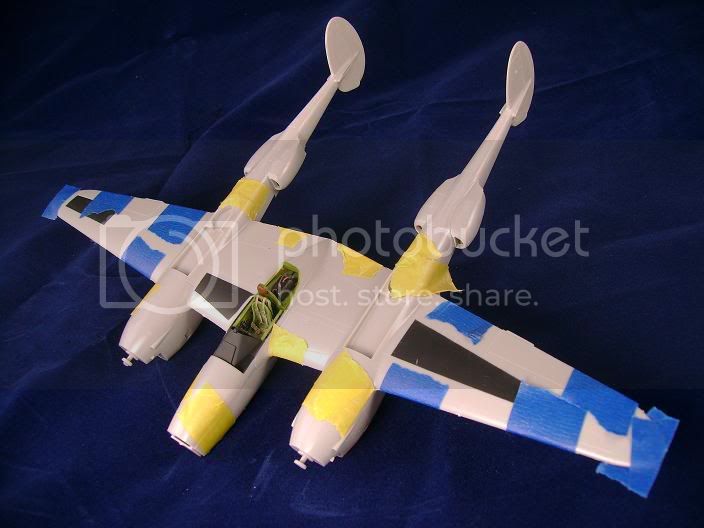
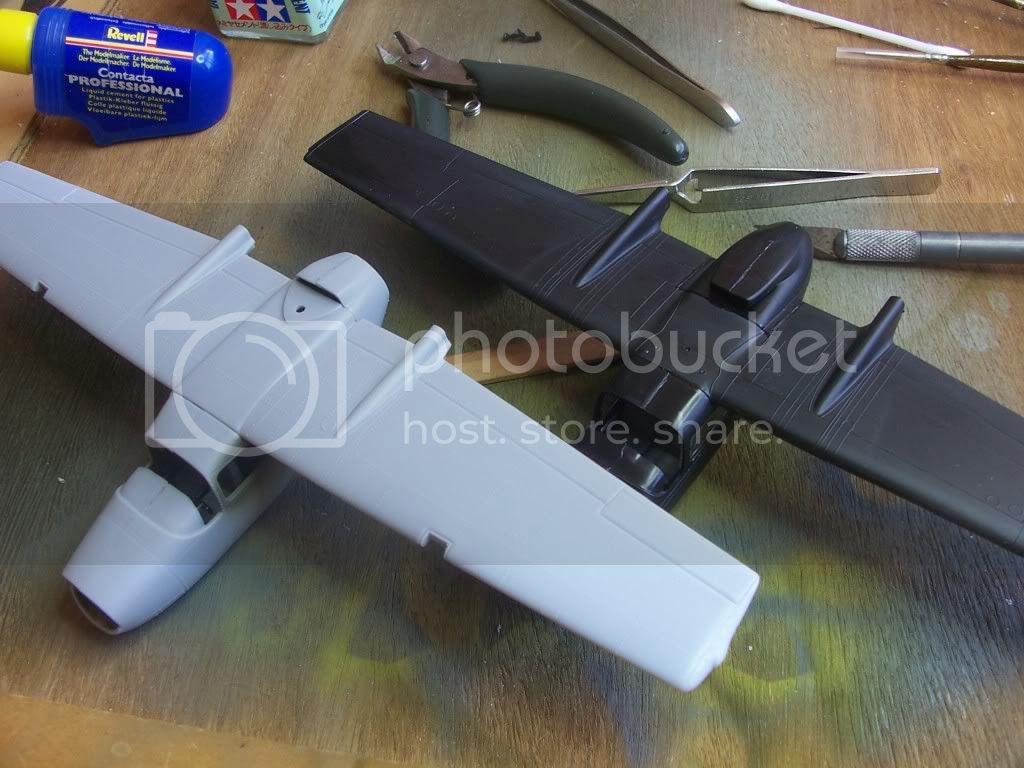
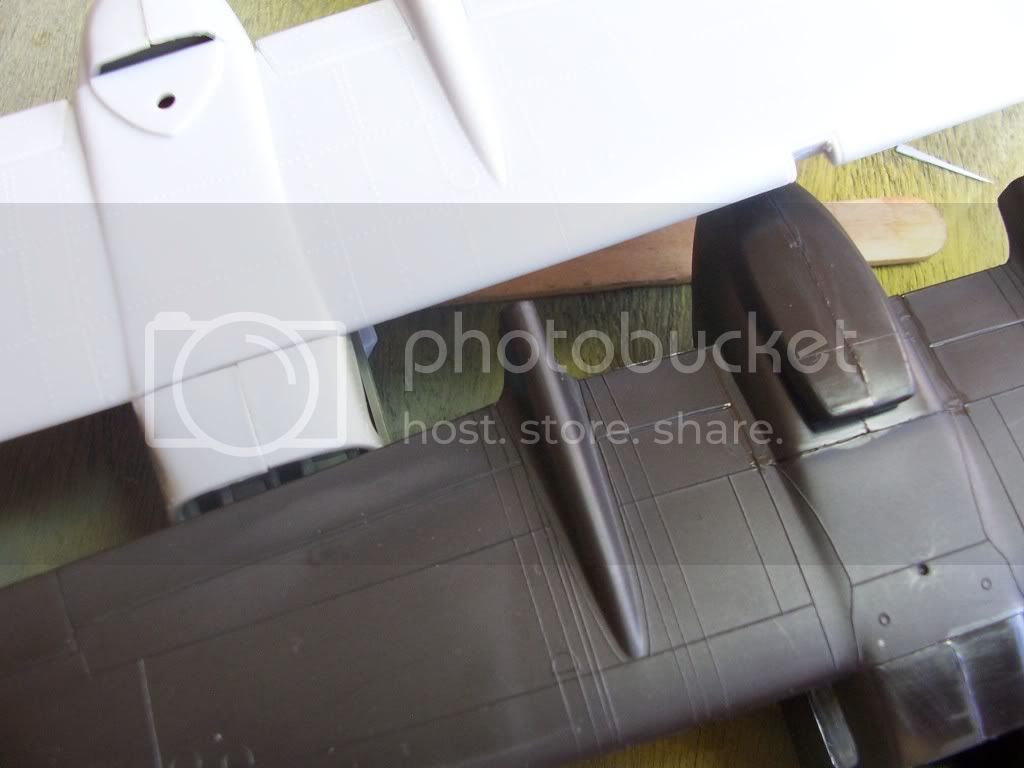
Little update, got both cabins closed up and main wings on. You were right about the Testors kit. I ran a bead of thin CA into that front gap to reduce the amount of filler required. The Heller was a much better fit, no real gap to speak of, just a small seamline.
Cheers, D
ON the bench
Revell 1/24 '53 Corvette (building as '54)
Revell 1/24 BMW 507 Coupe and Cabrio
Italeri 1/48 Me262 B-1a/U1 Nightfighter
Monogram 1/24 '57 Chevy Nomad
Dragon 1/350 USS Frank Knox DD-742
European Union
Joined: August 09, 2009
KitMaker: 1,732 posts
AeroScale: 1,336 posts
Posted: Monday, January 04, 2010 - 08:54 AM UTC
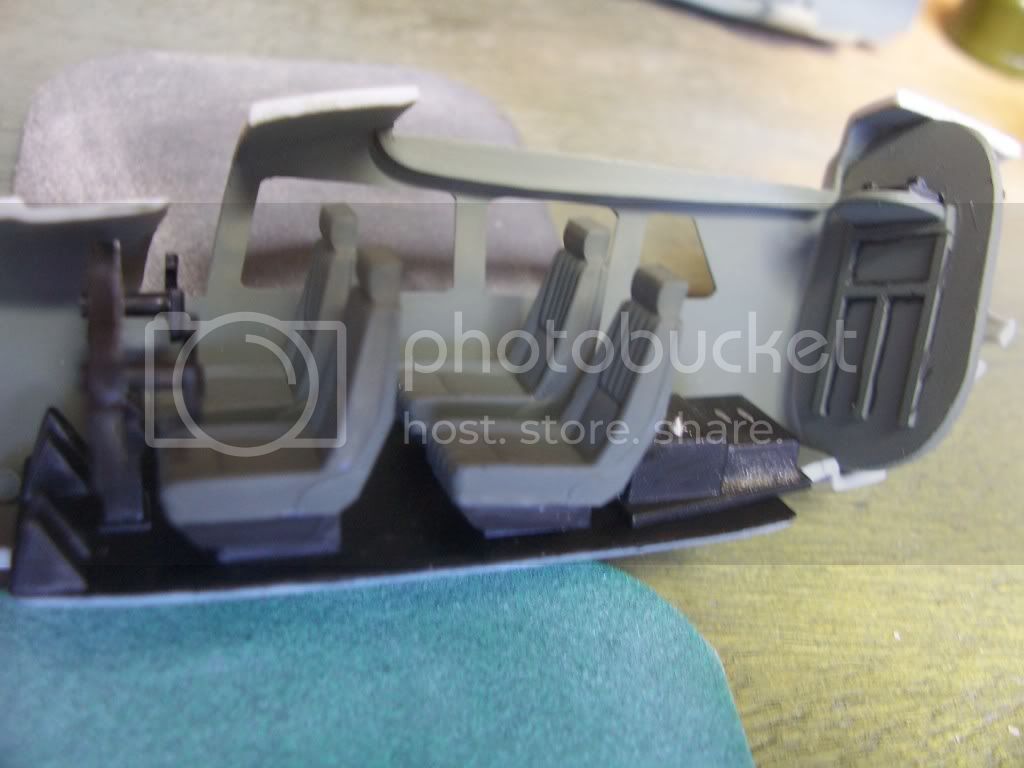
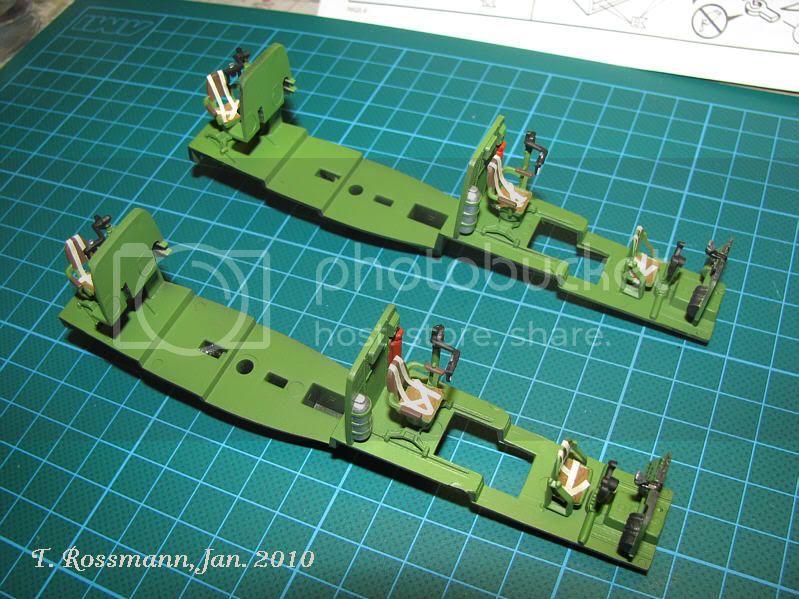
Some little process from me. I just finished the cockpits of my nocturnal ladys. Six seats with cushions made of toilet paper and 24 seat belts
made of crepe paper. This will probably be my only extras on the builds. Tomorrow I will have a closer look on the rest of the interior. So far no problems ....
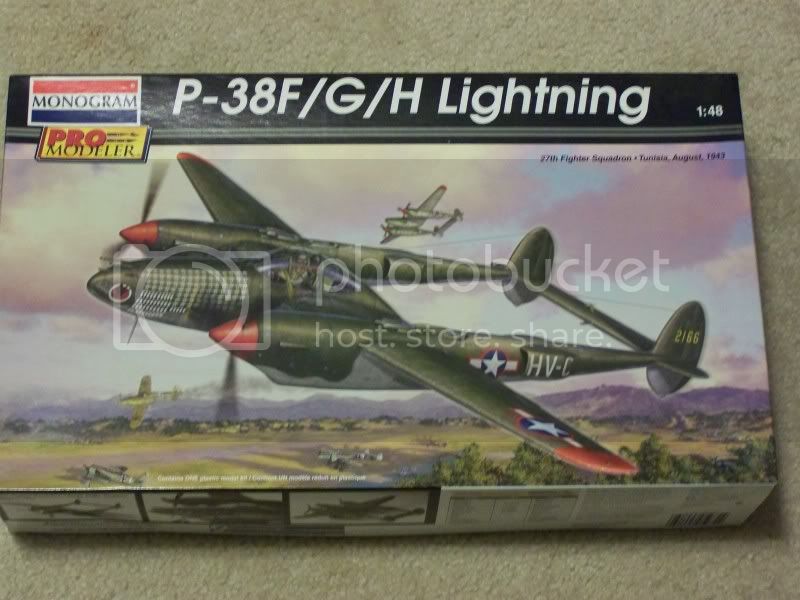
By the way, what kit is your P-38, Justin?
Happy modelling!
Torsten
My campaigns for 2020:
MiGs - Done !
The Big Three - Done !
65 years Bundeswehr - Done !
40 years Leopard 2 - Done !
Land Lease - Done !
AussieReg
Associate Editor #007
Victoria, Australia
Joined: June 09, 2009
KitMaker: 8,156 posts
AeroScale: 3,756 posts
Posted: Monday, January 04, 2010 - 09:25 AM UTC
Nice work Torsten, can you give me some more detail on how you do your cushions? I would like to use that idea on my P-61's
Quoted Text
Some little process from me. I just finished the cockpits of my nocturnal ladys. Six seats with cushions made of toilet paper and 24 seat belts made of crepe paper. This will probably be my only extras on the builds. Tomorrow I will have a closer look on the rest of the interior. So far no problems ....
By the way, what kit is your P-38, Justin?
Also, I have tried to put as much detail as possible in the Roll Call, the first post of this thread, so that it is easy to see which kits are being built. I will keep this updated as much as possible. Justin is doing the 1/48 Hasegawa kit.
Cheers, D
ON the bench
Revell 1/24 '53 Corvette (building as '54)
Revell 1/24 BMW 507 Coupe and Cabrio
Italeri 1/48 Me262 B-1a/U1 Nightfighter
Monogram 1/24 '57 Chevy Nomad
Dragon 1/350 USS Frank Knox DD-742
Florida, United States
Joined: January 14, 2009
KitMaker: 2,798 posts
AeroScale: 2,443 posts
Posted: Monday, January 04, 2010 - 04:16 PM UTC
correct D.I am also interested in this tissue cushions idea think you can get some close ups plz?
Got some work done today nothing exciting sanding of seams.got new desk today to reclaim my man cave so i spent most of my time putting that together HAVE TO MOVE EVERYTHING FROM KITCHEN TABLE

I will post some pics tomorrow.
Build On,
Justin
"From time to time, the tree of liberty must be watered with the blood of
tyrants and patriots."
- Thomas Jefferson
IPMS#47611
European Union
Joined: August 09, 2009
KitMaker: 1,732 posts
AeroScale: 1,336 posts
Posted: Tuesday, January 05, 2010 - 09:47 AM UTC
Quoted Text
Nice work Torsten, can you give me some more detail on how you do your cushions? I would like to use that idea on my P-61's
Cheers, D
Oh, that's very easy to do. Just take a bowl of water, pour a little bit (but only a little bit!) of furniture glue (e.g. Ponal) into it and stir it well until it looks like milk. Then take a small piece of toilet paper of about the size of the seat, fold it as thick as you like, put it in the water/glue mix until it's completly wet and fix it to the seat. Let it dry overnight. The next day it is dry and sticks to the seat. Now you can paint it in the colour you like. That's all
BTW: You can use it also for other aircarfts, I guess british, japanese and german pilots also wouldn't mind to have a cosy cushion at their workplace - and Aussies too
Happy modelling
Torsten
My campaigns for 2020:
MiGs - Done !
The Big Three - Done !
65 years Bundeswehr - Done !
40 years Leopard 2 - Done !
Land Lease - Done !
Florida, United States
Joined: January 14, 2009
KitMaker: 2,798 posts
AeroScale: 2,443 posts
Posted: Wednesday, January 06, 2010 - 01:27 PM UTC
This is where I sit.sprayed with testors aluminum metalizer.firt time use for me and I used my new airbrush first time LOVE IT!Here you go will spray with future soon then it should be smooth sailing from there.Oh just a word of advice make shure your model has no imperfections when you spray metalizer it shows everything
.......
Build On,
Justin
"From time to time, the tree of liberty must be watered with the blood of
tyrants and patriots."
- Thomas Jefferson
IPMS#47611
AussieReg
Associate Editor #007
Victoria, Australia
Joined: June 09, 2009
KitMaker: 8,156 posts
AeroScale: 3,756 posts
Posted: Wednesday, January 06, 2010 - 01:37 PM UTC
Justin your Lightning is looking great. Man you really burn through these builds sometimes, all I have done for the last few days is a bit of filling and sanding, nothing to show really in the way of progress.
Keep it up mate, D
ON the bench
Revell 1/24 '53 Corvette (building as '54)
Revell 1/24 BMW 507 Coupe and Cabrio
Italeri 1/48 Me262 B-1a/U1 Nightfighter
Monogram 1/24 '57 Chevy Nomad
Dragon 1/350 USS Frank Knox DD-742
Florida, United States
Joined: January 14, 2009
KitMaker: 2,798 posts
AeroScale: 2,443 posts
Posted: Wednesday, January 06, 2010 - 02:03 PM UTC
Yeah I know D trying to keep up with my campaigns had three start at the same time.I want to be done before my PIN-UPS campaign starts.Still have P-38 for ACES HIGH and thinking of a 1/48th B-1B for BOMBERS campaign
Hope I can keep up have more campaigns coming after that...
Everybody keeps coming up with awesome campaign ideas how can i refuse.Really waiting on the Zombie campaign to start.
Build On,
Justin
"From time to time, the tree of liberty must be watered with the blood of
tyrants and patriots."
- Thomas Jefferson
IPMS#47611
European Union
Joined: August 09, 2009
KitMaker: 1,732 posts
AeroScale: 1,336 posts
Posted: Thursday, January 07, 2010 - 08:10 AM UTC
Your Lightning looks cool so far, Justin!

Here's some more process from my workbench. Today I could do some work on the fuselages to make them look bit more like an aircraft ....
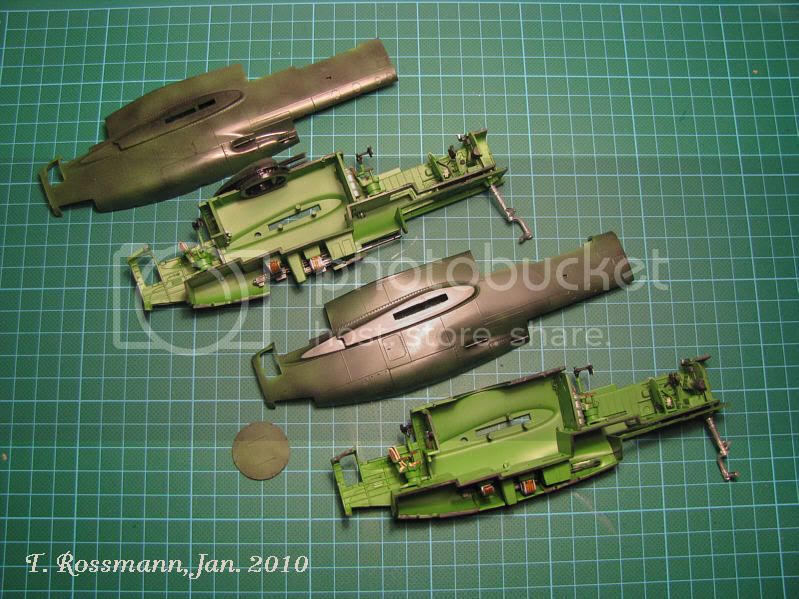
Here's the interior already glued into the left half. Already now yo can see some differences between both aircrafts. Top is "The Spook", below "Lady Gen" ....
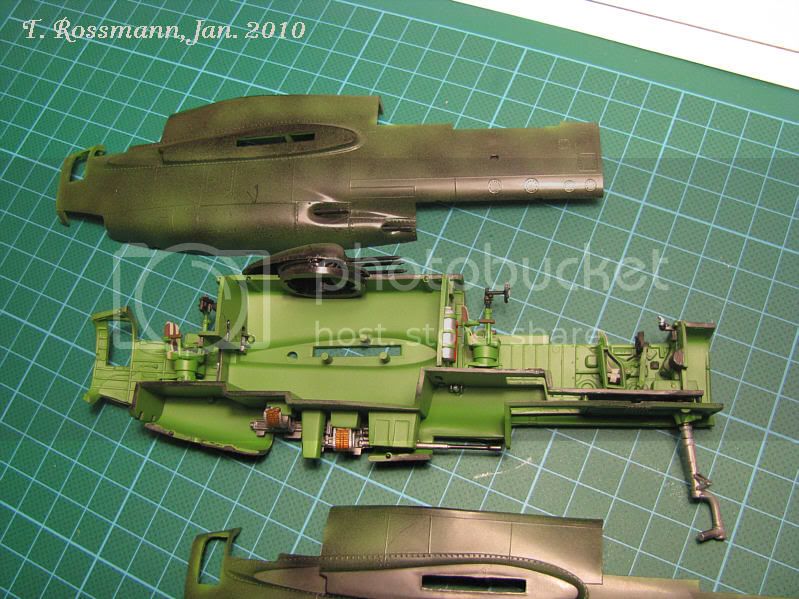
.... a closer look at "The Spook" with the top turret ....
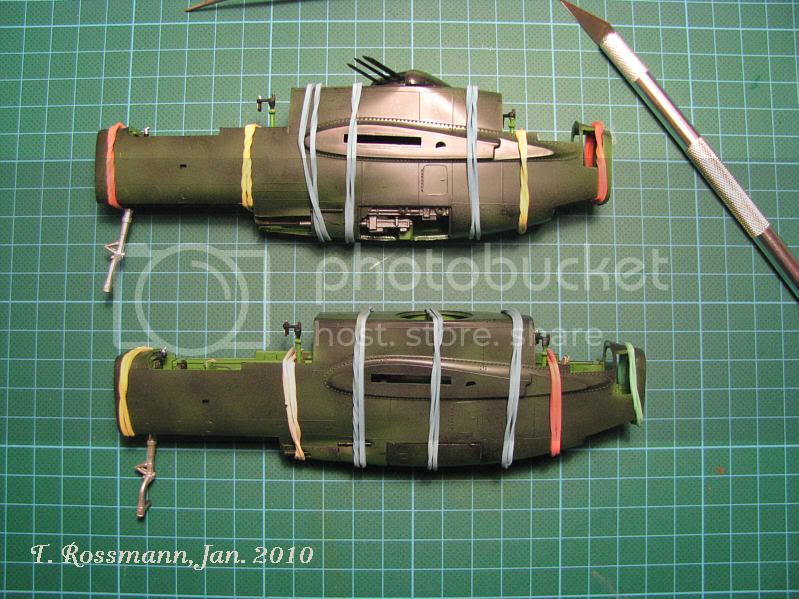
.... both fuselages are glued together now. Top is again "The Spook", below "Lady Gen" where I have closed the gun bays. The parts fit quite well, concerning that the kit was made when I was 10 years old. Looks a bit like spider bodies, don't they? No problems so far. In the next few days I will sand the seams.
Happy modelling
Tosten
My campaigns for 2020:
MiGs - Done !
The Big Three - Done !
65 years Bundeswehr - Done !
40 years Leopard 2 - Done !
Land Lease - Done !
Texas, United States
Joined: January 30, 2006
KitMaker: 1,954 posts
AeroScale: 1,163 posts
Posted: Thursday, January 07, 2010 - 08:22 AM UTC
I started on my Classic Airframes 1/48 scale Vampire Mk. 5.
got the basics of the kit's resin cockpit in:

I decided i did not like the kit exhaust tube - it is made of two pieces of plastic, winds up being out of round when assembled and sanded, and is far too thick. I will replace it with thin brass tubing. Here i have added a small section of the next larger size brass tubing to the rear bulkhead to act as an anchor for when i eventually put in the one i cut for the exhaust:

North Carolina, United States
Joined: November 28, 2005
KitMaker: 2,216 posts
AeroScale: 1,080 posts
Posted: Thursday, January 07, 2010 - 02:39 PM UTC
I'm slow but I'm still in the race.
Lot of filling and sanding on my Testers kit. So far I've lost quite a bit of the raised rivets but I'm hopeing the 3 color paint scheme will hide most of it.

Hermon
"Those who would give up Essential Liberty
to purchase a little Temporary Safety,
deserve neither Liberty nor Safety."
Benjamin Franklin
AussieReg
Associate Editor #007
Victoria, Australia
Joined: June 09, 2009
KitMaker: 8,156 posts
AeroScale: 3,756 posts
Posted: Thursday, January 07, 2010 - 02:51 PM UTC
G'day Hermon,
Man, we've just got going and there's 7-1/2 months left, what's with this SLOW business ??
Your O-2A is looking good. I put about 2 pounds of lead in the nose of mine but I think I'm gunna end up with a tail-sitter
Got some more filling and sanding done and added some more bits to both of mine, photo's a bit later.
Torsten, your Widows are looking real nice also. Keep those pics coming. Is that overspray or a deliberate mist coat of Interior Green on the outside of the fuselages ??
Vance, great idea with the brass tube, that will look great once it goes together.
Cheers all, and thanks for posting,
Your Illustrious Leader, D
ON the bench
Revell 1/24 '53 Corvette (building as '54)
Revell 1/24 BMW 507 Coupe and Cabrio
Italeri 1/48 Me262 B-1a/U1 Nightfighter
Monogram 1/24 '57 Chevy Nomad
Dragon 1/350 USS Frank Knox DD-742