

Apply sticky masking tape to the affected area and slowly peel off. Hopefully the masking stuff will come off as well. Or else, apply the micromask again except a bit thicker this time and it may get it off.
Good luck Sir!
Air Campaigns
Want to start or join a group build? This is where to start.
Want to start or join a group build? This is where to start.
Hosted by Frederick Boucher, Michael Satin
OFFICIAL: Hangar Queen III Campaign

warreni

Joined: August 14, 2007
KitMaker: 5,926 posts
AeroScale: 2,201 posts

Posted: Monday, April 22, 2013 - 02:39 PM UTC

Bigrip74

Joined: February 22, 2008
KitMaker: 5,026 posts
AeroScale: 2,811 posts

Posted: Tuesday, April 23, 2013 - 04:05 AM UTC
@ Warren: thanks for the information, it worked great on a little project of mine.
Bob
Bob
raypalmer

Joined: March 29, 2010
KitMaker: 1,151 posts
AeroScale: 985 posts

Posted: Tuesday, April 23, 2013 - 02:27 PM UTC
Okay I didn't mean to but I've totally repainted it now. So many layers it must be approaching 1/32 now. This is my very first mottling attempt. It's serviceable, but something's off. Just can't quite put my finger on it. Onward and upward, I may be able to decal it tomorrow!


Bigrip74
Joined: February 22, 2008
KitMaker: 5,026 posts
AeroScale: 2,811 posts
Posted: Wednesday, April 24, 2013 - 04:00 AM UTC
Richard, don't you just love those "I did not mean its" that turn out great. Your paint job looks really fine, keep up the great work.
Bob
Bob

woltersk
Joined: May 27, 2003
KitMaker: 1,026 posts
AeroScale: 215 posts
Posted: Saturday, April 27, 2013 - 04:25 PM UTC
I'm in with my HQII leftover 1/32 F-16A, and possibly two 1/48s: an Albatross DIII and an He178.


Keith
Keith

raypalmer
Joined: March 29, 2010
KitMaker: 1,151 posts
AeroScale: 985 posts
Posted: Sunday, April 28, 2013 - 01:41 PM UTC
Decalsss...
I had a paint coming free on the tail so I applied a nice coat of testors glosscote. Then I decaled, then I futured on the glosscote. But the future looks a bit sweaty and seems to be drying oddly.
Did I done a bad???


I had a paint coming free on the tail so I applied a nice coat of testors glosscote. Then I decaled, then I futured on the glosscote. But the future looks a bit sweaty and seems to be drying oddly.
Did I done a bad???

Jessie_C

Joined: September 03, 2009
KitMaker: 6,965 posts
AeroScale: 6,247 posts
Posted: Sunday, April 28, 2013 - 02:06 PM UTC
If you did you can use Windex to take the Future off and try again.

North4003

Joined: August 01, 2012
KitMaker: 960 posts
AeroScale: 391 posts
Posted: Monday, April 29, 2013 - 08:32 AM UTC
Quoted Text
If you did you can use Windex to take the Future off and try again.
That's what I like about this forum, one learn so much.
raypalmer
Joined: March 29, 2010
KitMaker: 1,151 posts
AeroScale: 985 posts
Posted: Monday, April 29, 2013 - 02:17 PM UTC
Quoted Text
I tried that. On a test mule. I can't get results. I have to be ginger because the decals are unprotected under the future and because this model has peeled more than its fair share of paint. If you did you can use Windex to take the Future off and try again.
It's a bit orange peel ish, I'm just going to spray another coat or two to level it out.
I don't know why but I never get results with future. I think I might just switch to microgloss and be done with it.
I have the undercarriage and payload racks on now. Nearing the finish line.
Bigrip74
Joined: February 22, 2008
KitMaker: 5,026 posts
AeroScale: 2,811 posts
Posted: Monday, April 29, 2013 - 10:07 PM UTC
I have added some straight ammonia to my windex to give it a little more strength, just put a teaspoon at a time to the bottle of windex until it does the trick.

windysean
Joined: September 11, 2009
KitMaker: 1,917 posts
AeroScale: 563 posts
Posted: Tuesday, April 30, 2013 - 01:20 AM UTC
Does orange peel indicate that one of the earlier coats wasn't fully cured before a later coat went on? Or is the "orange peel ish" not the same as the sommon spray paint problem? I imagine the problem is difficult to photograph for discussion, being more of a fine texture thing and not a color or shape that shows up well in photos.
thanks for posting,
Sean H.
thanks for posting,
Sean H.

GaryKato
Joined: December 06, 2004
KitMaker: 3,694 posts
AeroScale: 163 posts

Posted: Wednesday, May 08, 2013 - 07:30 PM UTC
I've been doing a bit on my entry (or maybe entries). I sanded off the knockout marks on the B-52 main gear doors. I have been playing around with painting areas Gloss White with little success. I searched Aeroscale on tips and have started priming the parts with Flat Light Gray (which seems to be coating better). After this I might put a coat of Flat White and then a coat of Gloss White.
I have been experimenting mostly on the Dragon 1/200 B-2/F-117A kit so I might get these done for this campaign as well. Unfortunately I forgot to any weight in the F-117 nose so it's a tail sitter.
Here is the B-2/F-117A kit before I started experimenting.

I have been experimenting mostly on the Dragon 1/200 B-2/F-117A kit so I might get these done for this campaign as well. Unfortunately I forgot to any weight in the F-117 nose so it's a tail sitter.
Here is the B-2/F-117A kit before I started experimenting.
windysean
Joined: September 11, 2009
KitMaker: 1,917 posts
AeroScale: 563 posts
Posted: Thursday, May 09, 2013 - 01:03 AM UTC
Great to hear your progress, Gary! Yes, I've learned to use primer on everything. I use generic spray can primer, but I've read good things here about Tamiya's primers too.
-Sean
-Sean
Bigrip74
Joined: February 22, 2008
KitMaker: 5,026 posts
AeroScale: 2,811 posts
Posted: Thursday, May 09, 2013 - 02:05 AM UTC
@ Sean: is it the paint drying before it reaches the surface? If so a little retarder may help.
@ Gary: I have found that the old Foguil primer does stick to plastic forming a surface that any paint will adere to.
Bob
@ Gary: I have found that the old Foguil primer does stick to plastic forming a surface that any paint will adere to.
Bob

Cam

#275
Joined: March 01, 2006
KitMaker: 174 posts
AeroScale: 19 posts

Posted: Thursday, May 09, 2013 - 04:19 PM UTC
I'm in with eduards Mirage III
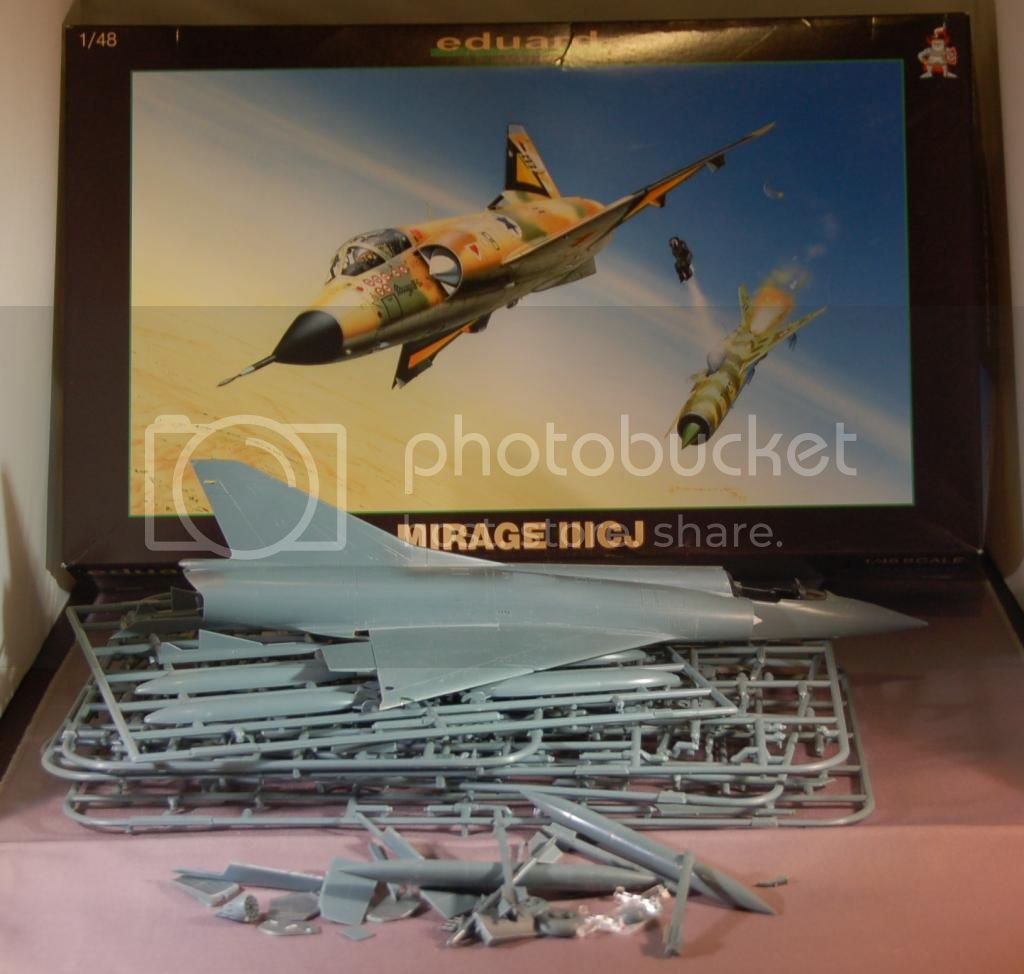
Hopefully that will get one more box out of the hobby room

Hopefully that will get one more box out of the hobby room

amegan
#243

Joined: March 21, 2008
KitMaker: 996 posts
AeroScale: 915 posts

Posted: Thursday, May 09, 2013 - 07:04 PM UTC
Ier will enlist with either a 1/144 Hastings, or a ex-Hangar Queen Eduard Camel in 1/48 or a Revell 1/48 C-47 that has been kicking around for years

vdejarnette
Joined: February 25, 2013
KitMaker: 209 posts
AeroScale: 138 posts
Posted: Friday, May 10, 2013 - 01:27 AM UTC
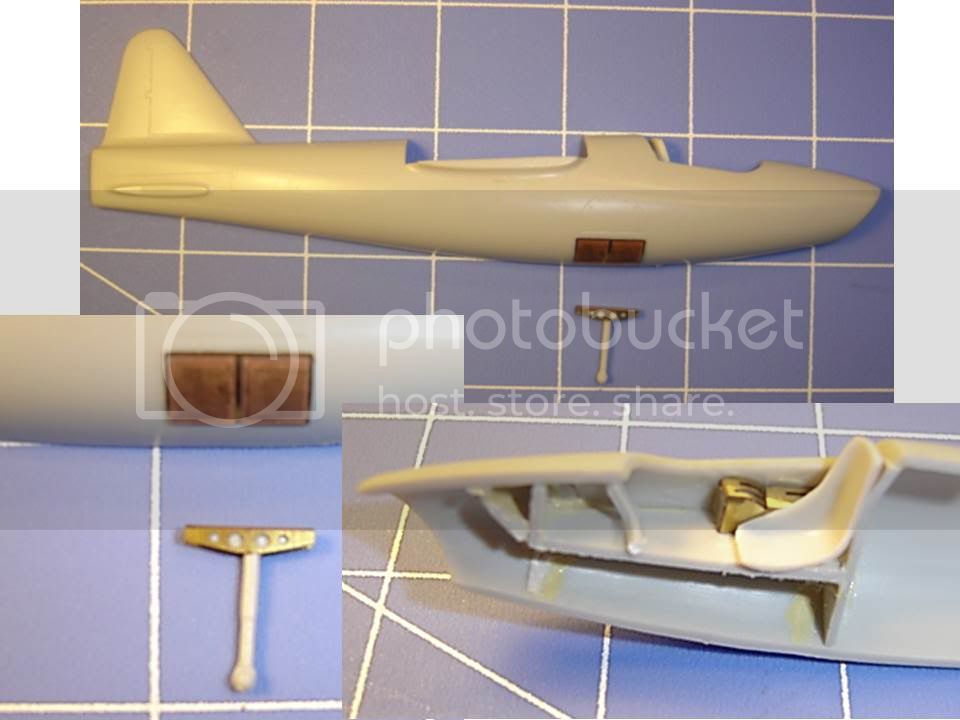
My entry for this campaign, it's been getting a bit of attention about once a month or so.

Why is this little thing stuck in the hanger? It has tricycle landing gear and is a guaranteed tailsitter... the main issue is that the plane is so thin in profile and the nose is so narrow that I am going to have to get seriously creative with getting weight in the front of the aircraft. Right now I am leaning towards epoxy and few nickels or dimes. It is a light model so I don't think too many should be required.
I have also had to box in the cockpit and jet intakes so that you can't see right through them, which is still an ongoing process.
Bigrip74
Joined: February 22, 2008
KitMaker: 5,026 posts
AeroScale: 2,811 posts
Posted: Friday, May 10, 2013 - 02:06 AM UTC
Welcome aboard CAM, Andrew, and Van. It is nice to see everyone try to finish off some of those QUEENS.
@ Cam: I had come close purchasing that kit several times, but talked myself out of it at the last moment, how is the fit? Yours looks good so far.
@ Andrew: Hello again and I know that if you are not that busy with other campaigns or projects then maybe you can build all of those mentiioned to clear your work bench.
@ Van: Interesting subject that you have there, tell us how the kit stacks up and neat tip on the cockpit.
Bob
vdejarnette
Joined: February 25, 2013
KitMaker: 209 posts
AeroScale: 138 posts
Posted: Friday, May 10, 2013 - 02:22 AM UTC
The kit is very cleanly molded for a PM model kit (If you have built their other kits they can sometimes be a disaster). The biggest problem is that it is terribly terribly basic. As I said if I had not added the pieces of scratch styrene shown in the picture you would be able to see from one intake to the other and also straight into the cockpit from the jet intakes.
warreni
Joined: August 14, 2007
KitMaker: 5,926 posts
AeroScale: 2,201 posts
Posted: Friday, May 10, 2013 - 02:38 AM UTC
Quoted Text
Great to hear your progress, Gary! Yes, I've learned to use primer on everything. I use generic spray can primer, but I've read good things here about Tamiya's primers too.
-Sean
And strangely, I never prime my models and have never had a problem. Maybe I have been lucky so far.
Cam
#275
Joined: March 01, 2006
KitMaker: 174 posts
AeroScale: 19 posts
Posted: Friday, May 10, 2013 - 02:55 AM UTC
Bob the eduard kit goes together like a dream. My biggest reasons for not finishing the kit were my mistakes in building it. As an armour modeller I don't have to worry about things like the stores pylons not going on until after those beautiful decals for example.That and having to pack and move 500 miles relegated the kit to the "in progress" pile.
GaryKato
Joined: December 06, 2004
KitMaker: 3,694 posts
AeroScale: 163 posts
Posted: Friday, May 10, 2013 - 05:42 AM UTC
Quoted Text
Quoted TextGreat to hear your progress, Gary! Yes, I've learned to use primer on everything. I use generic spray can primer, but I've read good things here about Tamiya's primers too.
-Sean
And strangely, I never prime my models and have never had a problem. Maybe I have been lucky so far.
I never have either but most of the kits I've painted were a dark color (Panzer Grey or Olive Drab). I am also hand painting these small areas.
Bigrip74
Joined: February 22, 2008
KitMaker: 5,026 posts
AeroScale: 2,811 posts
Posted: Friday, May 10, 2013 - 05:54 AM UTC
quote ( That and having to pack and move 500 miles relegated the kit to the "in progress" pile. )
I can relate to that problem Cam, I am still unpacking after a year.
Bob
I can relate to that problem Cam, I am still unpacking after a year.
Bob

29Foxtrot
Joined: September 19, 2003
KitMaker: 708 posts
AeroScale: 674 posts
Posted: Tuesday, May 14, 2013 - 07:51 AM UTC
Hi All,
Having returned from my Overseas sojourn and seeing a few interesting subjects being added to the campaign, I'll get back to the RAAF F 111
Having returned from my Overseas sojourn and seeing a few interesting subjects being added to the campaign, I'll get back to the RAAF F 111

 |

WEB HOSTING BY


Copyright ©2021 AeroScale and Kitmaker Network, a subsidiary of Silver Star Enterprises
All Rights Reserved. Please read our Conditions of Use and Privacy Policy.
All Rights Reserved. Please read our Conditions of Use and Privacy Policy.