Thanks for the suggestions guys, I have done this before but with Tamiya tape which I had no problems with. May original plan was to mask without wings and tail and that may have worked better. It will have to be stripped then I am thinking of making it Lowenherz' machine with an all yellow fuselage and lozenge wings, the kit markings are correct for that and Lowenherz appears to have been a bit of a character. He was killed when his parachute failed to open following a combat collision with one of his own aircraft. He was commander of JG10 and was the second pilot to achieve 50 victories after Manfred v. Richtofen.
btw I have some pinstriping tape that looks better quality than the stuff I used but it is too wide to give the correct spacing. I is probable that I rushed this a bit and missed some of the edges, I know that using Tamiya tape has made me a bit complacent. Thanks again for the tips
Air Campaigns
Want to start or join a group build? This is where to start.
Want to start or join a group build? This is where to start.
Hosted by Frederick Boucher, Michael Satin
OFFICIAL: Fighters! Campaign Thread
Posted: Wednesday, September 05, 2012 - 10:51 AM UTC
Blueheeler

Joined: March 18, 2008
KitMaker: 347 posts
AeroScale: 223 posts

Posted: Wednesday, September 05, 2012 - 10:58 PM UTC
Finally completed a campaign!! Academy 1/72 F/A-18A with the kits decals being used.


Cheers,
Nick.


Cheers,
Nick.


Siderius

Joined: September 20, 2005
KitMaker: 1,747 posts
AeroScale: 1,673 posts

Posted: Thursday, September 06, 2012 - 09:36 AM UTC
Nick, good looking Hornet there. Is it in Australian markings, at least I think I see the Australian flag on the vertical stabilizers? Do they not use the Kangaroo's anymore on the Aussie birds? Just curious. Russell

Jessie_C


Joined: September 03, 2009
KitMaker: 6,965 posts
AeroScale: 6,247 posts

Posted: Thursday, September 06, 2012 - 09:46 AM UTC
If you look closely, you can see Skippy on the nose just below the cockpit. Subdued markings are subdued 

Blueheeler

Joined: March 18, 2008
KitMaker: 347 posts
AeroScale: 223 posts

Posted: Thursday, September 06, 2012 - 10:19 AM UTC
Thanks for the replies guys. Yes Russell, it is an Aussie bird dressed up in 3rd squadron markings. As Jessica pointed out, you can just see the Kangaroo roundels on the nose under the cockpit but the others are on the bottom of both wings. They dont have them on top of the wings for whatever reason someone decided upon for a large chunk of money!
Cheers,
Nick.
Cheers,
Nick.

Posted: Friday, September 07, 2012 - 06:53 PM UTC
Wow some amazing progress everyone nice to see some many entries finished or close to finishing. Don't forget about another 7 weeks left until the end of the campaign so still plenty of time 
Hopefully I should be around a bit more by next weekend chaotic few weeks here with work and some non modelling things I have ended up driving all over the country for (well not all over but felt like it)

Hopefully I should be around a bit more by next weekend chaotic few weeks here with work and some non modelling things I have ended up driving all over the country for (well not all over but felt like it)
Posted: Saturday, September 08, 2012 - 09:51 AM UTC
Eagle update ... Ok so i have painted the F-15 and given it a nice coat of Klear , also i have started to wash a few areas and put some of the Decals on and i have to say its been a bit of a nightmare so far.. The decals are very fragile and also there are no instructions to show their placement so iv been hitting the books BIG time but im getting there .. slowly haha


Snorri23

Joined: March 25, 2010
KitMaker: 514 posts
AeroScale: 244 posts

Posted: Saturday, September 08, 2012 - 12:15 PM UTC
I am running out of time, finishing up the Ju 52 for Rochester is eating up the valuable resources that I have. Thus the Do 17z-10 is put aside. Hauling out a trusty and quick Bf 109G-10 from Monogram. Placing it under the Royal Hungarian flag with a late war underside bare metal and RLM 76, top and side 75/76/82 and mottled with 81/83. Photos coming soon.
Posted: Saturday, September 08, 2012 - 12:36 PM UTC
Got the booms on,  as with all the P-38's I have seen the fit is not the greatest so lots of work on the seams coming up
  especially since I want a metal finish.
Cheers Rob.
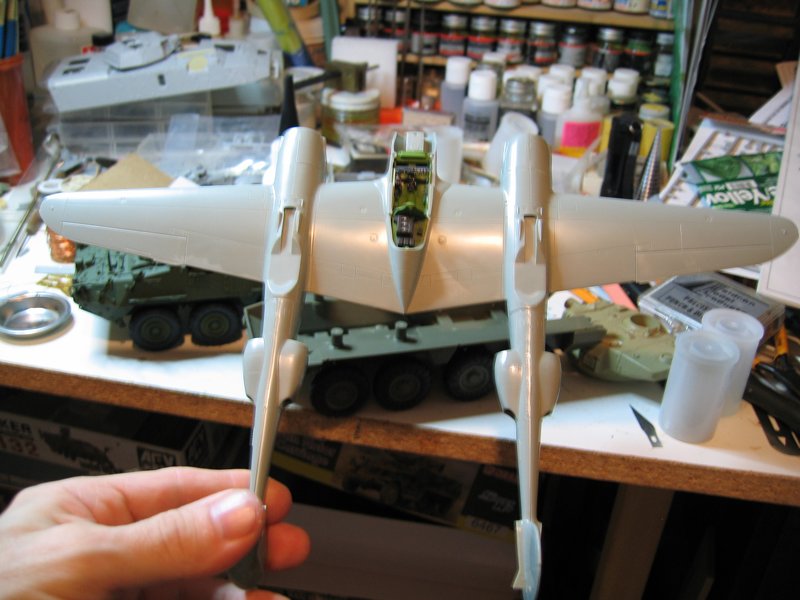
 as with all the P-38's I have seen the fit is not the greatest so lots of work on the seams coming up
  especially since I want a metal finish.
Cheers Rob.


SaxonTheShiba

Joined: February 01, 2009
KitMaker: 1,233 posts
AeroScale: 663 posts

Posted: Saturday, September 08, 2012 - 02:33 PM UTC
Made some more progress on the F-4 "Sierra". The base coat of Flat Gull Gray is on and the wing slats have been mounted on the leading edges. Most of the sub-assemblies are built as well. I will start on the post shading and panel line and rivet work this week. Should be smooth from here on out since I beat the wing slat conversion into submission.
Dave------Your Eagle looks great. You really made good progress on it.
Rob----Your -38 looks excellent. Sorry about the seam and fit problems...........always seems any airplane with booms on it has that type of issue. Nonetheless, great work on your part.
Best wishes, Ian

Dave------Your Eagle looks great. You really made good progress on it.
Rob----Your -38 looks excellent. Sorry about the seam and fit problems...........always seems any airplane with booms on it has that type of issue. Nonetheless, great work on your part.
Best wishes, Ian


Snorri23

Joined: March 25, 2010
KitMaker: 514 posts
AeroScale: 244 posts

Posted: Sunday, September 09, 2012 - 02:58 AM UTC
I am using a different paint Vallejo and their model colour line.What is a good thinner to use. I have used; Alcohol Tamyia and windex. Tamyia works to an extent though cleaning the airbrush with windex seems to work even better. Any suggestions? Thanks for the reply.
wespe66

Joined: June 27, 2011
KitMaker: 122 posts
AeroScale: 121 posts

Posted: Sunday, September 09, 2012 - 08:01 AM UTC
Quoted Text
I am using a different paint Vallejo and their model colour line.What is a good thinner to use. I have used; Alcohol Tamyia and windex. Tamyia works to an extent though cleaning the airbrush with windex seems to work even better. Any suggestions? Thanks for the reply.
I use Vallejo Model Air and Model Color too, and I normally use (what I think is) the danish equivalent to windex - called Ajax Crystal Clean. That works fine for me. I have also tried alcohol - does NOT work with Vallejo!
Lately I have switched to Hannants Xtracrylix for major paint jobs though. I also use Ajax for them. Works even better.
Posted: Sunday, September 09, 2012 - 08:57 AM UTC
Quoted Text
Hi Steffan I've discussed this with Sam and she think this would be the better option as your not sure when you started the Eduard kit.
Sam is a bit busy at the moment so I'll take the reins by saying great progress everyone
Hi Allen,
well, I will see if I can make it. The Bf 109 E-3 is done since a week and I am finishing some hangar queens now (not for the campaign but just to get some working space). BTW we are talking about one or two weeks starting date. Anyway you're in charge

all the best
Steffen
P.S. Jean-Luc and me will be in Telford again


Posted: Tuesday, September 11, 2012 - 01:01 AM UTC
Stripped the Fokker back to bare plastic using Modelstrip 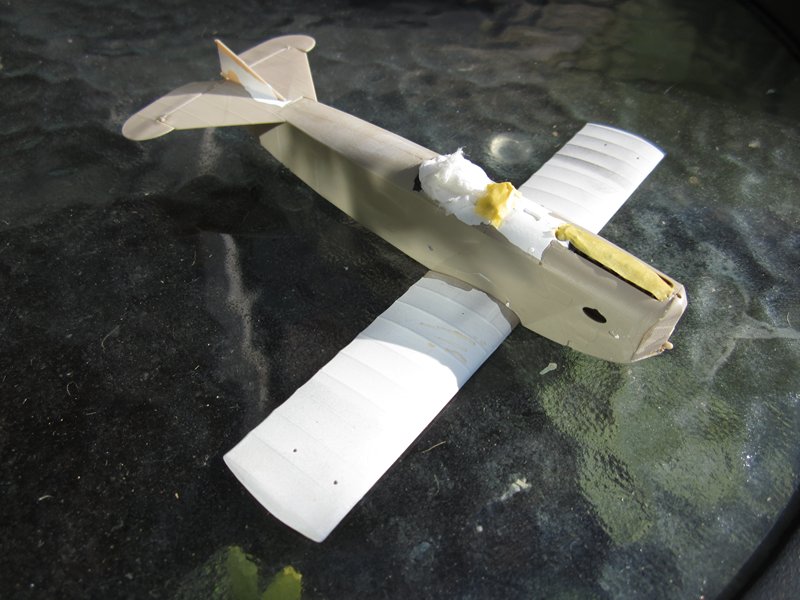
Reprimed
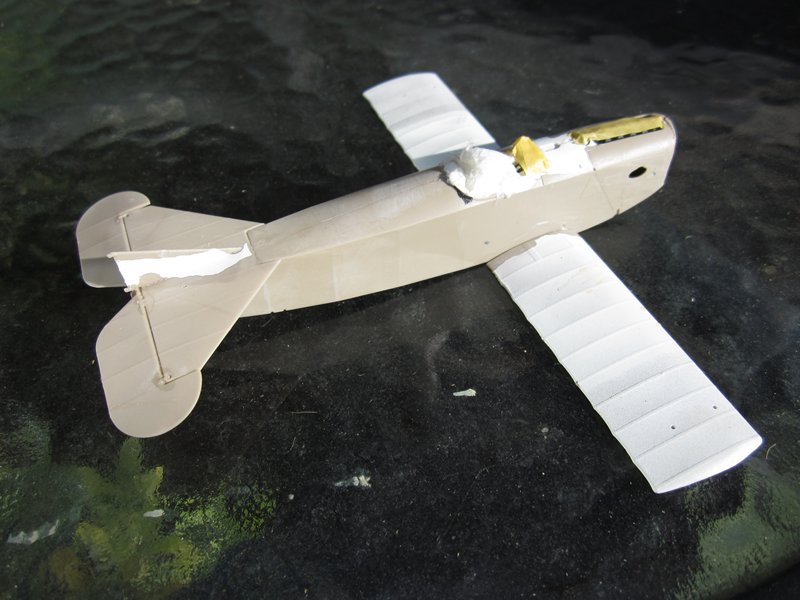
Masked for preshading
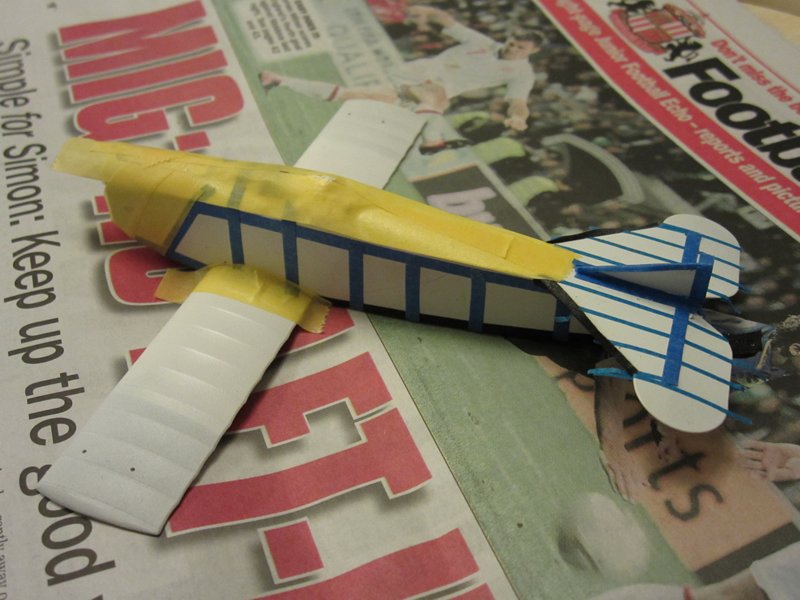
Forgot to take a picture of the preshaded aircraft
Repainted and applied Lozenge to the lower wing
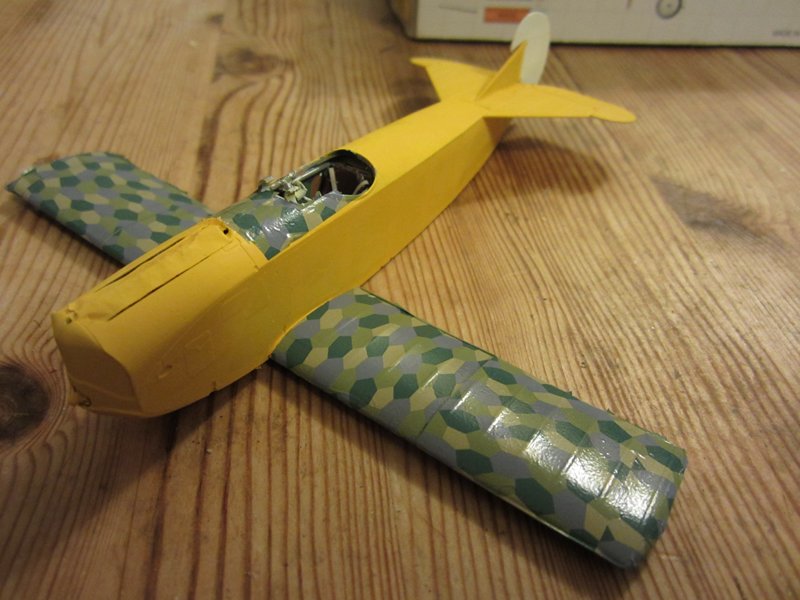
Preshading doesn't show much in the picture but is definitly there on the model
Back to where I was 2 weeks ago. Next step spray Klear when it is all dry.

Reprimed

Masked for preshading

Forgot to take a picture of the preshaded aircraft
Repainted and applied Lozenge to the lower wing

Preshading doesn't show much in the picture but is definitly there on the model
Back to where I was 2 weeks ago. Next step spray Klear when it is all dry.
Posted: Tuesday, September 11, 2012 - 11:24 AM UTC
looking good there Andy  Nice to see it in good shape again after .. shall we say the little mishap
  ...
... 
 Nice to see it in good shape again after .. shall we say the little mishap
  ...
... 

EmperoR

Joined: October 06, 2008
KitMaker: 67 posts
AeroScale: 61 posts

Posted: Wednesday, September 12, 2012 - 04:18 AM UTC
Greetings. I have managed to put my model together and it already looks like Airacobra.


Bye for now
Bye for now
litespeed


Joined: October 15, 2009
KitMaker: 1,976 posts
AeroScale: 1,789 posts

Posted: Thursday, September 13, 2012 - 09:53 AM UTC
Hi all
I finished off the cockpit adding a few more of Eduards pre coloured PE parts. The photo etched radiator faces were also added. These are available with the separate PE release for the Me 110 from Eduard. They do look much better than the plastic radiator faces included with the kit.
The resin under nose fairing [part of the Brassin release] was added after I cut out two slots for the magazines. A bit scary as the resin is very thin. Strange thing is Eduard instructions don’t mention cutting out the slots to fit the magazines, but I cannot see how else they will fit.


Posted: Friday, September 14, 2012 - 05:04 AM UTC
The Eagle is really taking shape now iv finally got the decals done and gave the whole thing a nice coat of clear matt varnish . i also painted the canopy and got it fitted . The bombs were mounted to their racks ready to go on and the centre tank and fast packs were fitted . The barrels of the M61 cannon were drilled out and then it was fitted into the side. Still got a few more things to do but thats all for now 


Posted: Friday, September 14, 2012 - 06:18 AM UTC
Nice progress, Dave. Great looking Eagle. Looking forward to see it finished.
Posted: Friday, September 14, 2012 - 06:55 AM UTC
Hi all,
I submitted the Eduard Bf 109E-3 as a foto-feature. As I had to wait for some PE for the Zvezda Bf 109F-2 I started something different ... as it turned out it was/is a very cool project. I will keep it secret until I am done... a small hint: rigging.
cheers
Steffen
I submitted the Eduard Bf 109E-3 as a foto-feature. As I had to wait for some PE for the Zvezda Bf 109F-2 I started something different ... as it turned out it was/is a very cool project. I will keep it secret until I am done... a small hint: rigging.
cheers
Steffen

Siderius

Joined: September 20, 2005
KitMaker: 1,747 posts
AeroScale: 1,673 posts

Posted: Friday, September 14, 2012 - 07:42 AM UTC
Does anyone have any objection to me changing horses so to speak? I am thinking of not building the Japanese Kawanishi "George" and instead starting a Hobbycraft F-89H Scorpion. This will break me out of my WWII mold. Russell
Posted: Saturday, September 15, 2012 - 10:47 PM UTC
So here is my entry for the campaign. I will also finish the Zvezda Bf 109, but I am not sure if I can make that in time.
About my build: I started it on Wednesday and have just finished it (I am on vacation ) it is my 4th finished kit in this two weeks and I am pretty happy about that


The kit: I bought the two initial boxings because of the different ground crew sprues. I will used this together with the Tateo Kato resin figure from the Hasegawa Ki 27 special release, Type 95 truck and Type 97 motorcycle (both Hasegawa) to build a small diorama (in the future). For this task I will also build the 2nd machine from the Kato box, which has spatted wheels and a tally below the cockpit. For now it is only this machine: easy build, great kit!!! :
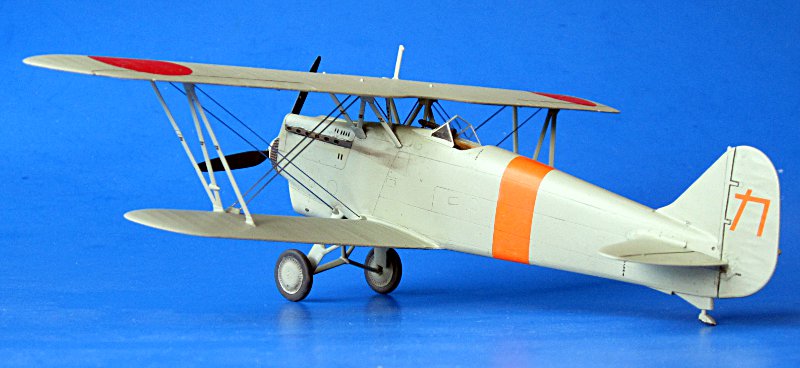
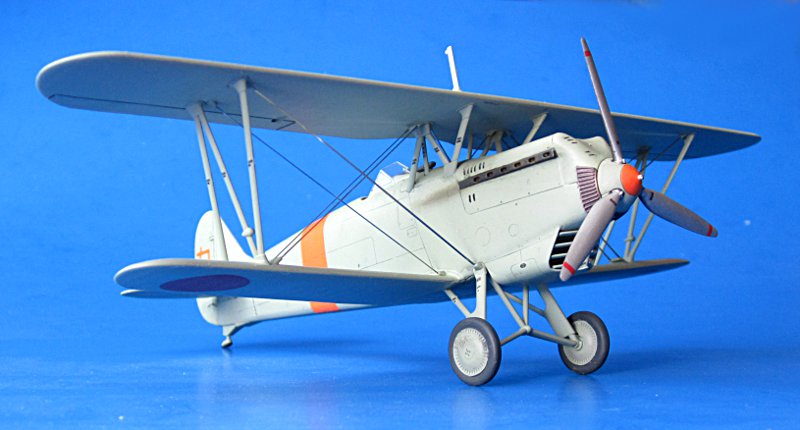
all the best
Steffen
About my build: I started it on Wednesday and have just finished it (I am on vacation
 ) it is my 4th finished kit in this two weeks and I am pretty happy about that


The kit: I bought the two initial boxings because of the different ground crew sprues. I will used this together with the Tateo Kato resin figure from the Hasegawa Ki 27 special release, Type 95 truck and Type 97 motorcycle (both Hasegawa) to build a small diorama (in the future). For this task I will also build the 2nd machine from the Kato box, which has spatted wheels and a tally below the cockpit. For now it is only this machine: easy build, great kit!!! :


all the best
Steffen
Posted: Sunday, September 16, 2012 - 08:07 PM UTC
Nice result Steffen. I like it very much.
Posted: Monday, September 17, 2012 - 03:35 AM UTC
Many thanks John! I like it too  as I wrote: it is an excellent kit
all the best
Steffen
 as I wrote: it is an excellent kit
all the best
Steffen
Posted: Monday, September 17, 2012 - 09:37 AM UTC
Finished the F-15 and my first campaign !! ..
Well im quite pleased with how its turned out i must say this was quite a hard build mainly due to the poor instructions bad fit and even worse decals but i got there in the end.. Thanks to everybody for their comments and advice and thanks to Joe for help with the decals .. I have really enjoyed doing this campaign and i will be continuing to watch closely to see the other builds progress on here .....
Now whats next ....

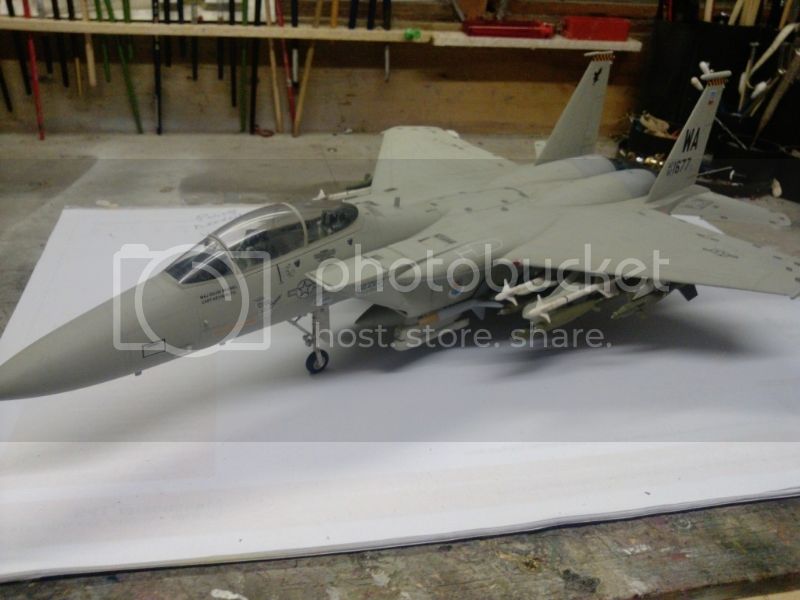


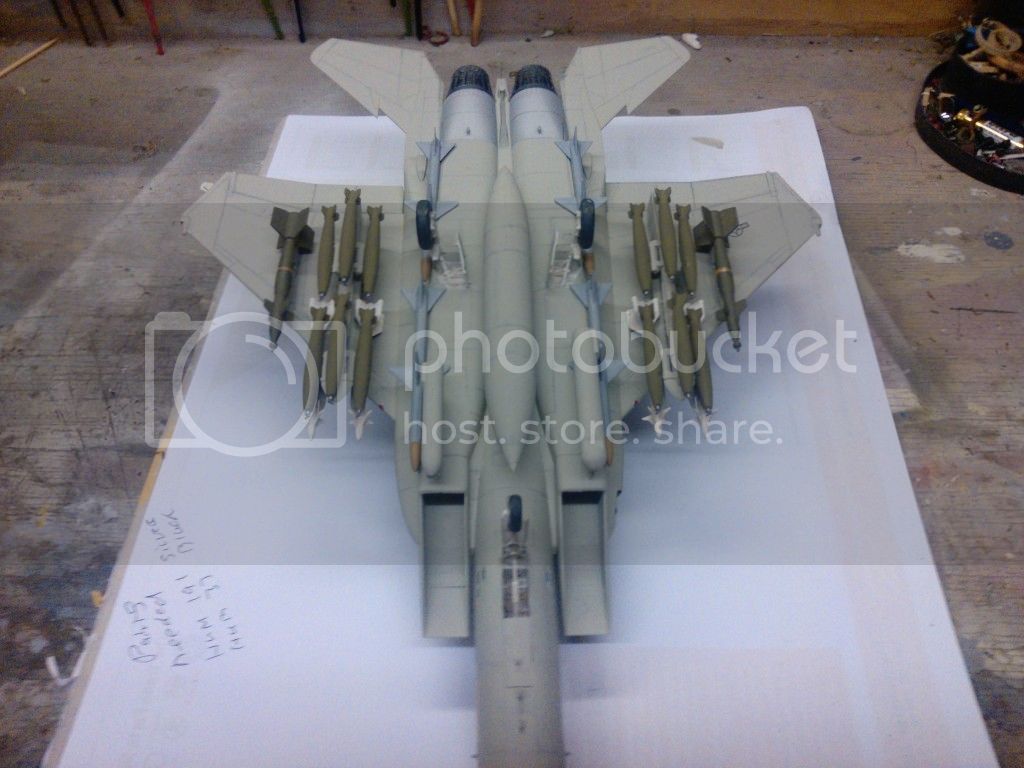
Thanks again all
Well im quite pleased with how its turned out i must say this was quite a hard build mainly due to the poor instructions bad fit and even worse decals but i got there in the end.. Thanks to everybody for their comments and advice and thanks to Joe for help with the decals
 .. I have really enjoyed doing this campaign and i will be continuing to watch closely to see the other builds progress on here .....
 Now whats next ....


Thanks again all

 |


