OFFICIAL: Fighters! Campaign Thread
litespeed
 News Reporter
England - North West, United Kingdom
Joined: October 15, 2009
KitMaker: 1,976 posts
AeroScale: 1,789 posts
Posted: Monday, September 17, 2012 - 11:15 AM UTC
Hi all
Applied Halfords grey primer before painting the main colours. The under surfaces were sprayed with Halford matt black and when dry I then airbrushed a thin mix of Xtracrylic dk sea grey mixed with xtracrylic night black. The mix kills the strong black colour of the Halfords paint. The upper and lower demarcation line was masked with Tamiya tape and a little maskol was applied to create a ragged edge.
The rear part of the canopy was masked using the masks from the kit.
Upper surfaces were painted with life colour RLM 74. Its the first time I have used Life colour paints and I was very impressed.


Pennsylvania, United States
Joined: June 17, 2009
KitMaker: 566 posts
AeroScale: 507 posts
Posted: Monday, September 17, 2012 - 03:52 PM UTC
Got the base coat done on my zero. I used the old tamiya IJN gray and green colors. Ive found the world of japanese aircraft colors to be very treacherous, so in the spirit of simplicity and in view of the fact that their is currently 1 known photo of my subject in very rough shape on saipan and surrounded by color controversy, Im sticking to a basic green over gray scheme. I think it would have been original to a later production nakajima built model 21 zero, which this supposedly is, but again more controversy. Im going for how this aircraft may have looked before it found itself in lousy shape just in time for its picture day. Not sure yet what route im going to take for weathering.

"...Fat, drunk, and stupid is no way to go through life son"

#243
England - North East, United Kingdom
Joined: March 21, 2008
KitMaker: 996 posts
AeroScale: 915 posts
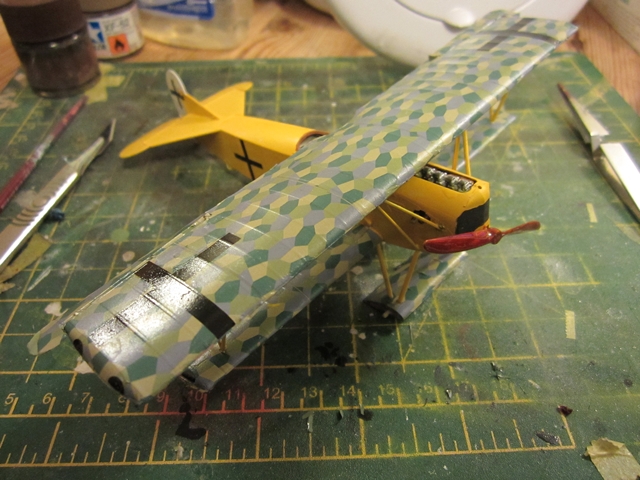
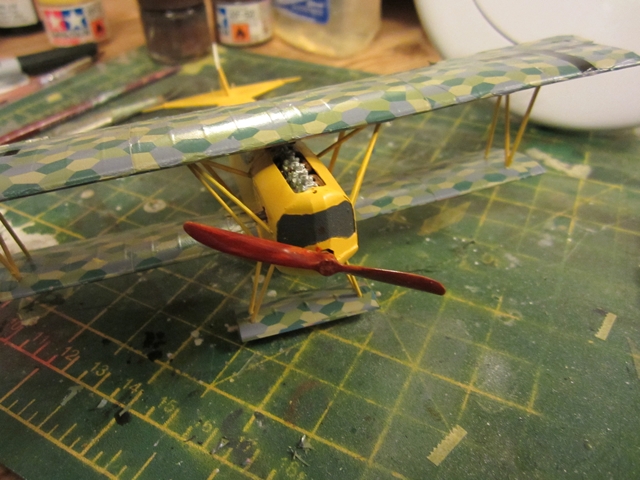
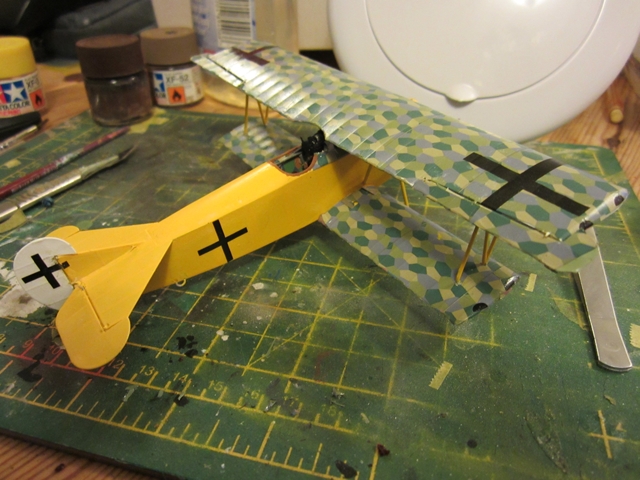
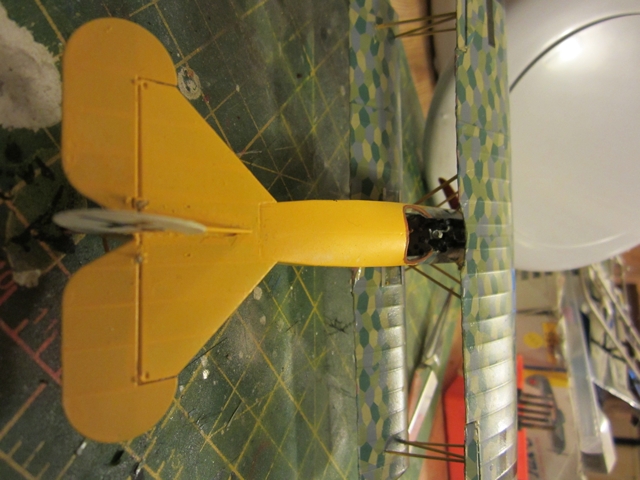
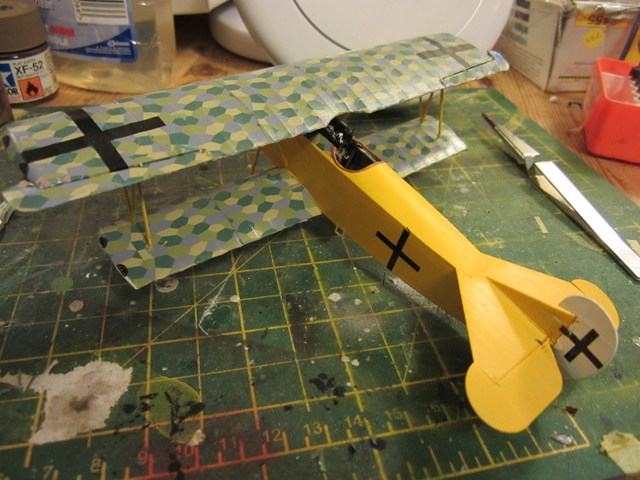
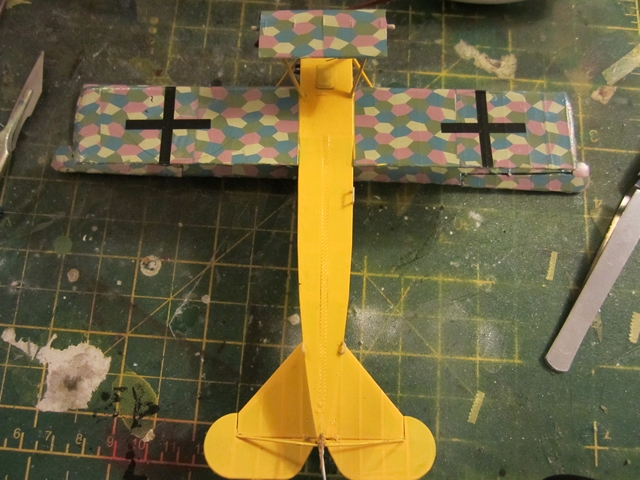
Posted: Tuesday, September 18, 2012 - 10:18 AM UTC
Andrew
Pfalz DIIIa, Eduard 1/48 Uffz Max Hitschler Jasta 18 Late 1917
Pennsylvania, United States
Joined: June 17, 2009
KitMaker: 566 posts
AeroScale: 507 posts
Posted: Tuesday, September 18, 2012 - 12:54 PM UTC
Glad to see your D.VII has made a nice recovery. The lozenge looks good

"...Fat, drunk, and stupid is no way to go through life son"
Sofiya, Bulgaria
Joined: October 06, 2008
KitMaker: 67 posts
AeroScale: 61 posts
Posted: Tuesday, September 18, 2012 - 07:19 PM UTC
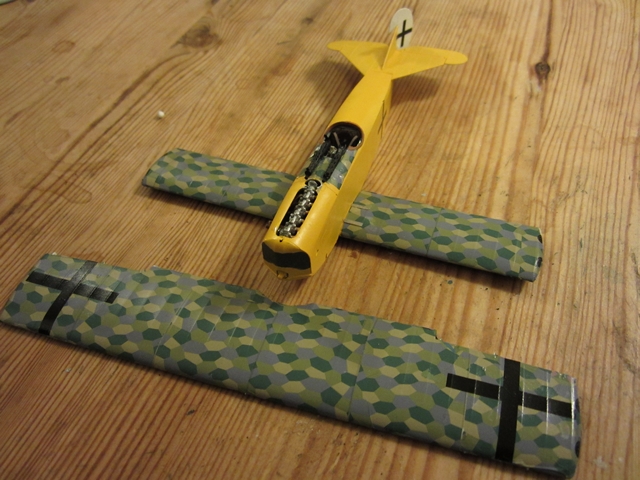
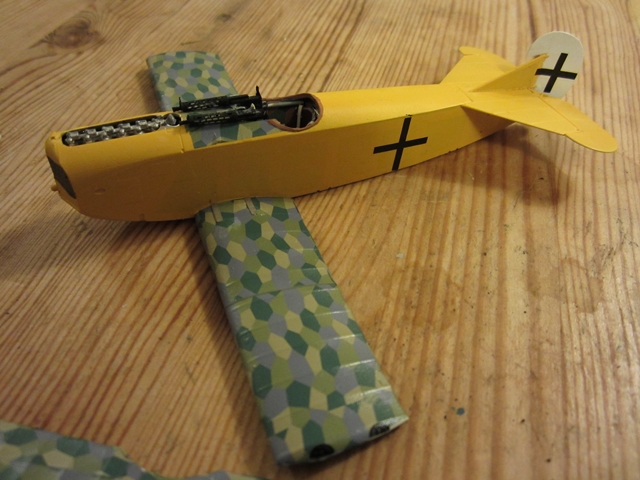
I have some short update just to show how I did my preshading.
First two pics show the preshading on top of the airplane... it is the same on its belly...


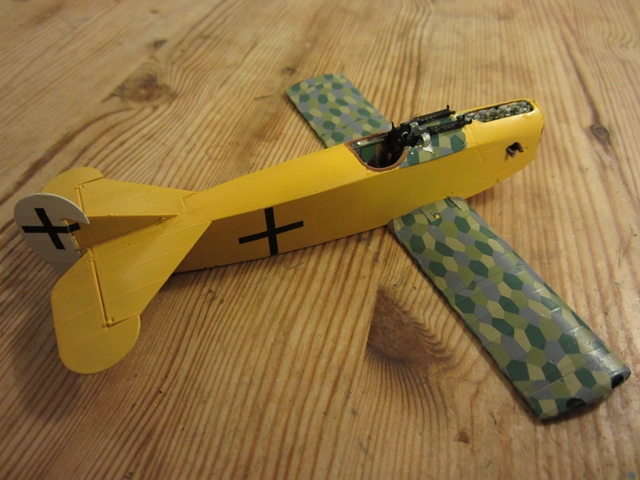
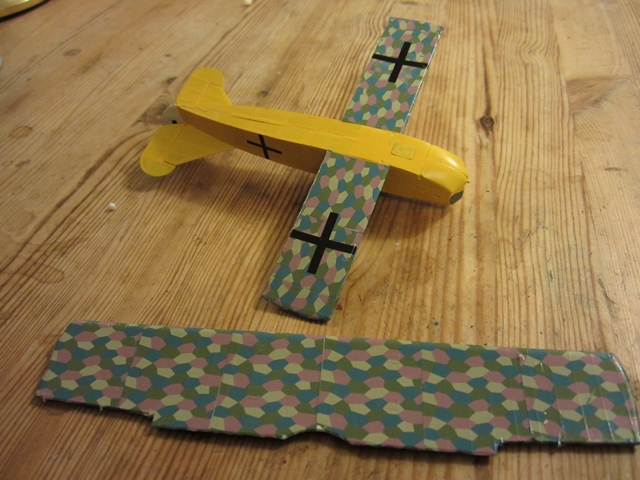
Next is the belly painted in blueish grey

It is not very visible in the pic bur in real life this kind of preshading gives nice and subtle differences between panels.
Bye for now

Visit My Blog Here: www.mmscalemodels.com
United States
Joined: February 01, 2009
KitMaker: 1,233 posts
AeroScale: 663 posts
Posted: Thursday, September 20, 2012 - 04:21 AM UTC
I began work on the post shading on the F-4S. I also got most of the panel lines drawn. Hopefully I will have the rest of the panel line work done this week and then I will shade them with Tamiya Smoke.
Andrew----Great work and the Fokker and glad you saved the airplane. It looks great.
Metodi----Look forward to seeing the P-39.
Best wishes, Ian

It is a fact that under equal conditions, large-scale battles and whole wars are won by troops which have a strong will for victory, clear goals before them, high moral standards, and devotion to the banner under which they go into battle.
-Georgy Zhukov
#047
England - East Anglia, United Kingdom
Joined: September 13, 2005
KitMaker: 2,016 posts
AeroScale: 475 posts
Posted: Friday, September 21, 2012 - 01:14 AM UTC
Major Caryle,
"Shall we have a go at the far end now,sir?"
Lt Colonel "Johnny" Frost,
"Having a go,is hardly text book terminology Harry"
Major Caryle,
"But you'll let us try sir?"
A Bridge Too Far
Lottery Campaign "Oh de Vichy"
#243
England - North East, United Kingdom
Joined: March 21, 2008
KitMaker: 996 posts
AeroScale: 915 posts
Posted: Friday, September 21, 2012 - 08:53 AM UTC
Nice Lightning, and good looking Alclad, looking forward to your return from the seaside to see it finished
Andrew
Pfalz DIIIa, Eduard 1/48 Uffz Max Hitschler Jasta 18 Late 1917
Pennsylvania, United States
Joined: June 17, 2009
KitMaker: 566 posts
AeroScale: 507 posts
Posted: Friday, September 21, 2012 - 09:31 PM UTC
First step in the weathering, inspired by builds here on aeroscale. I dont really have a plan, so im going to let it develop as I go. I mixed the base color, Tamiya IJN green (old version) about 50/50 with khaki and shaded some panels and parts of panels, mostly at random. I might use another shade lighter a bit more sparingly then add a thin coat of the base color to tie it together

"...Fat, drunk, and stupid is no way to go through life son"
Pennsylvania, United States
Joined: June 17, 2009
KitMaker: 566 posts
AeroScale: 507 posts
Posted: Saturday, September 22, 2012 - 03:09 PM UTC
and further high lights

"...Fat, drunk, and stupid is no way to go through life son"
United States
Joined: February 01, 2009
KitMaker: 1,233 posts
AeroScale: 663 posts
Posted: Saturday, September 22, 2012 - 03:28 PM UTC
Mike, great looking post-shading!!!!! Very realistic.
Regards, Ian
It is a fact that under equal conditions, large-scale battles and whole wars are won by troops which have a strong will for victory, clear goals before them, high moral standards, and devotion to the banner under which they go into battle.
-Georgy Zhukov
#330
Queensland, Australia
Joined: July 15, 2011
KitMaker: 175 posts
AeroScale: 103 posts
Posted: Saturday, September 22, 2012 - 09:16 PM UTC
An update on my Tomahawk, have just done the underside and then found out I had run out of middle stone paint!

#243
England - North East, United Kingdom
Joined: March 21, 2008
KitMaker: 996 posts
AeroScale: 915 posts
Posted: Monday, September 24, 2012 - 10:49 AM UTC
Andrew
Pfalz DIIIa, Eduard 1/48 Uffz Max Hitschler Jasta 18 Late 1917
Victoria, Australia
Joined: September 19, 2003
KitMaker: 708 posts
AeroScale: 674 posts
Posted: Monday, September 24, 2012 - 05:45 PM UTC
Hi All,
Having completed the 'Gekko' for thiss campaign earlier, I have been commissioned to build the Hobby Boss 48 scale P40m Kittyhawk kit, as this campaign still has a bit to run I wonder if I can add the P40 as a very late starter.

The box and the artwork options.
President:- Southern Model Club.
Those who never learn from history will always repeat it.
"When you go home tell them of us and say.
For your tomorrow we gave our today."
Ontario, Canada
Joined: March 25, 2010
KitMaker: 514 posts
AeroScale: 244 posts
Posted: Tuesday, September 25, 2012 - 02:25 AM UTC
I am currently placing decals on the Bf 109. Late war underside a/c were painted sparingly. R.B.a.f. had the centres painted grey. Thus when I masked the decals they pulled up with the tape. What my question is when using a metal paint under decals does one need to use a special method to adhere them? Running out of spare decals at this rate. Thanks
Ontario, Canada
Joined: March 29, 2010
KitMaker: 1,151 posts
AeroScale: 985 posts
Posted: Tuesday, September 25, 2012 - 02:50 AM UTC
Quoted Text
I am currently placing decals on the Bf 109. Late war underside a/c were painted sparingly. R.B.a.f. had the centres painted grey. Thus when I masked the decals they pulled up with the tape. What my question is when using a metal paint under decals does one need to use a special method to adhere them? Running out of spare decals at this rate. Thanks
Try applying dullcote to the metal before the decals. Then seal them on with future.
#243
England - North East, United Kingdom
Joined: March 21, 2008
KitMaker: 996 posts
AeroScale: 915 posts
Posted: Tuesday, September 25, 2012 - 08:45 AM UTC
I have never managed to mask on decals as they always pull off with the tape. If you do find a successful method I would be interested.
Andrew
Pfalz DIIIa, Eduard 1/48 Uffz Max Hitschler Jasta 18 Late 1917
England - North East, United Kingdom
Joined: October 20, 2005
KitMaker: 1,045 posts
AeroScale: 622 posts
Posted: Friday, September 28, 2012 - 09:50 PM UTC
Some fantastic progress everyone

Im still struggling to be around as much as before as work has gone ballistic at the moment I have not touched a model kit or been near the bench in weeks. Hopefully will settle down again soon and will be able to devote more time to modelling.
Only another 4.5 weeks left of the campaign to go
Don't forget once you finish to post your completed pic in the campaign gallery
Angel by day, Devil by night
Pennsylvania, United States
Joined: June 17, 2009
KitMaker: 566 posts
AeroScale: 507 posts
Posted: Sunday, September 30, 2012 - 11:00 AM UTC
Some more progress in the paint booth on my A6M2. I decided the kit provided decal stripes color looked lame and more of a sky tone and not white. Measurements were approximated to or even just hinted at when I masked the wings stripes with tamiya tape and burnished the edges. The fuselage stripe provided a challenge. I overcame on first attempt. I laid out several overlapping strips of tape and use the closely cut decal from the sheet to trace the shape onto the strips. This was cut out, trial fitted to the model and adjusted several times. When I was happy, the outline, with some relief cuts, was placed back around it, burnished down with a toothpick, then the center lifted back out. I didnt think to take a pic until after I had used it, but you get the idea.


I mixed a drop of neutral gray into my white, I felt like it made the stripes pop out, which for some reason is what I feel like Im looking for. Only got two tiny runs on the wings in some panel line, 1 small spot of overspray where my additional masking lifted (cursed cheap post-it-notes!) However If you look in the pic the tamiya tape left some sort of reside on the surface of the paint. Im leaving it to sit and maybe it will evaporate. Im guessing it wont and ill have to break the IJN green out and blend it in. Im kicking myself for not sealing the finished base colors. I skipped it trying not to have too many clear coats. With the results so far, I am so glad I went through the effort. Now how to lay my hands on the stuff to do the Hinomarus in the next few weeks...


"...Fat, drunk, and stupid is no way to go through life son"
#330
Queensland, Australia
Joined: July 15, 2011
KitMaker: 175 posts
AeroScale: 103 posts
Posted: Monday, October 01, 2012 - 10:59 AM UTC
Mike the stripes came up nice. I love the mottled look you've achived with the green.
Texas, United States
Joined: February 22, 2008
KitMaker: 5,026 posts
AeroScale: 2,811 posts
Posted: Monday, October 01, 2012 - 12:03 PM UTC
Mike, good job on your masking those stripes and thanks for posting the photos they have given me much needed help for my Bf 109 on another campaign. Did you layer the strips together on glass before you cut out for the fuselage, and if so how difficult was it to place on the fuselage?
Again, great job.
Bob
If it aint broke dont fix it.
Tennessee, United States
Joined: September 20, 2005
KitMaker: 1,747 posts
AeroScale: 1,673 posts
Posted: Monday, October 01, 2012 - 12:59 PM UTC
Andy, love that English Electric Lightning! She is a real looker, quite a performer too from what I've read. Keep up the good work. Russell
To Thine Own Self Be True
Siderius
A.K.A., RTA
#330
Queensland, Australia
Joined: July 15, 2011
KitMaker: 175 posts
AeroScale: 103 posts
Posted: Monday, October 01, 2012 - 07:54 PM UTC
I found some middle stone paint and added the camo to the P-40, now for decals and some weathering.

Pennsylvania, United States
Joined: June 17, 2009
KitMaker: 566 posts
AeroScale: 507 posts
Posted: Tuesday, October 02, 2012 - 09:24 AM UTC
Quoted Text
Mike, good job on your masking those stripes and thanks for posting the photos they have given me much needed help for my Bf 109 on another campaign. Did you layer the strips together on glass before you cut out for the fuselage, and if so how difficult was it to place on the fuselage?
Again, great job.
Bob
Bob,
I didnt use a piece of glass, just a clear part of my modeling desk. I will be finding a suitable piece of glass to use in the future, probably steal it from the several unused picture frames laying about. If you cant tell from the pic, in the absence of wider tape I did overlap the pieces of tape and was sure each time I lifted the masks that I started with the bottom most piece so that the mask stayed together. As for lining up the mask on the fuselage, I curved up both sides and let the center touch down first and then slowly steered it from there. It did take a few attempts till I was happy with its positioning. It wasnt too difficult but did take some thought and patience.
Wish I had the stuff handy to do the Hinomarus but I guess decals will have to do for now.
"...Fat, drunk, and stupid is no way to go through life son"
New South Wales, Australia
Joined: March 18, 2008
KitMaker: 347 posts
AeroScale: 223 posts
Posted: Wednesday, October 03, 2012 - 11:16 AM UTC
Some great looking builds there!
I managed to finish off my entry by adding a few extra pieces and taking some half decent photos.


Cheers,
Nick.
Assumption is the mother of all f*#k ups.