Air Campaigns
Want to start or join a group build? This is where to start.
OFFICIAL: Fighters! Campaign Thread
Delbert
#073
_VISITCOMMUNITY
Pennsylvania, United States
Joined: October 05, 2002
KitMaker: 2,659 posts
AeroScale: 209 posts
Posted: Thursday, October 25, 2012 - 12:03 PM UTC
Thanks for the comments guys.

and Bob I wish you well. This is not as easy as I thought it would be. But I keep pushing my own limits. LOL

I added in the RLM 81 Brown Violet splinter scheme on the wing tops using as little tape as possible.

Then I super thinned the paint and spraying at around 8 to 10 psi I added some more mottle in the darker color.

here is the photo of my attempt. I am sure we will all agree that its much better than my first try.


thanks for looking
Delbert
Dragon164
#226
_VISITCOMMUNITY
British Columbia, Canada
Joined: February 20, 2012
KitMaker: 1,909 posts
AeroScale: 508 posts
Posted: Thursday, October 25, 2012 - 12:16 PM UTC
Delbert,
It's coming along nicely!

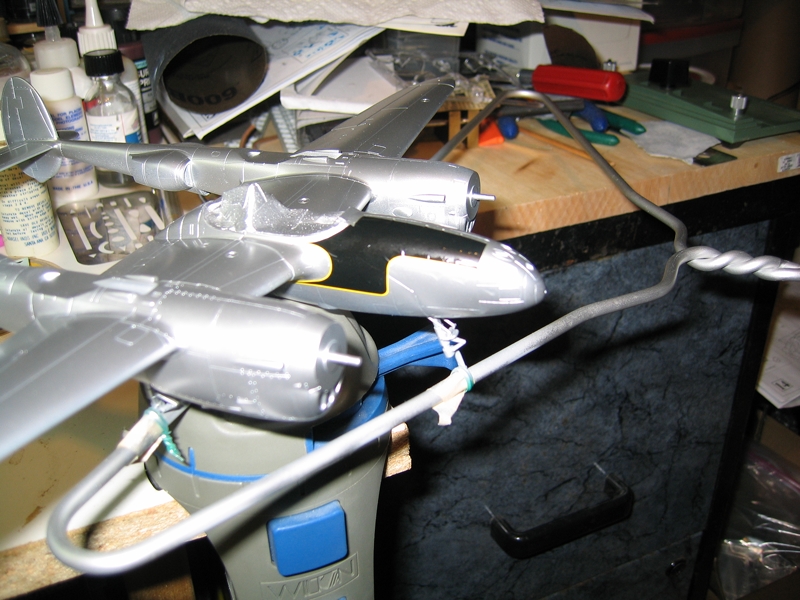
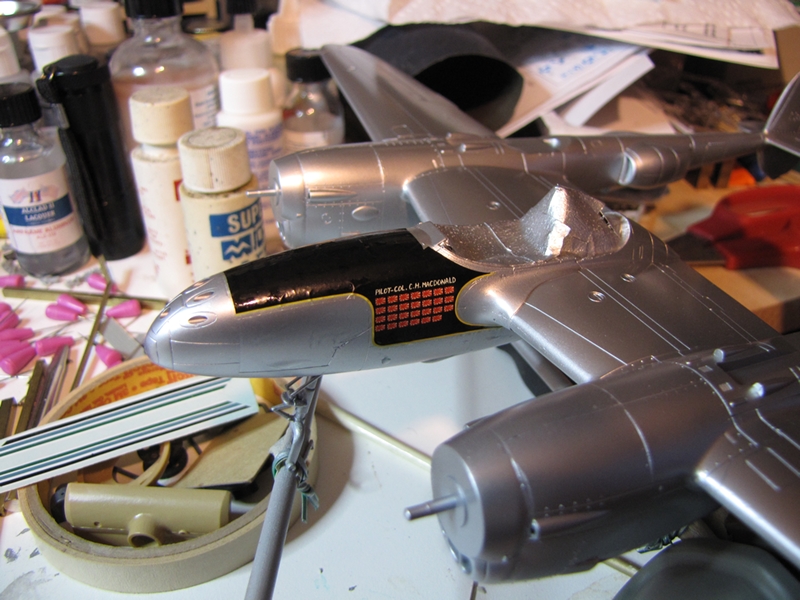
I thought I was going to have to paint the the black on the nose and nacelles but after looking at my decal collection I found that there is a set from a Hasegawa kit that should do fine. I have one on and when it sets I'll decide if that's the route I will take.

Cheers Rob.
Siderius
_VISITCOMMUNITY
Tennessee, United States
Joined: September 20, 2005
KitMaker: 1,747 posts
AeroScale: 1,673 posts
Posted: Thursday, October 25, 2012 - 12:49 PM UTC
Looks good Delbert, keep up the good work. Russell
SaxonTheShiba
_VISITCOMMUNITY
United States
Joined: February 01, 2009
KitMaker: 1,233 posts
AeroScale: 663 posts
Posted: Thursday, October 25, 2012 - 01:04 PM UTC
Delbert-----Great work on the camo scheme! And a Lindberg kit to boot!
Looks every inch a -262.


Rob----Sweet looking anti-glare/trim panel. Very sleek!!


Regards, Ian
Dragon164
#226
_VISITCOMMUNITY
British Columbia, Canada
Joined: February 20, 2012
KitMaker: 1,909 posts
AeroScale: 508 posts
Posted: Thursday, October 25, 2012 - 09:41 PM UTC
Thanks Ian,
They are going on great!
I am hoping the decals for the spinners and tail fit just as good, will save me a lot of time and trouble.
Here is a close up of the other side, still a bit wrinkled but should settle down when dry.

Cheers Rob.
Dragon164
#226
_VISITCOMMUNITY
British Columbia, Canada
Joined: February 20, 2012
KitMaker: 1,909 posts
AeroScale: 508 posts
Posted: Saturday, October 27, 2012 - 05:22 PM UTC
Well,
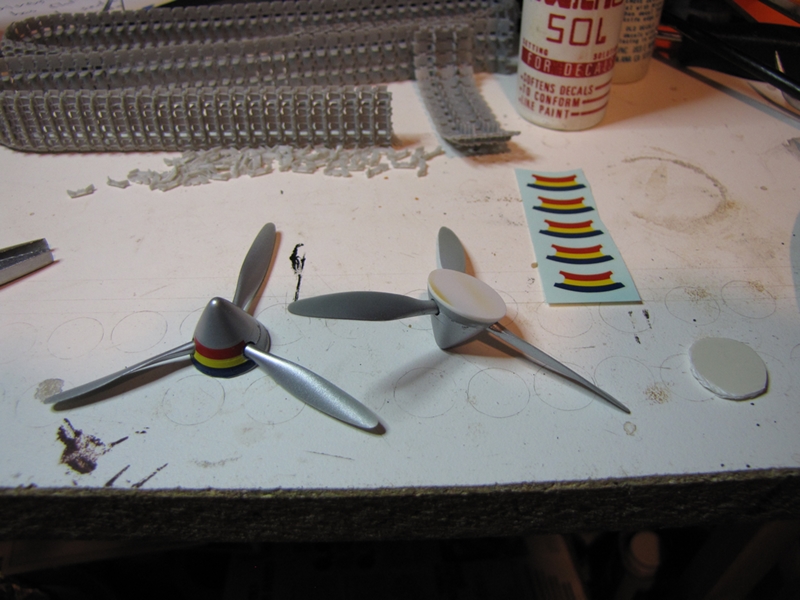
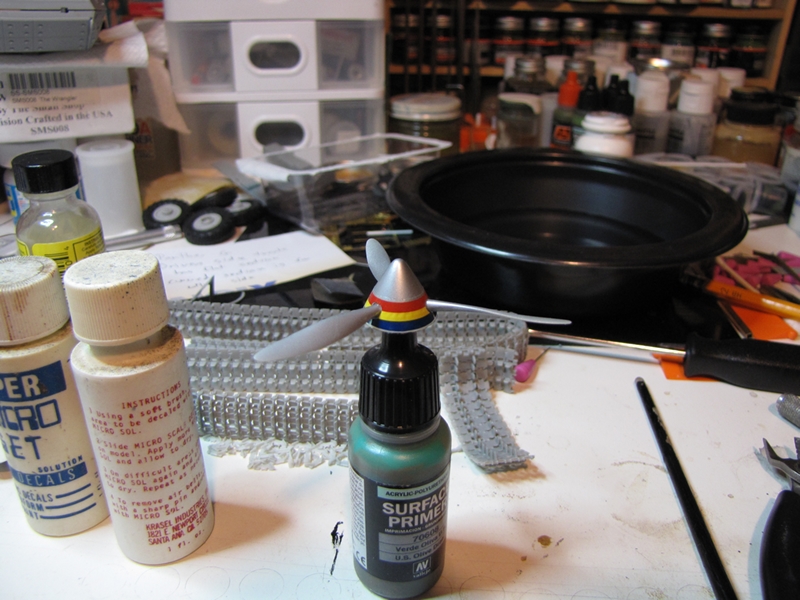
It's slowly coming together the decals for the most part are working out great I am slowed a bit by not having the instructions for the kit the decals are from so it's taking some figuring to sort out where some go I had to add a piece to the back of the spinners so that the blue stripe was not too thin I hope that it does not show too much.

Cheers Rob.

camogirl
_VISITCOMMUNITY
England - North East, United Kingdom
Joined: October 20, 2005
KitMaker: 1,045 posts
AeroScale: 622 posts
Posted: Saturday, October 27, 2012 - 08:16 PM UTC
Great work on the 262 Delbert

Rob the P-38 is coming along well.

Don't forget only 3 days left of this campaign to get the builds finished and please remember to post your finished pics into the campaign gallery so a ribbon can be awarded
Delbert
#073
_VISITCOMMUNITY
Pennsylvania, United States
Joined: October 05, 2002
KitMaker: 2,659 posts
AeroScale: 209 posts
Posted: Sunday, October 28, 2012 - 07:22 AM UTC
Sam thanks. and I know its getting close but I'm on track, unless this "storm of the Century" everyone in PA is getting ready for actually knocks out the power here for a couple weeks like everyone says.

you know you can't find a size D battery anywhere now. go figure.

And Rob that P 38 is looking awesome, although I think you have a little too much track there for it. LOL

Ok on my ME-262. I got the painting and mottling done. I pulled out the decals and lo and behold these lindberg decals are thick, and Yellowish, right out of the box.

I have other decals in and about the spares area, but I decided that I wanted to try something I've been thinking about. And I've used my scanner/printer combo to make some copies of my decals on index card stock and made my own stencils for the aircraft.

So Far So Good as they say. although I am not too sure of the latest Swastika's on the tail they were a little on the complex side, but we will see.

here is a photo so far


later
Delbert
Siderius
_VISITCOMMUNITY
Tennessee, United States
Joined: September 20, 2005
KitMaker: 1,747 posts
AeroScale: 1,673 posts
Posted: Sunday, October 28, 2012 - 07:45 AM UTC
Good job Delbert on painting those markings! Something I wouldn't try. Russell
mykroft
_VISITCOMMUNITY
Ontario, Canada
Joined: November 14, 2009
KitMaker: 270 posts
AeroScale: 264 posts
Posted: Sunday, October 28, 2012 - 08:25 AM UTC
It's been a while since I've posted an update.

Got the paint done yesterday on my Hellcat Mk.1


Eduard Hellcat Mk1 1/72 by mawz_models, on Flickr


Eduard Hellcat Mk1 1/72 by mawz_models, on Flickr

And then I did the decals, which were the easy part.


Eduard Hellcat Mk1 1/72 by mawz_models, on Flickr

Stuck the cowling and prop on


Eduard Hellcat Mk1 1/72 by mawz_models, on Flickr

And then dullcote, unmasking and completion


Eduard Hellcat Mk1 1/72 by mawz_models, on Flickr


Eduard Hellcat Mk1 1/72 by mawz_models, on Flickr


Eduard Hellcat Mk1 1/72 by mawz_models, on Flickr

The last 3 pics are up in the gallery as well.
Siderius
_VISITCOMMUNITY
Tennessee, United States
Joined: September 20, 2005
KitMaker: 1,747 posts
AeroScale: 1,673 posts
Posted: Sunday, October 28, 2012 - 03:11 PM UTC
Adam, your Hellcat is outstanding! It is the right scale too! LOL I am very impressed with your work. Enjoyed looking at it. Always like to see some Fleet Air Arm aircraft thrown into the mix here. Good job again; Russell
mrockhill
_VISITCOMMUNITY
Pennsylvania, United States
Joined: June 17, 2009
KitMaker: 566 posts
AeroScale: 507 posts
Posted: Sunday, October 28, 2012 - 04:04 PM UTC
preparation for this supposed storm are hampering my good building weekend, but Ive managed to work some progress in. I treated the Zero to some washes of burnt umber, paynes gray and black oils, depending on how dark I wanted the panel lines to be. Next I tried my hand at dirt and fluid streaks, again using oils. i referenced a pic of the underside of a flying Zero which showed some heavy fluid leaks around the wing fuel tank panels, so I did mine similarly and Im fairly happy with the results. I tried mixing tamiya flat base (1) with future (5) I got it on too heavy and it hazed in places so I gave it another straight future coat. Trying to decide if I want to try again or use model master acryl flat coat. Ive used the acryl before, but havent managed to get it really flat, at least enough for pastels and pigments to take hold. After the flat coat, Ill attach a few more parts, do some exhaust and powder burns and try my hand at some pigments for the landing gear, underside and work areas. Then some chipping, final assembly, touch ups and hopefully all in next 3 days!


Hope this weather doesnt get too disruptive, i want to spend my time wrapping this one up and not bailing out my basement
SaxonTheShiba
_VISITCOMMUNITY
United States
Joined: February 01, 2009
KitMaker: 1,233 posts
AeroScale: 663 posts
Posted: Sunday, October 28, 2012 - 04:28 PM UTC
Delbert----- the markings look great on the -262. Nicely done!

Adam----Beautiful Hellcat. Always liked the Invasion Stripes on that scheme.

Mike----Zero looks awesome. Great weathering on the underside regarding the fluid leaks. Very true to form.


Hope the storm doesn't impact you guys heavily up there and stay safe.


Best wishes, Ian

Siderius
_VISITCOMMUNITY
Tennessee, United States
Joined: September 20, 2005
KitMaker: 1,747 posts
AeroScale: 1,673 posts
Posted: Sunday, October 28, 2012 - 04:55 PM UTC
Mike, great looking Zero. Really good job on it. Russell
EmperoR
_VISITCOMMUNITY
Sofiya, Bulgaria
Joined: October 06, 2008
KitMaker: 67 posts
AeroScale: 61 posts
Posted: Sunday, October 28, 2012 - 08:25 PM UTC
Well this was second campaign for me ad now first finished.
My cobra is ready now, thanks to all of you for the support and kind words.
.. and, of course if you like it you can vote for my cobra in the Model Of the Month October.


Best regards
Metodi
Hawkeye65
_VISITCOMMUNITY
Western Australia, Australia
Joined: February 11, 2012
KitMaker: 56 posts
AeroScale: 50 posts
Posted: Sunday, October 28, 2012 - 08:42 PM UTC
Adam: Your Hellcat is great. Look who I saw doing maintenance work at the Fleet Air Arm Museum in Yeovilton last month...
phantom_phanatic309
#372
_VISITCOMMUNITY
United Kingdom
Joined: March 10, 2010
KitMaker: 2,568 posts
AeroScale: 1,619 posts
Posted: Monday, October 29, 2012 - 07:15 AM UTC
Metodi, great work on the Airacobra! Inspiration to us all.

My 109 is nearing completion just not sure if I'll make the deadline. Unfortunatley I thinned the sand paint a little too much and the primer can still be seen under a few streaks. So needs another coat.

Delbert
#073
_VISITCOMMUNITY
Pennsylvania, United States
Joined: October 05, 2002
KitMaker: 2,659 posts
AeroScale: 209 posts
Posted: Monday, October 29, 2012 - 10:21 AM UTC

mykroft that hellcat is looking great, the invasion strips is on my to someday try list.

Mike I feel for you I'm in PA also, your zero is looking good and hope you stay on track..

and Metodi not much I can saw about your cobra except "WOW!"

anyways in spite of the storm they keep telling me around here for the last 3 days will be the "storm of the century", I've finished up my build.

To repeat. This is a Lindberg Me-262 I bought at an outlet store mainly to use as airbrush practice for a German freehand mottling scheme.

Its RLM 83 dark green and RLM 81 Brown violet over RLM 76 light blue. and except for the hard edged RLM 81 on the wings it was done entirely Freehand using a Badger Krome.

The Lindberg decals were thick and yellow right out of the box so I spent some time making some templates and airbrushed the markings with stencils, except for the numbers and the coat of arms shield the latter was from the lindberg set and don't look all that great.

I will have to say I felt my airbrushing skills improve doing this one, as I intended.


the photos are not the greatest, I prefer to take photos outside in the sun, but theres a storm out called sandy so that is prob out for a few days..

Thanks for a fun campaign, even though I only jumped in at the tail end of it..

Delbert

Siderius
_VISITCOMMUNITY
Tennessee, United States
Joined: September 20, 2005
KitMaker: 1,747 posts
AeroScale: 1,673 posts
Posted: Monday, October 29, 2012 - 10:33 AM UTC
Lindberg kit or not your work is very good Delbert. I really like how the a/c came out. Good job there. Russell
Dragon164
#226
_VISITCOMMUNITY
British Columbia, Canada
Joined: February 20, 2012
KitMaker: 1,909 posts
AeroScale: 508 posts
Posted: Monday, October 29, 2012 - 10:57 AM UTC
Yes Delbert,
It came out really good!

Adam,
Fantastic paint job!

Mike,
Your Zero is coming out nicely!

Metodi,
Great job on your Aircobra!

Cheers Rob.
Snorri23
_VISITCOMMUNITY
Ontario, Canada
Joined: March 25, 2010
KitMaker: 514 posts
AeroScale: 244 posts
Posted: Monday, October 29, 2012 - 03:24 PM UTC
All great planes here, I am exceedingly impressed with the quality of the finished planes here. Mine unfortunately will not measure up with some glaring goofs which occurred while in the finishing phase. Here are the photos of my completed Bf 109 G-6 of the MKHL Magyar Kiralyi Honved Legiero, Royal Hungarian National Air Force. One thing I learned with this is never mask over decals no matter how well you think that they are sealed. I needed to paint the inner cross grey and I thought that I could just seal them and then mask. Well that never happened with any manner of success. Thus I gave up trying to paint them all, who will ever know. Thus I give you the photogenic side. Also wanted to do a late war scheme. The tape is to hold the canopy while it is drying.There is an on going debate upon the colour of the plane number. Everything from yellow, blue and red, trying to decipher photographs is a science. I stuck with red for that is what I had.
STH70198-1
STH70201
STH70191
STH70193
eMan
#298
_VISITCOMMUNITY
Hong Kong S.A.R. / 繁體
Joined: August 08, 2002
KitMaker: 1,182 posts
AeroScale: 351 posts
Posted: Monday, October 29, 2012 - 08:09 PM UTC
Just finished the painting, some progress pics.


mrockhill
_VISITCOMMUNITY
Pennsylvania, United States
Joined: June 17, 2009
KitMaker: 566 posts
AeroScale: 507 posts
Posted: Tuesday, October 30, 2012 - 03:45 AM UTC
Lots of nice builds bubbling to the surface!

-Delbert, my hats off to you for your work on the lindberg 262, I built that kit before and your effort blew mine away. I really like how your tossed the decals and dove right into painting your own.

-mykroft your FAA helcat is a little work of art!

-Metodi your p-39 turned out awesome! Your weathering on the wing walk areas really caught my eye

- I dig the change of pace in the 109 department with the tropical and hungarian schemes. I might have to build a hungarian 109 myself!

Thanks to hurricane Sandy I had no power and got little done, the briht sde is that it is back on and work was cancelled, so Ive got all day to work on the Zero!!! this should be my last update before completion. I had trials and tribulations with trying to obtain a reasonable flatcoat but will have to work on this more in the future. I experimented with pigments. This aircraft was operating off of a frontline airfield on the island of saipan so I felt some filth was appropriate. Some areas turned out great others not as much but none were offensive enough to bother removing. Chipping was done with silver pencil. All that is left is to get its legs under it, finish up the prop, canopy and attach the antenna and she should be done. Appologies for the occasional lousy cell pic

wespe66
_VISITCOMMUNITY
Frederiksborg, Denmark
Joined: June 27, 2011
KitMaker: 122 posts
AeroScale: 121 posts
Posted: Tuesday, October 30, 2012 - 07:42 AM UTC
Hi,

You all seem to be coming along nicely!
There's still 1 day left - you can do it!

Adam: Congrats on your finished build. It looks great - I love that scheme!

Metodi: Congrats on your completion. Your P-39 looks amazing!

Delbert: Congrats on your Me-262. It looks wonderful. I would never have guessed that this was your first airbrush job!

I will call my warbird finished
To sum up: This is the Eduard Royal Class 1/48 kit. The paint scheme and markings are Hauptman Werner Mölders, commander of III./JG53, May, 1940. He was shot down in this aircraft over France on June 6, 1940 but survived the crash. The aircraft was initially painted standard early war RLM71, RLM70 and RLM65, and later it was lightened with splotches of RLM02.
This model is my first with open engine cowling, and it did complicate the painting a bit, but I think it was worth it. Please note the french map in the cockpit (this is the coolest and easiest detail on this build IMO ) The model will be placed in a future diorama. Hope you like her!

Thanks for a great campaign


phantom_phanatic309
#372
_VISITCOMMUNITY
United Kingdom
Joined: March 10, 2010
KitMaker: 2,568 posts
AeroScale: 1,619 posts
Posted: Tuesday, October 30, 2012 - 08:40 AM UTC
Kenneth, brilliant work! The overspray is very nicely done. I plan on doing an ICM 1/48 Spitfire for next years diorama campaign with its engine on show. Just hope I can do as good a job as you have.

Afraid my 109 will not make the deadline. I've had a fair bit of collage work to do tonight and that took priority. It is after all just modelling, not a life, and it will be finished when I have the extra time to commit.